

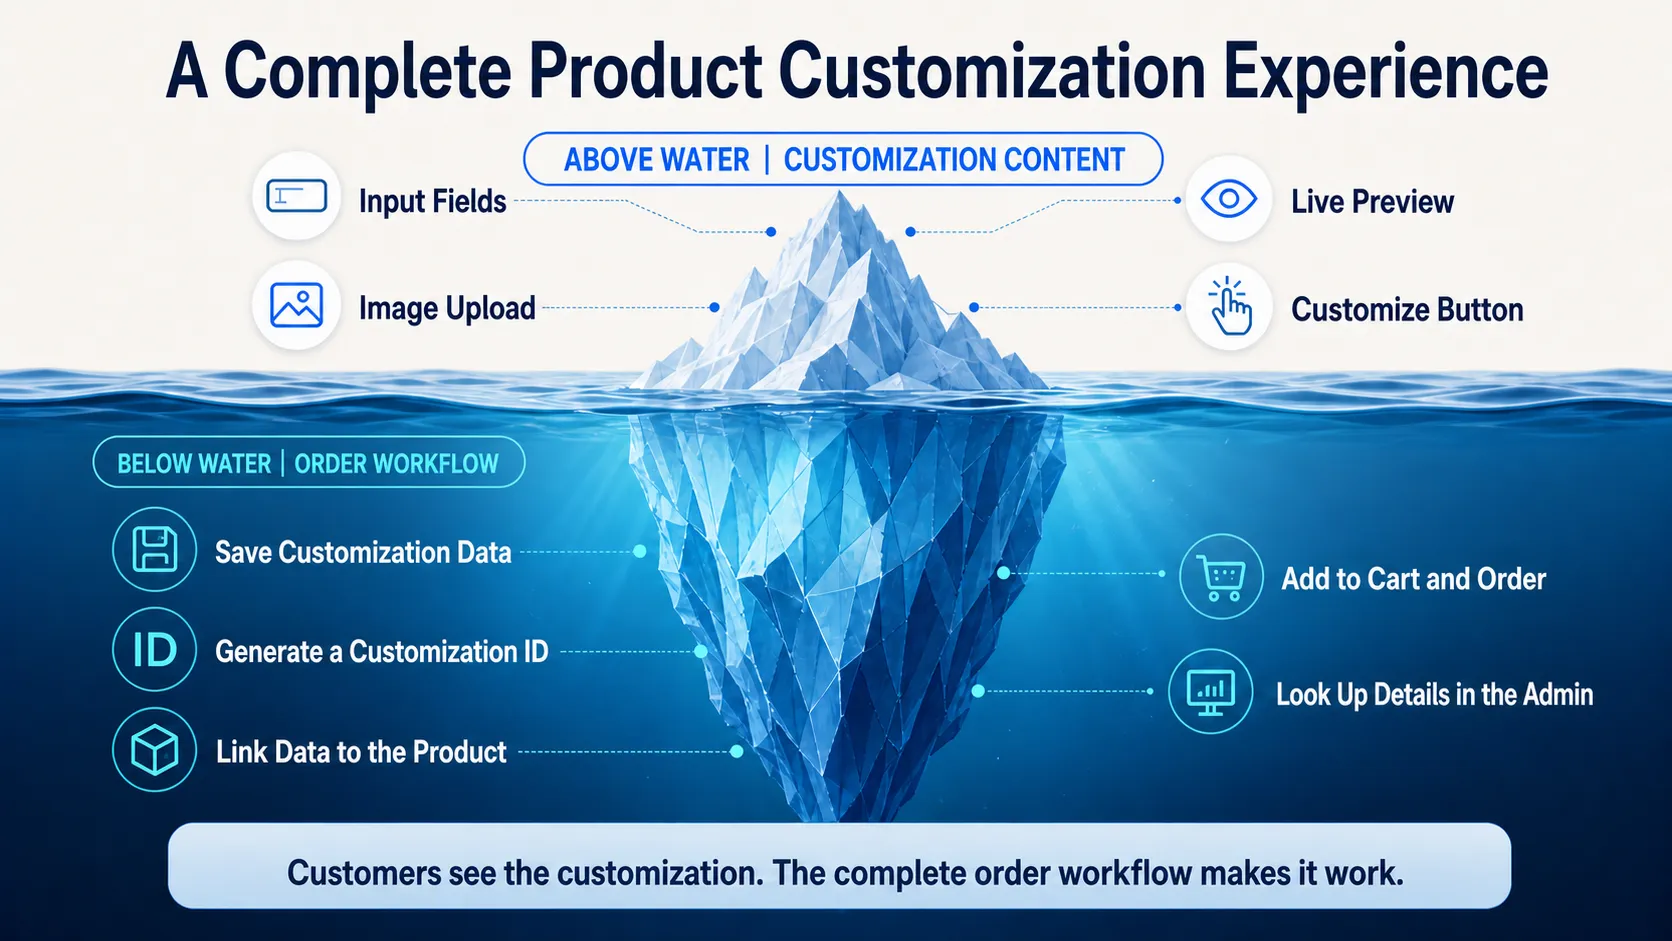
Customers see the customization content, but the complete order workflow is what makes the transaction possible.
This guide focuses on building the product customization order workflow. It does not cover which customization inputs you should collect.We recommend starting with a customization button, a modal, and a separate product template.This setup has the least impact on other parts of your store, minimizes the work required from merchants, and helps customers stay focused on customization.
Product customization order workflow overview
Describe the order workflow
Tell Meowgic how to save customization data, generate a customization ID, add the product to the cart, and carry the ID through to the order.
Configure customizable products
Create a separate product template, hide the original purchase buttons, and confirm that other products are not affected.
Test and look up orders
Complete a test order and confirm that you can use the customization ID to retrieve the customer’s data in the app admin.
1. Describe the product customization order workflow in Meowgic
When creating your app, add the following order workflow requirements to the feature description: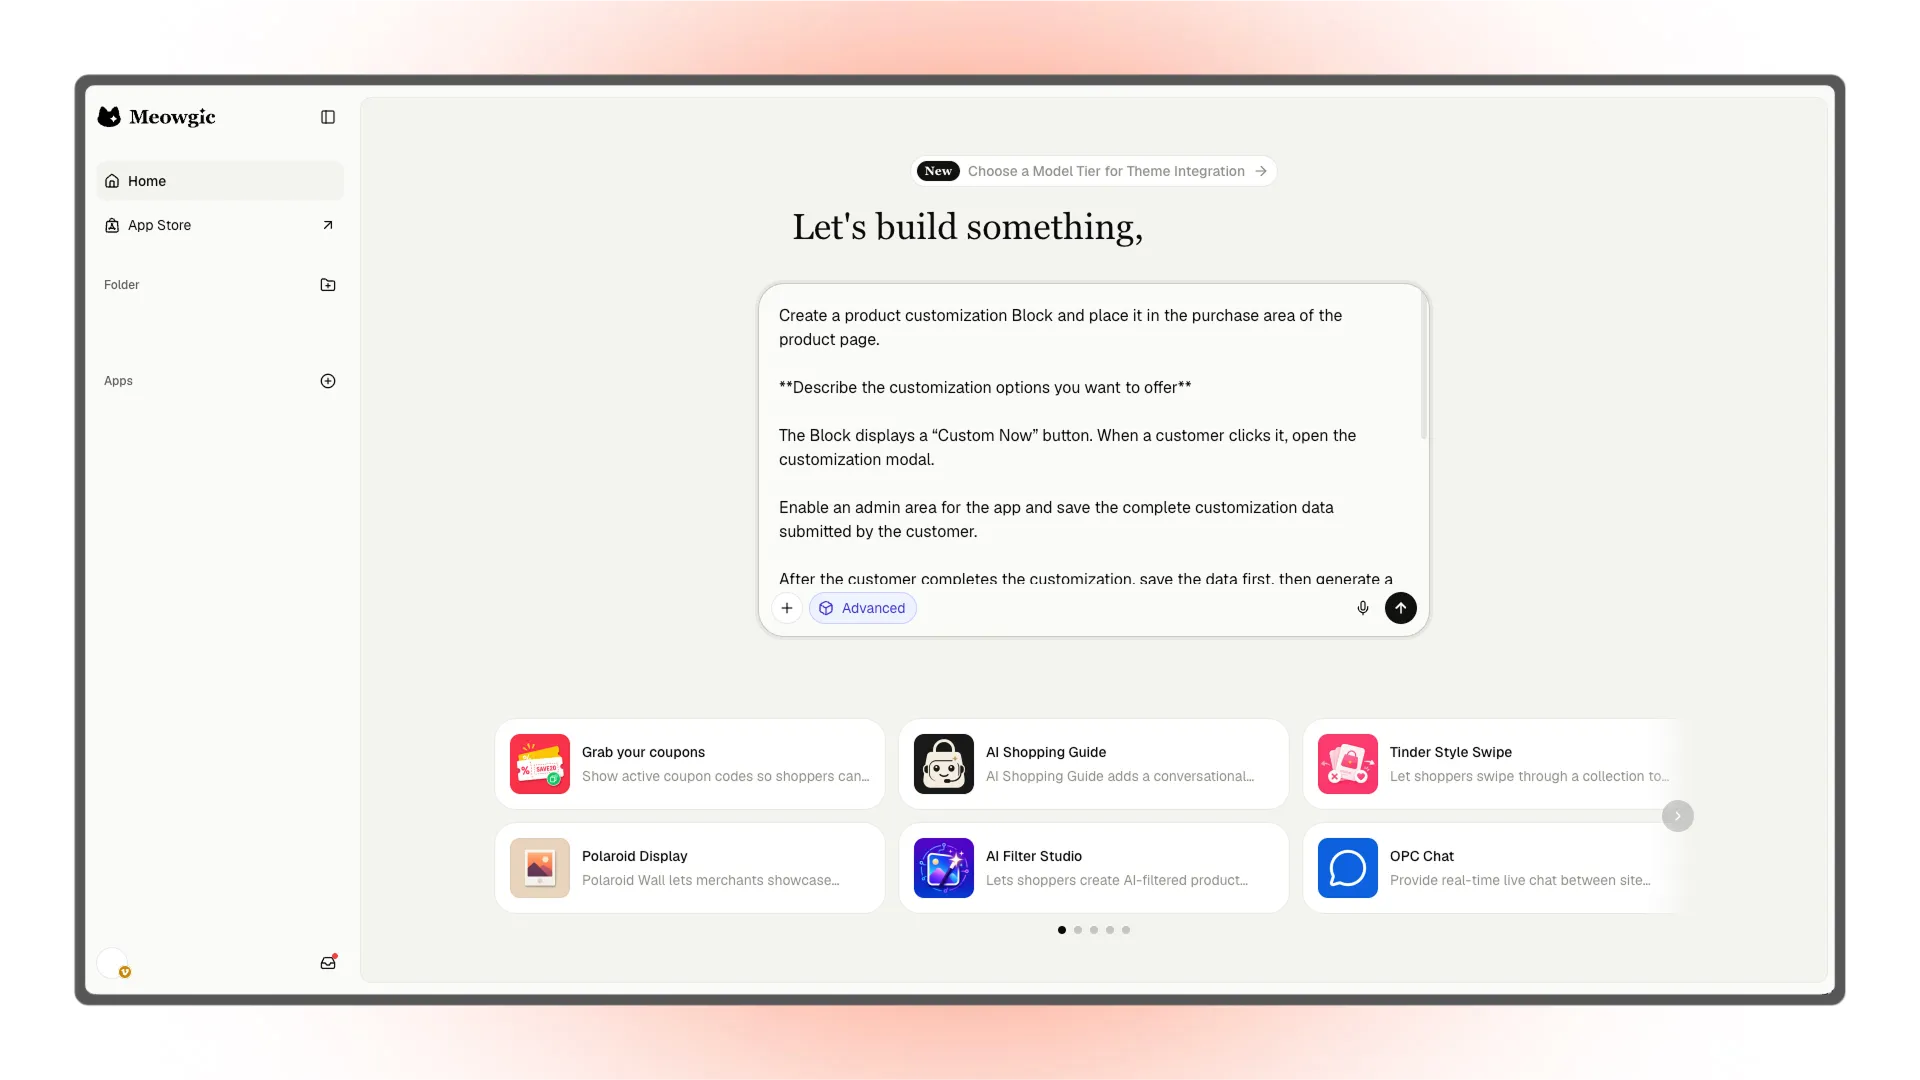
2. Configure a separate product template for customizable products
We recommend using a separate product template for customizable products.The steps below use Shopify as an example. Other ecommerce platforms may use different menu locations and interface labels, but the configuration principles are the same.
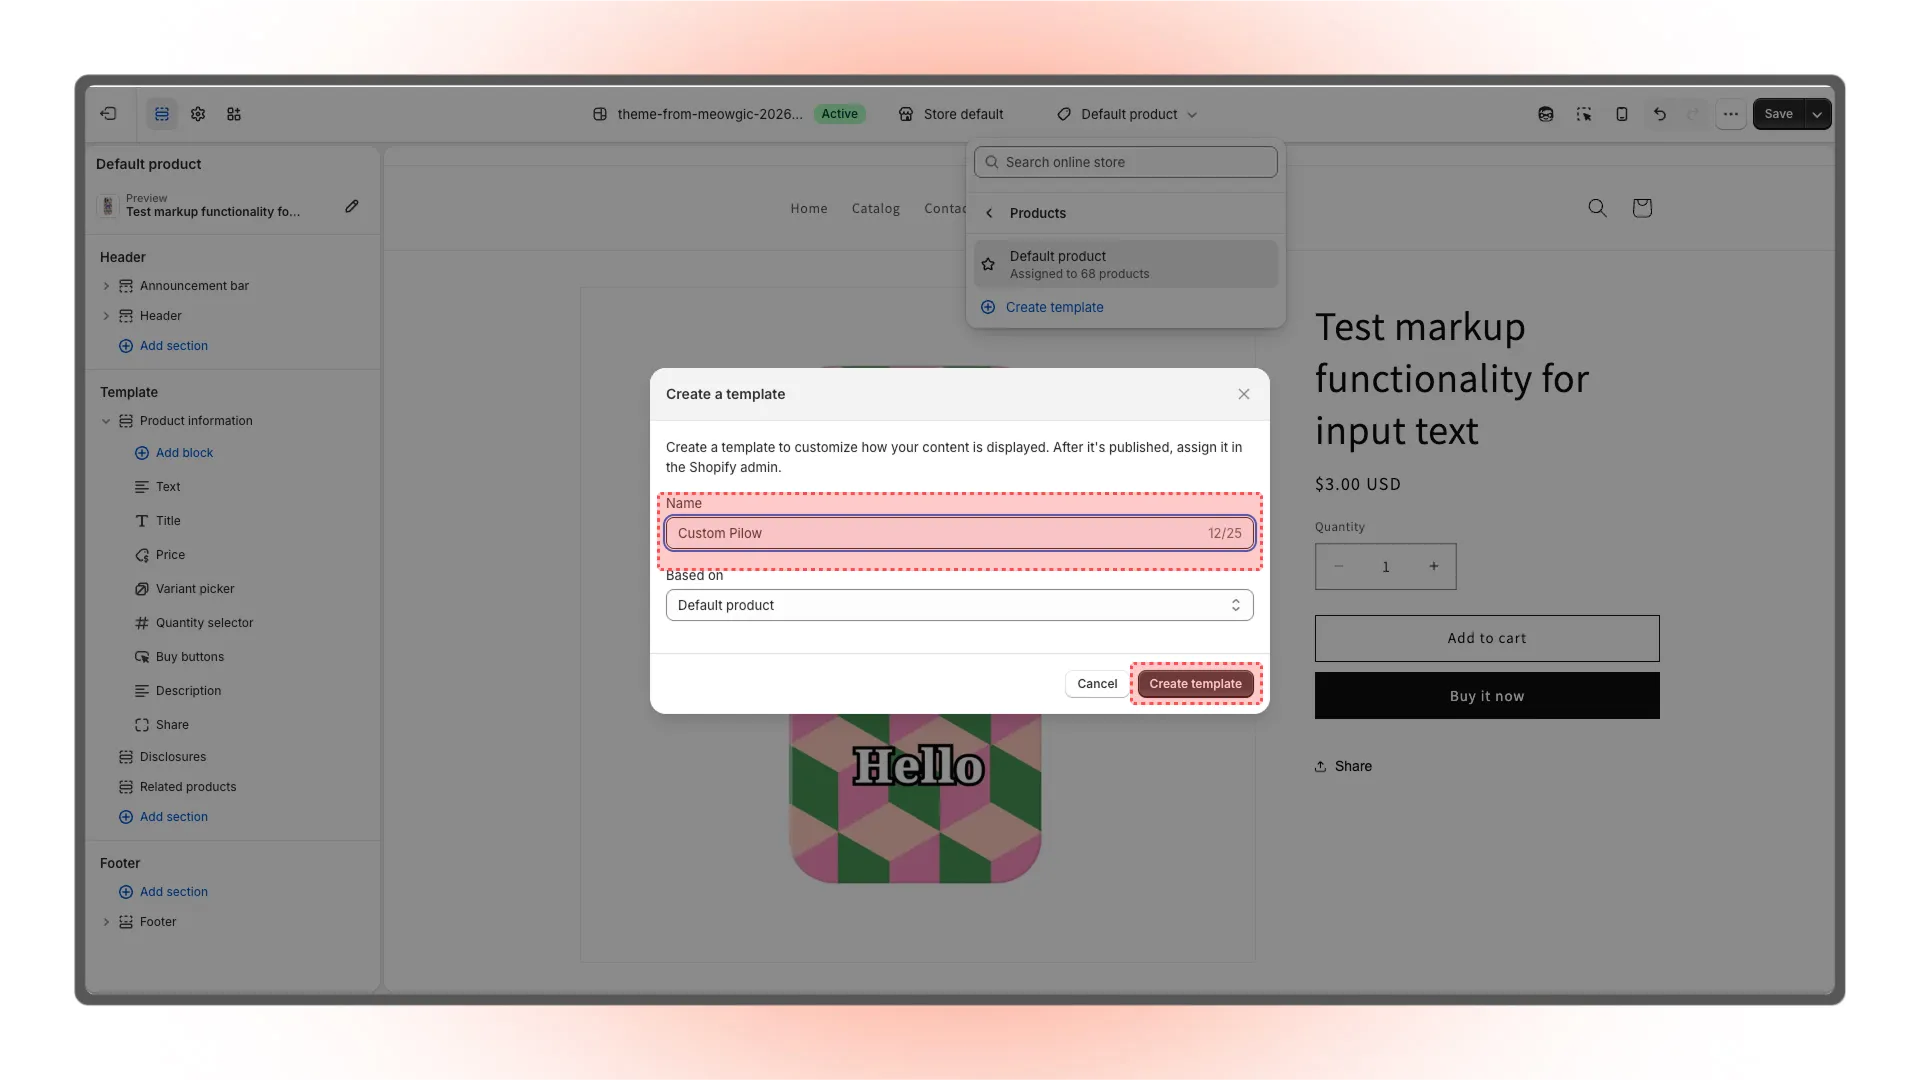
In the Shopify theme editor, create a dedicated template for customizable products based on the default product template.
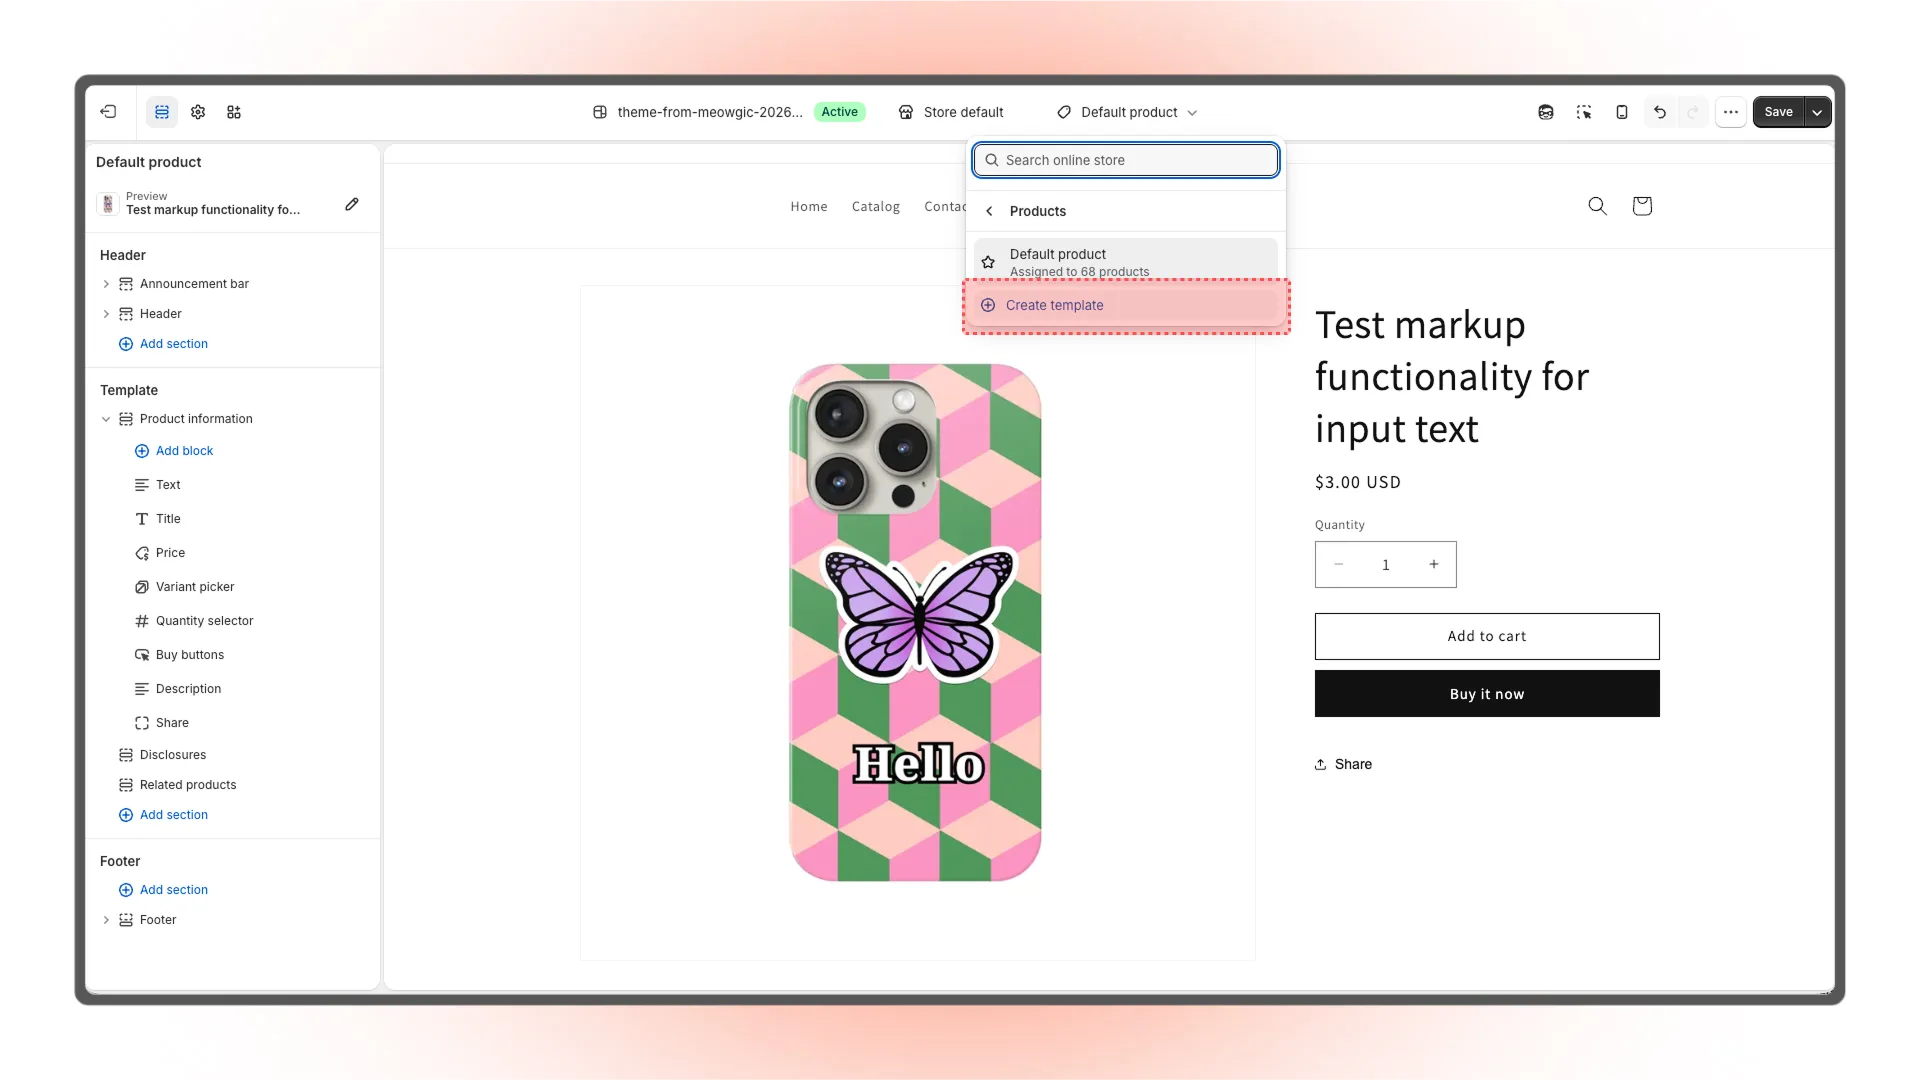
Enter a template name, then click Create template.
Find the Buy buttons block and click the visibility icon on the right.
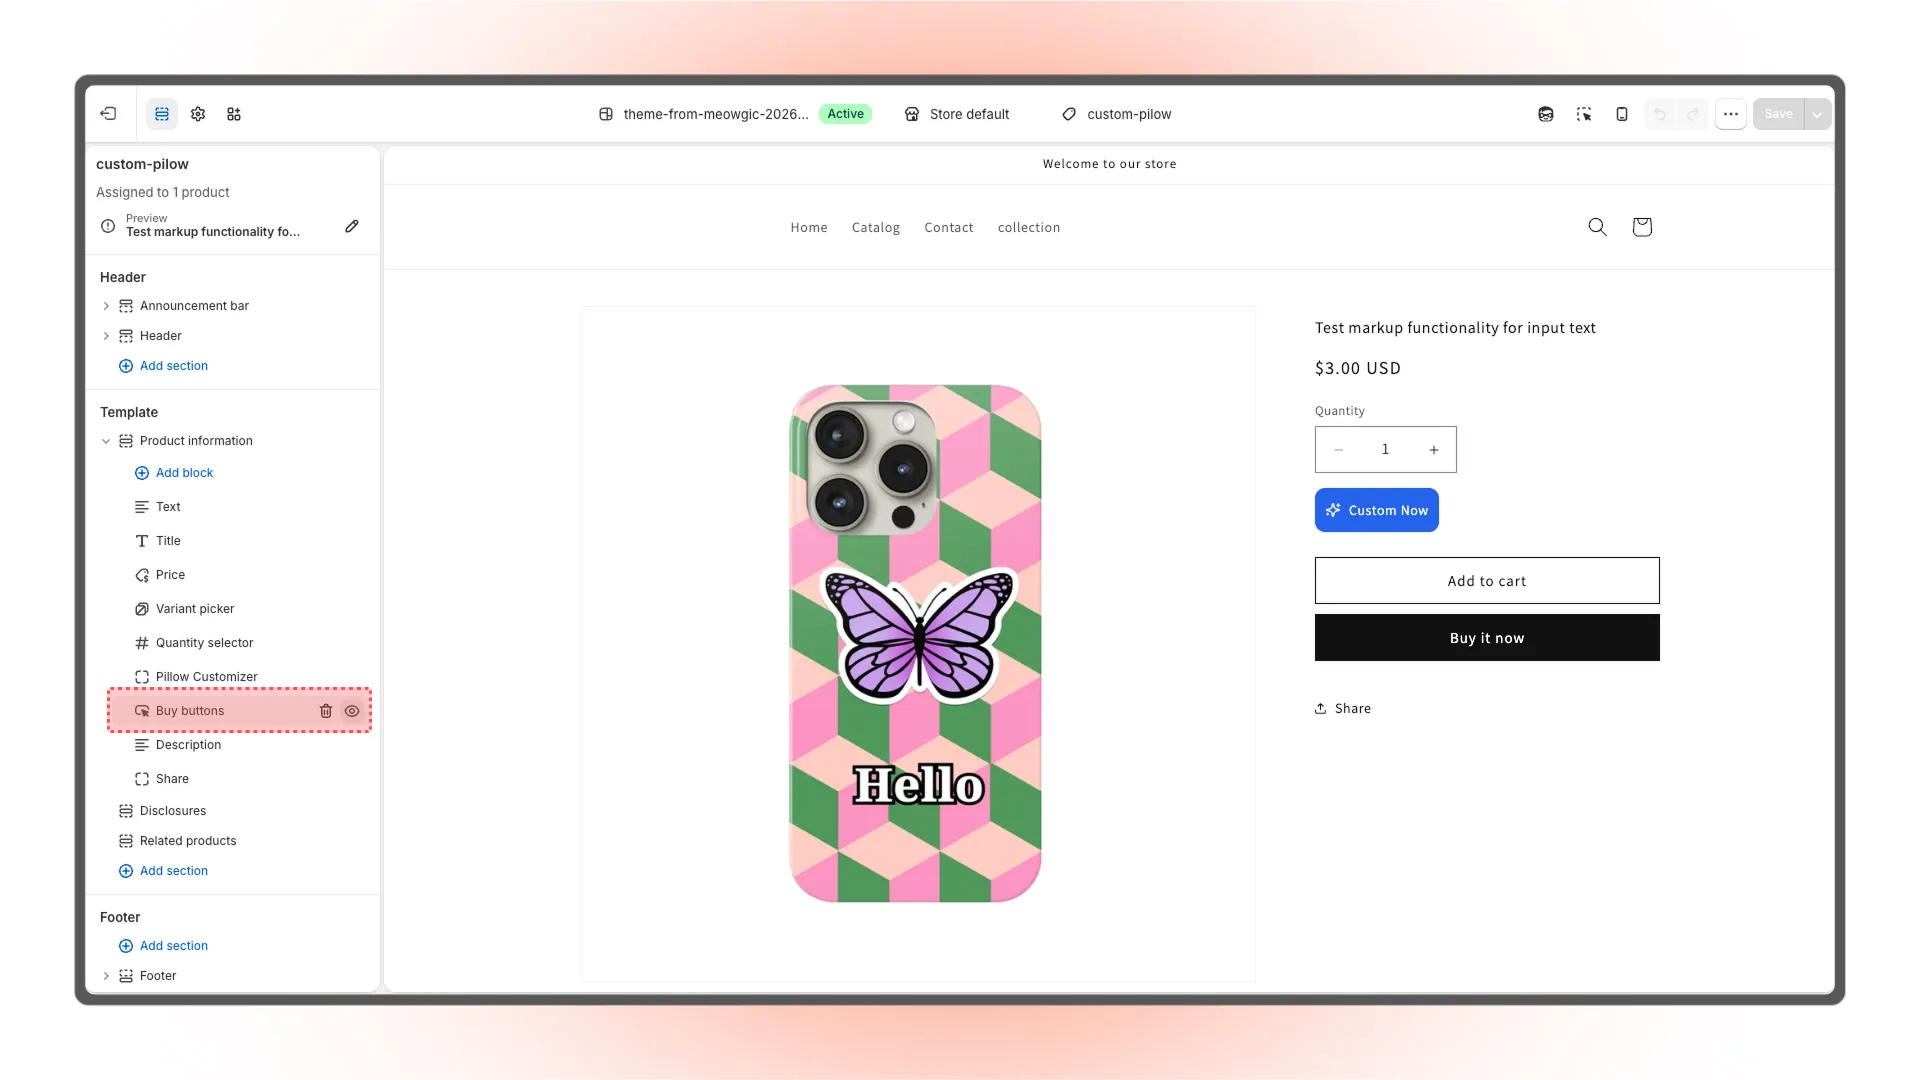
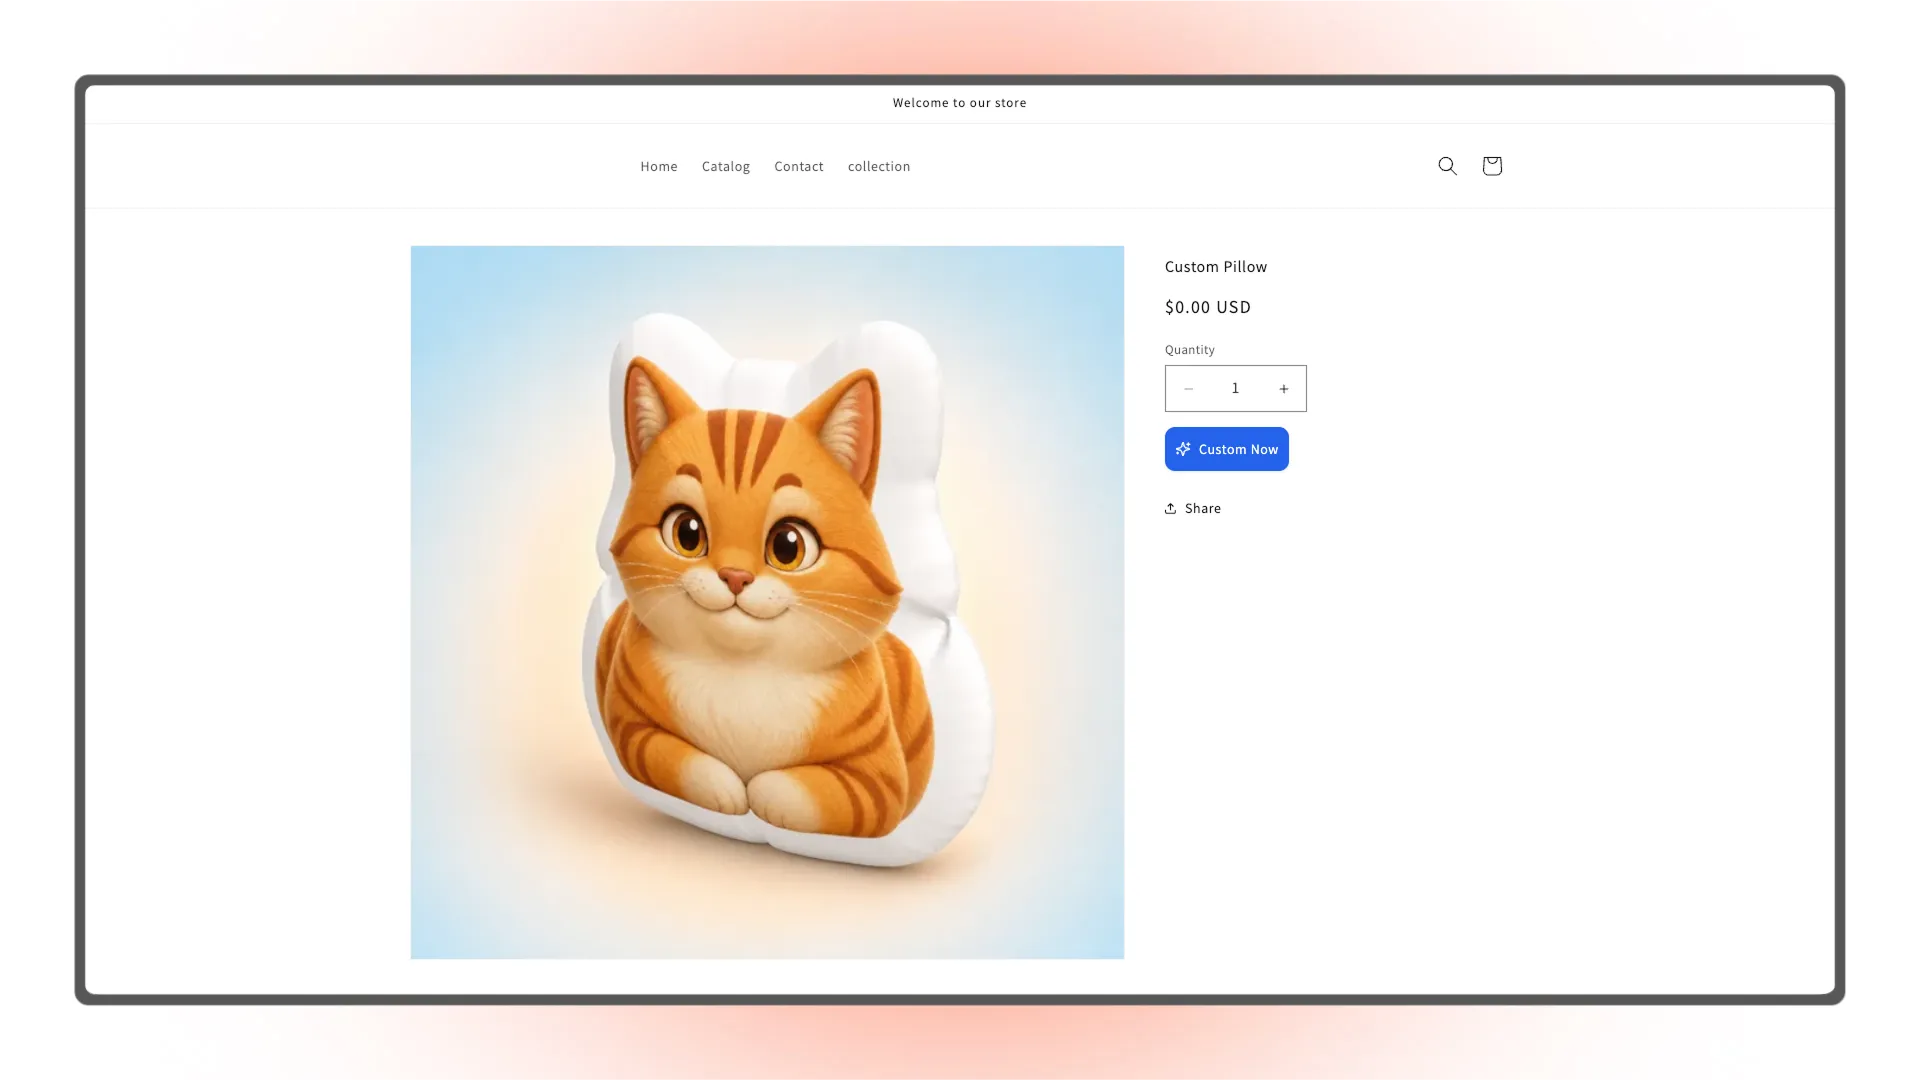
Confirm that Buy buttons is hidden and that only Custom Now remains on the product page.
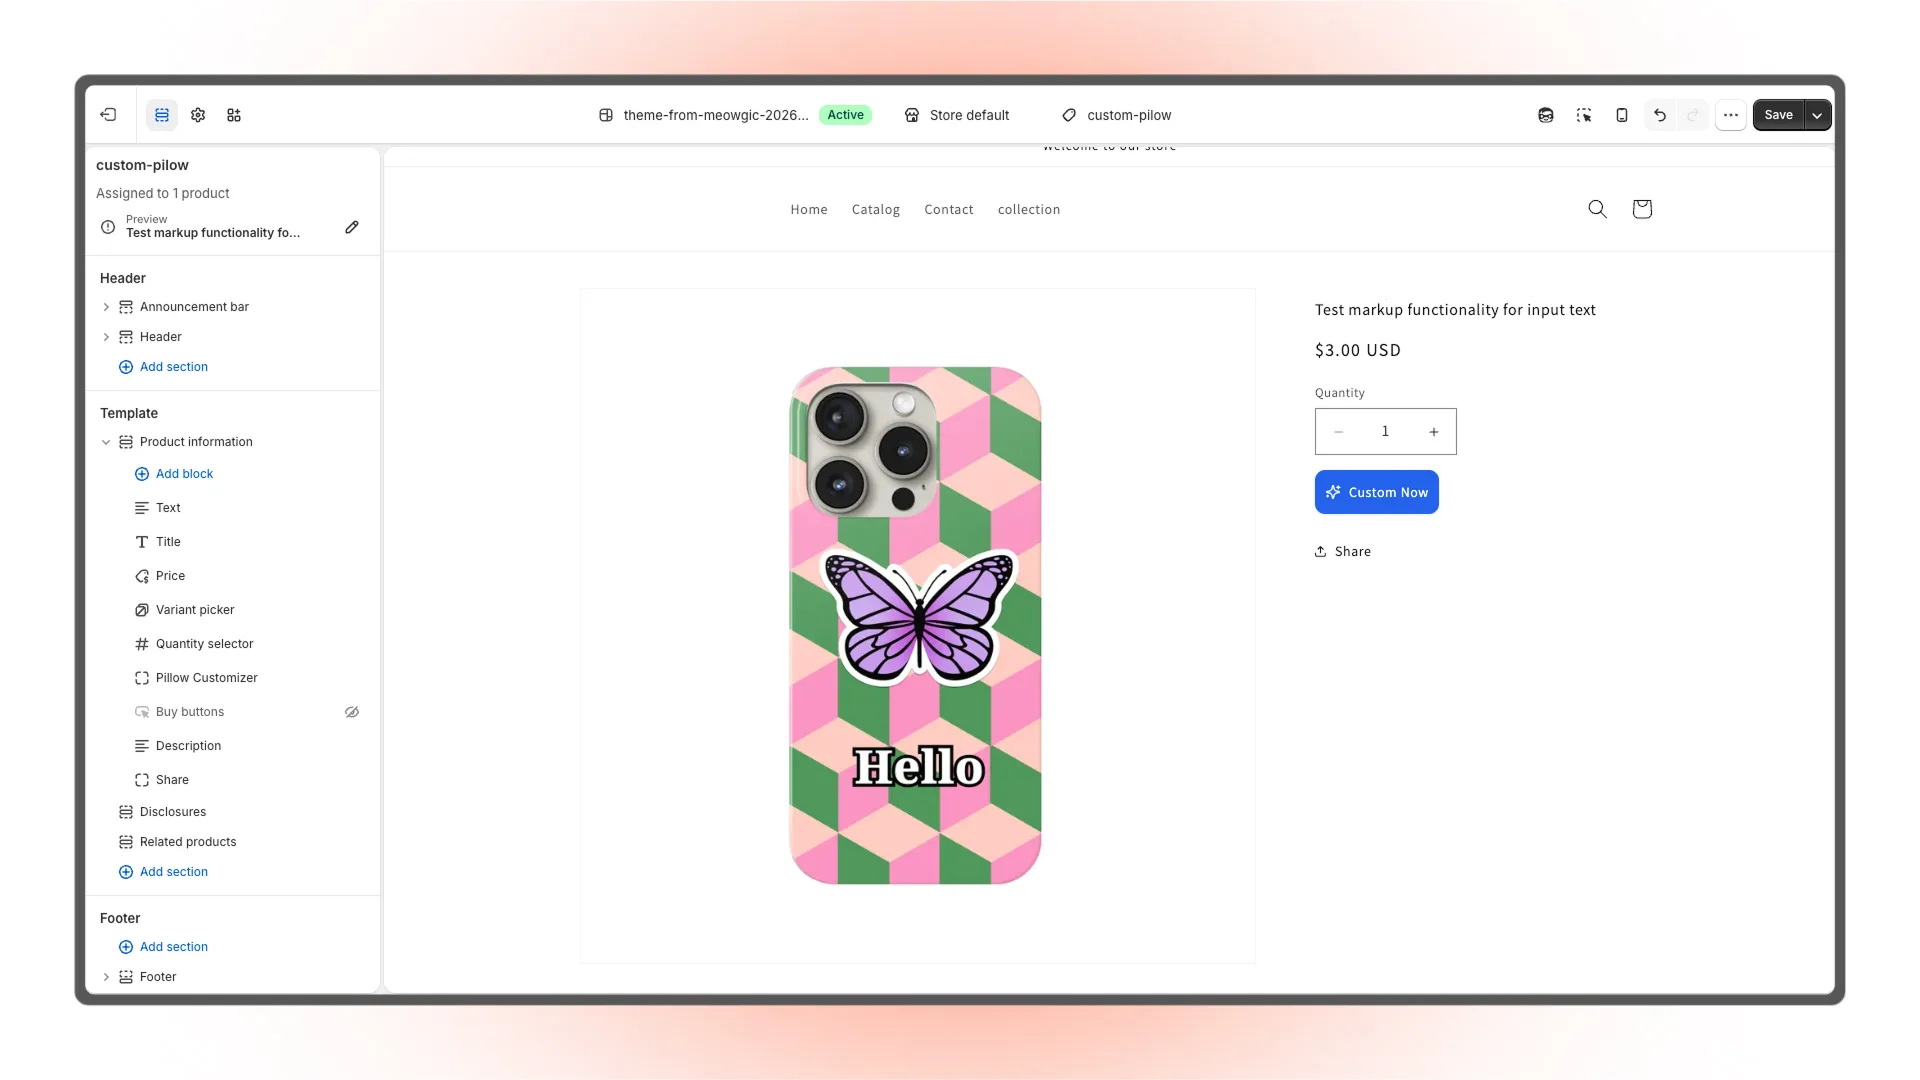
Check whether other product templates contain the product customization Block. If they do, hide it so it does not affect regular products.
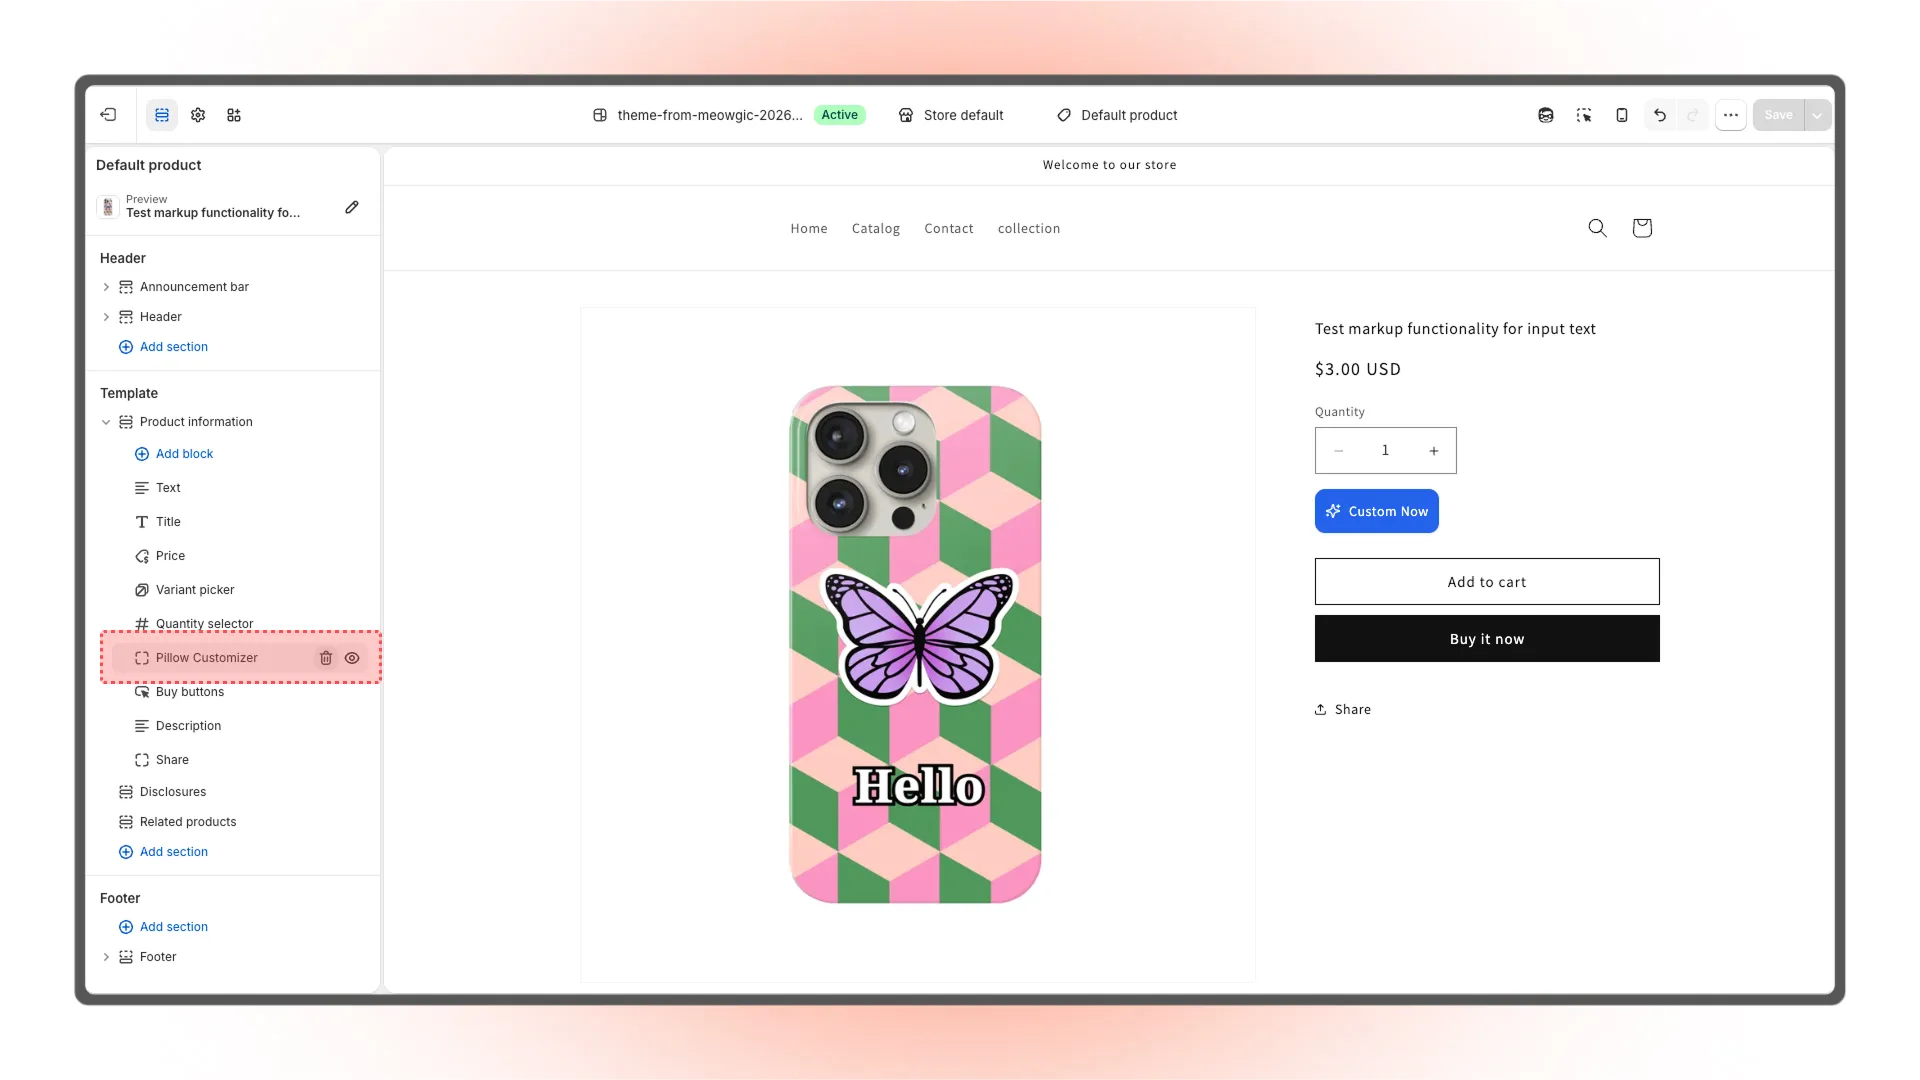
Go to the Shopify product editor and find the Theme template setting.
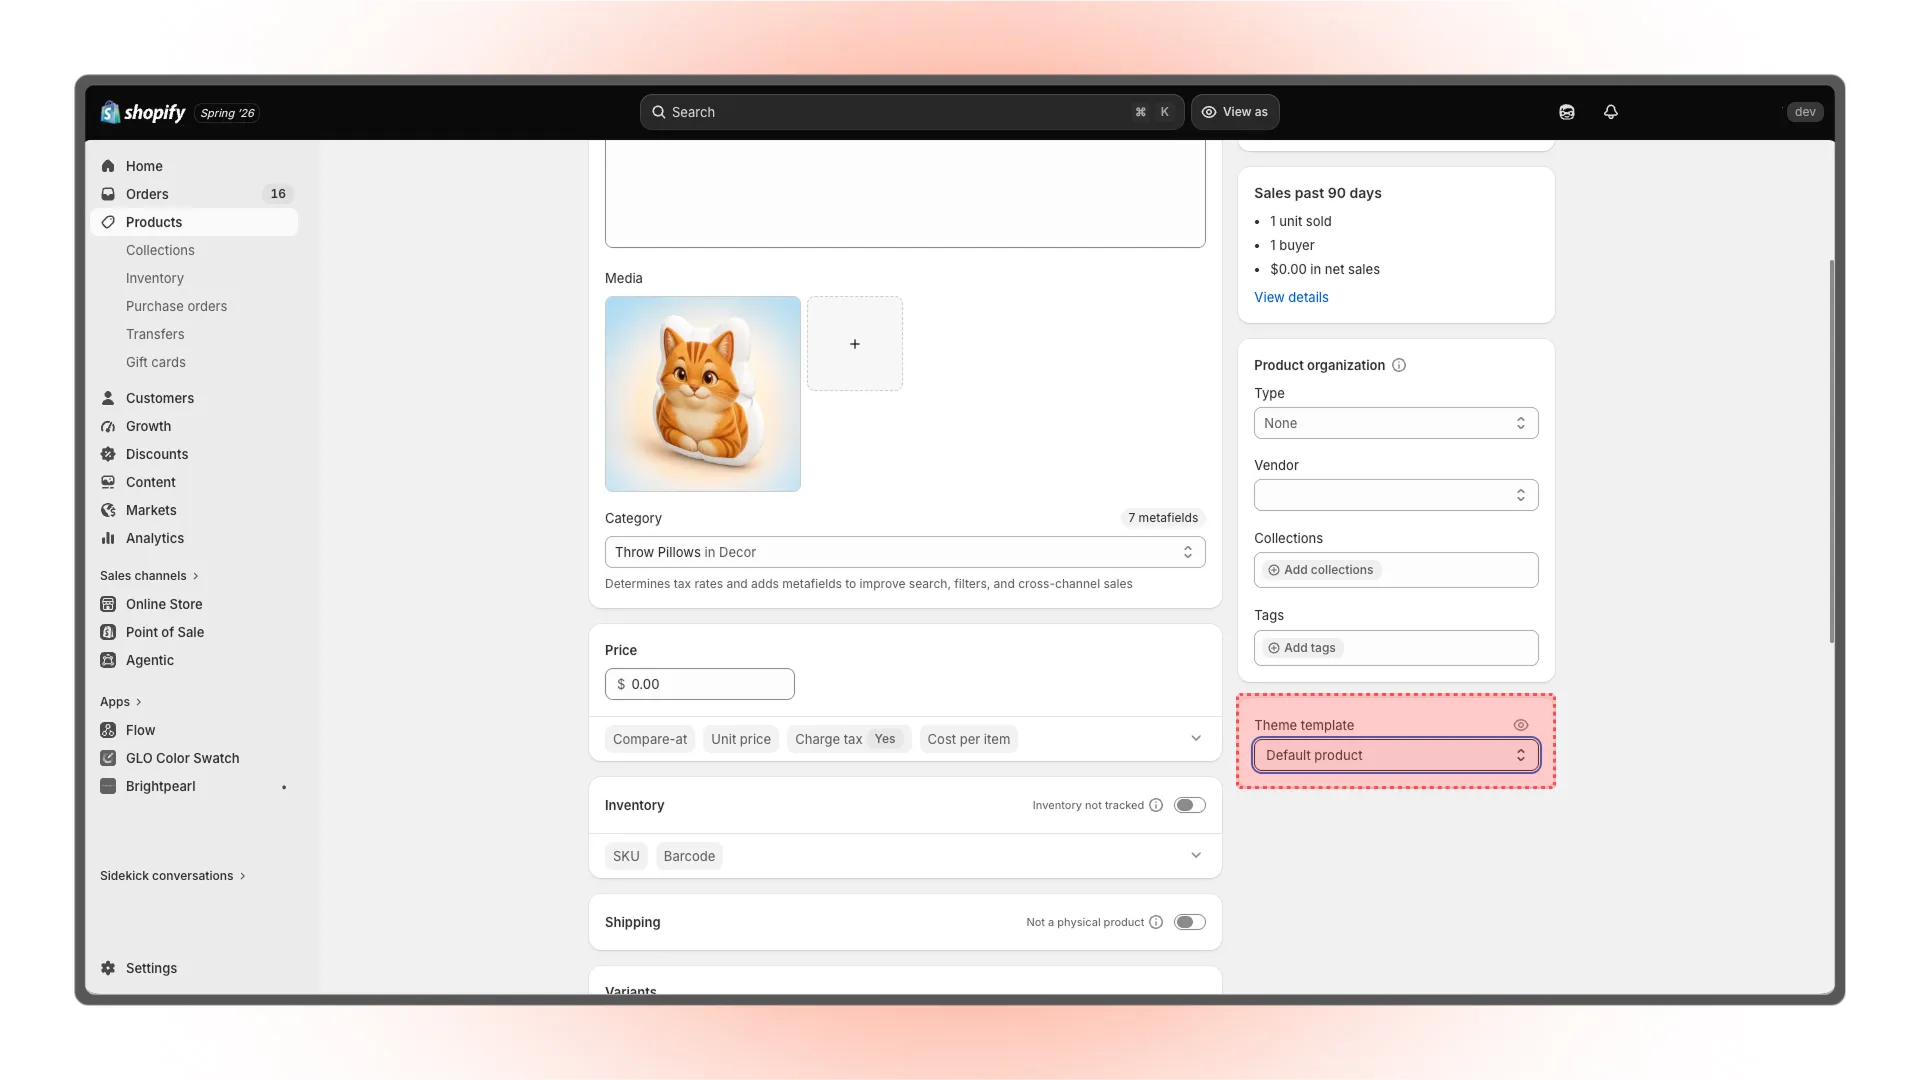
Select custom-pillow, then click Save.
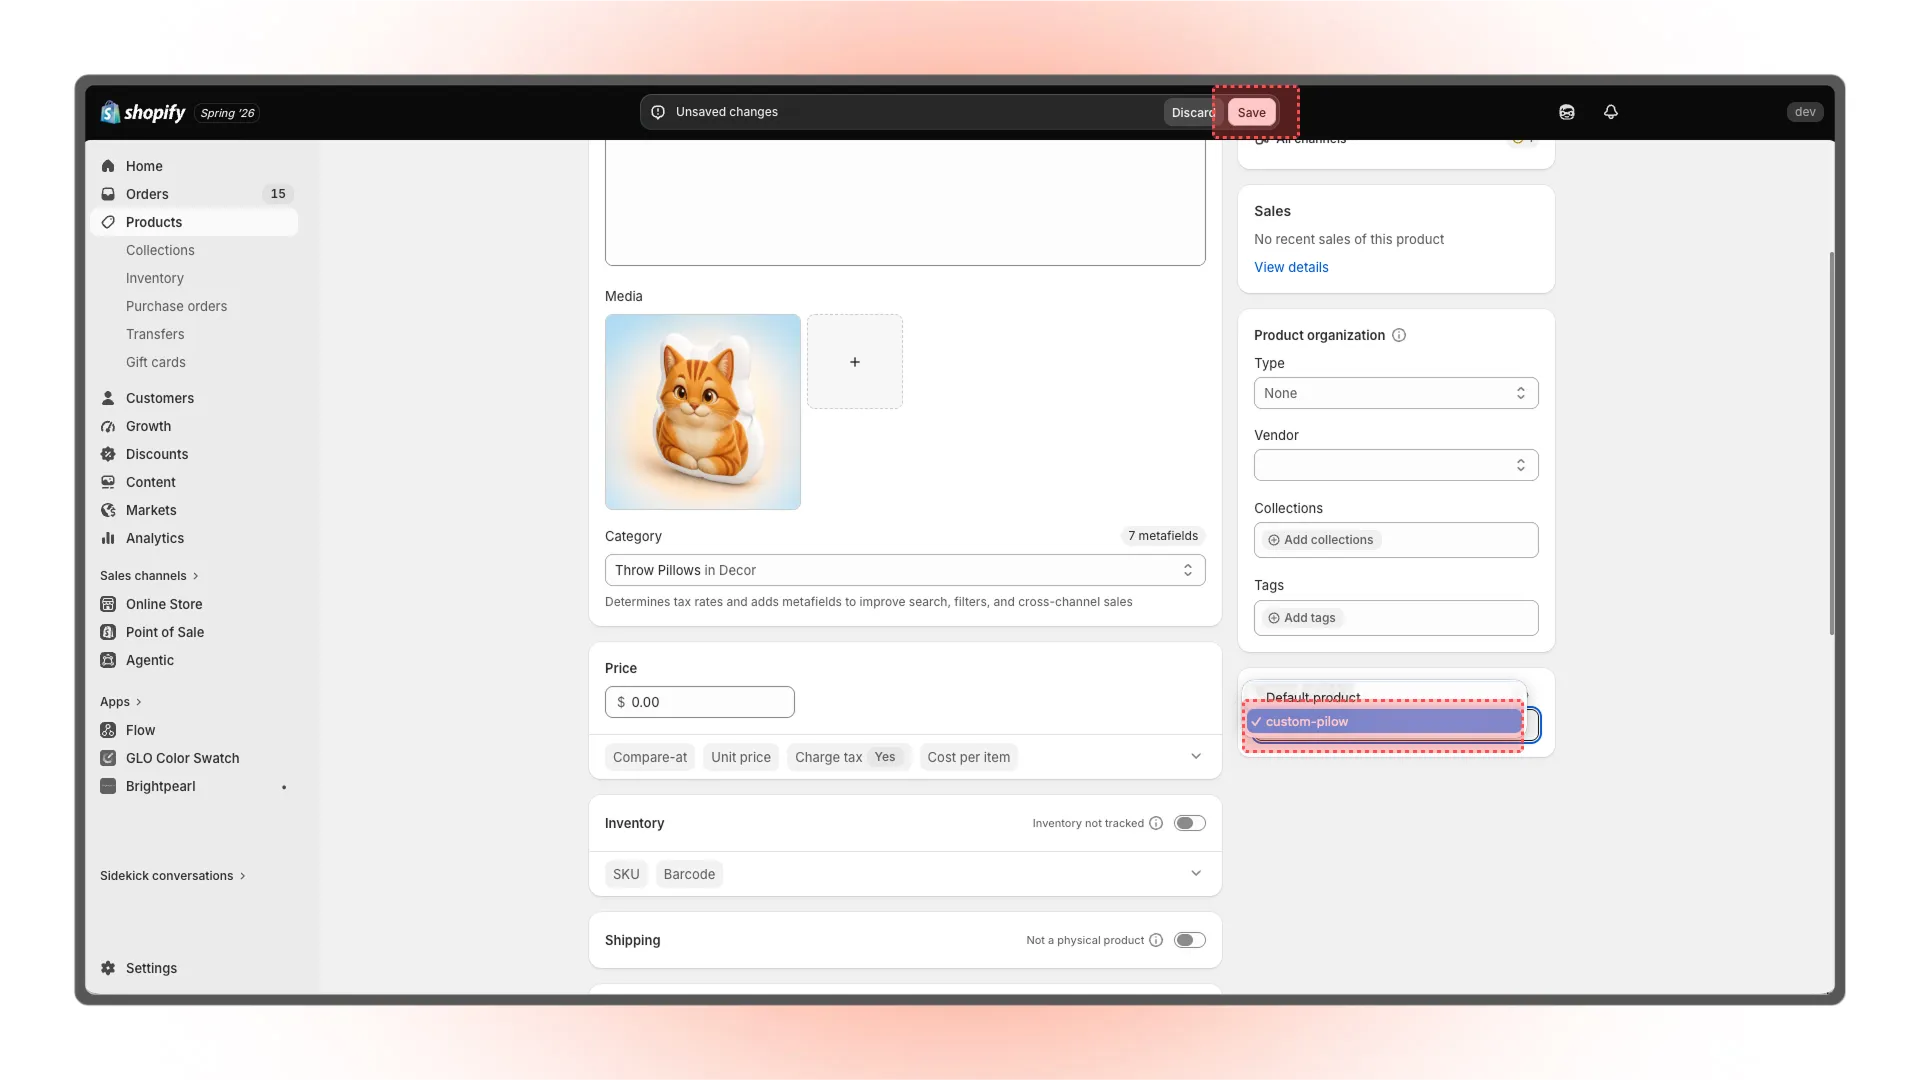
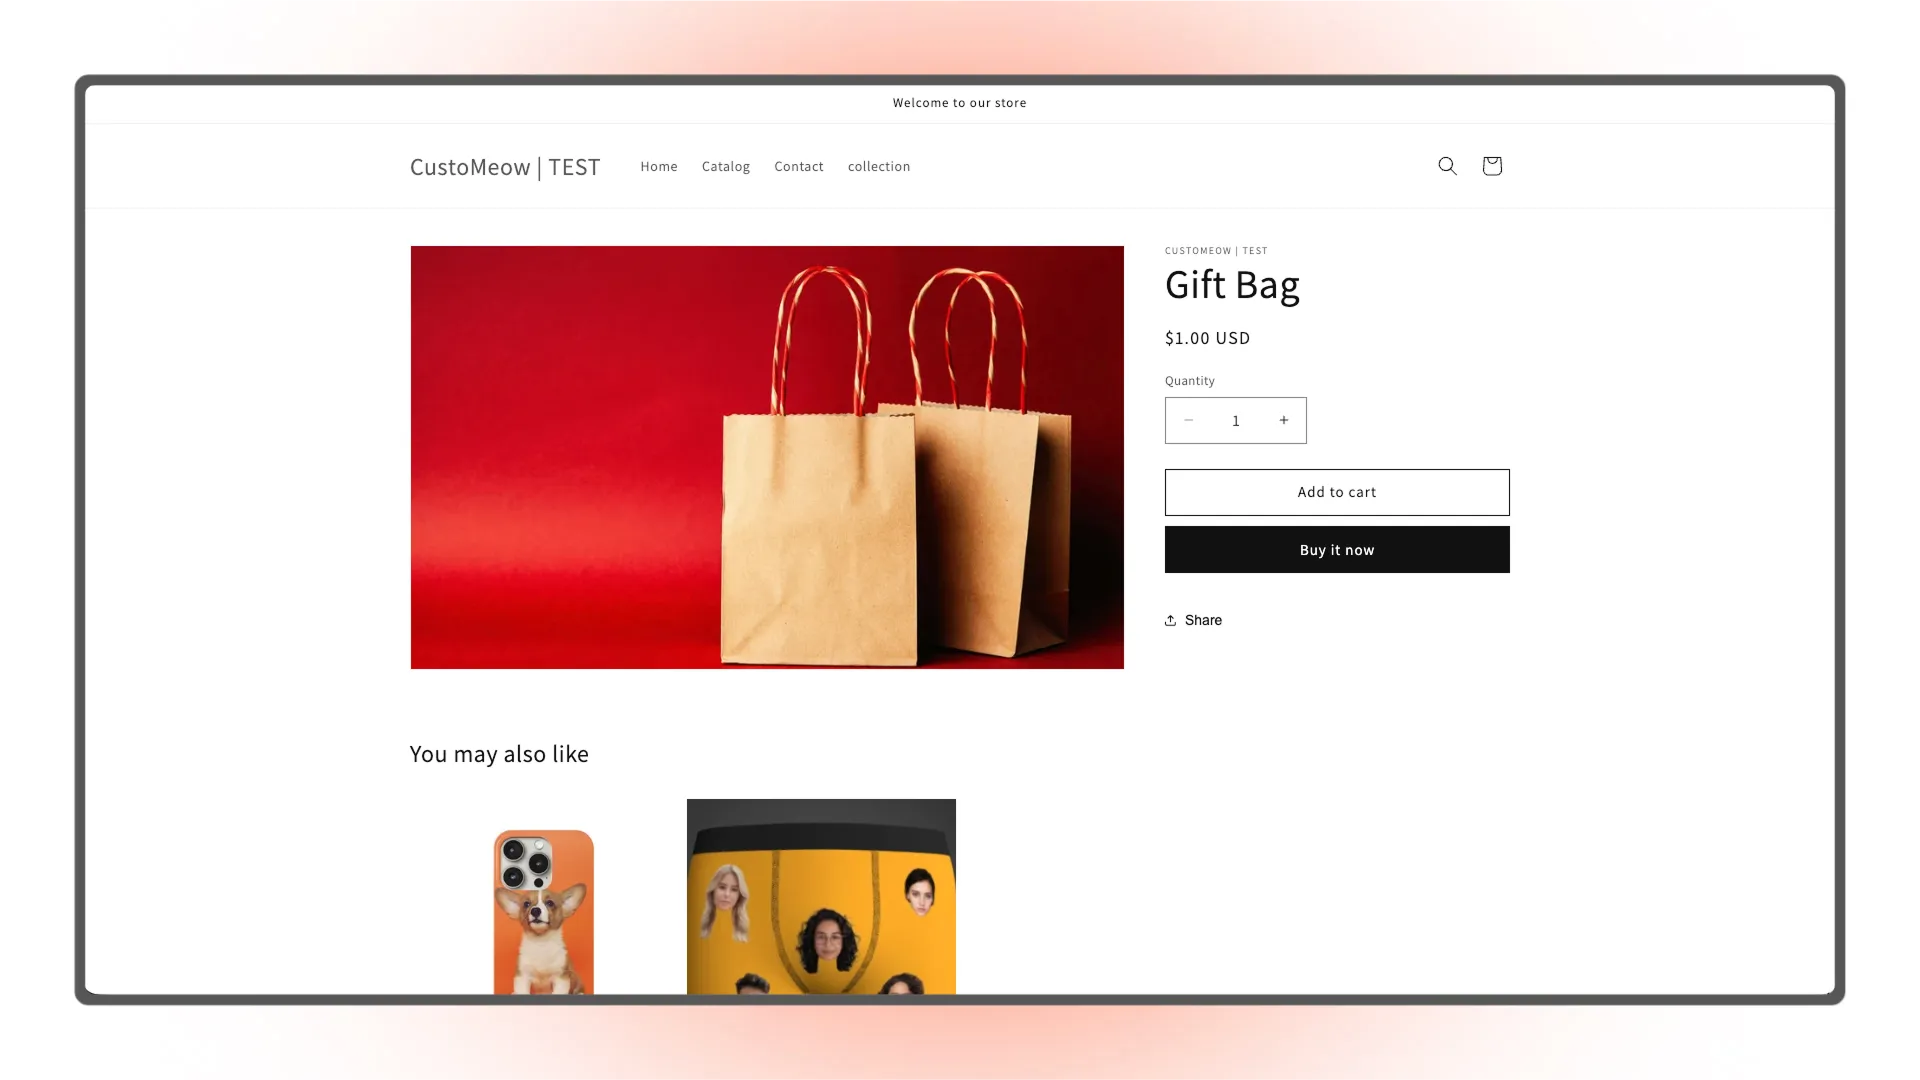
Open your storefront and check the purchase buttons on both the customizable product and other products. After you hide the original purchase buttons, customers must complete the customization before purchasing and cannot bypass the workflow.
Check the customizable product.
Check another product.
If your theme includes quick-add or sticky purchase buttons, check whether customers can use them to bypass customization.
3. What does the customization ID do?
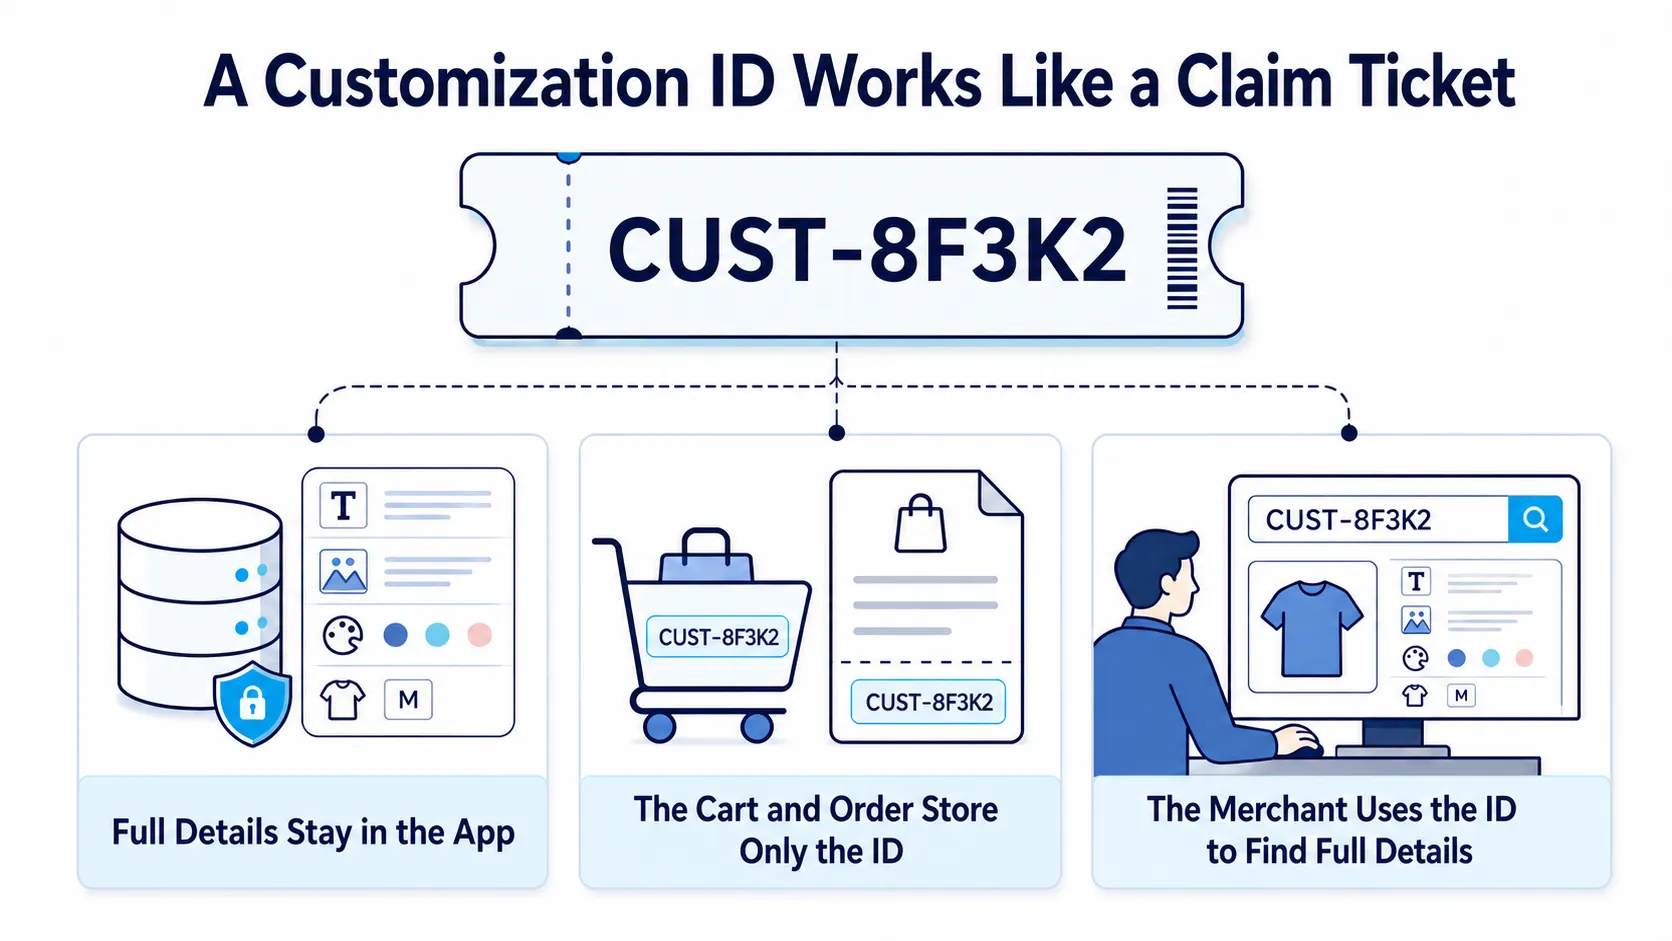
A customization ID works like a claim ticket:- The complete customization data stays in the app admin.
- The cart and order store only the customization ID.
- The merchant uses the ID from the order to retrieve the complete data.
line item property is an extra piece of information attached to an item in the order.
4. How to test a product customization order
Before publishing, complete an entire order as a real customer would.1. Check the customizable product buttons
Open the customizable product page. Confirm that it displays only Custom Now and that the native Add to cart and Buy it now buttons are hidden.2. Upload a test image
Click Custom Now and upload a test image that represents a realistic customer request.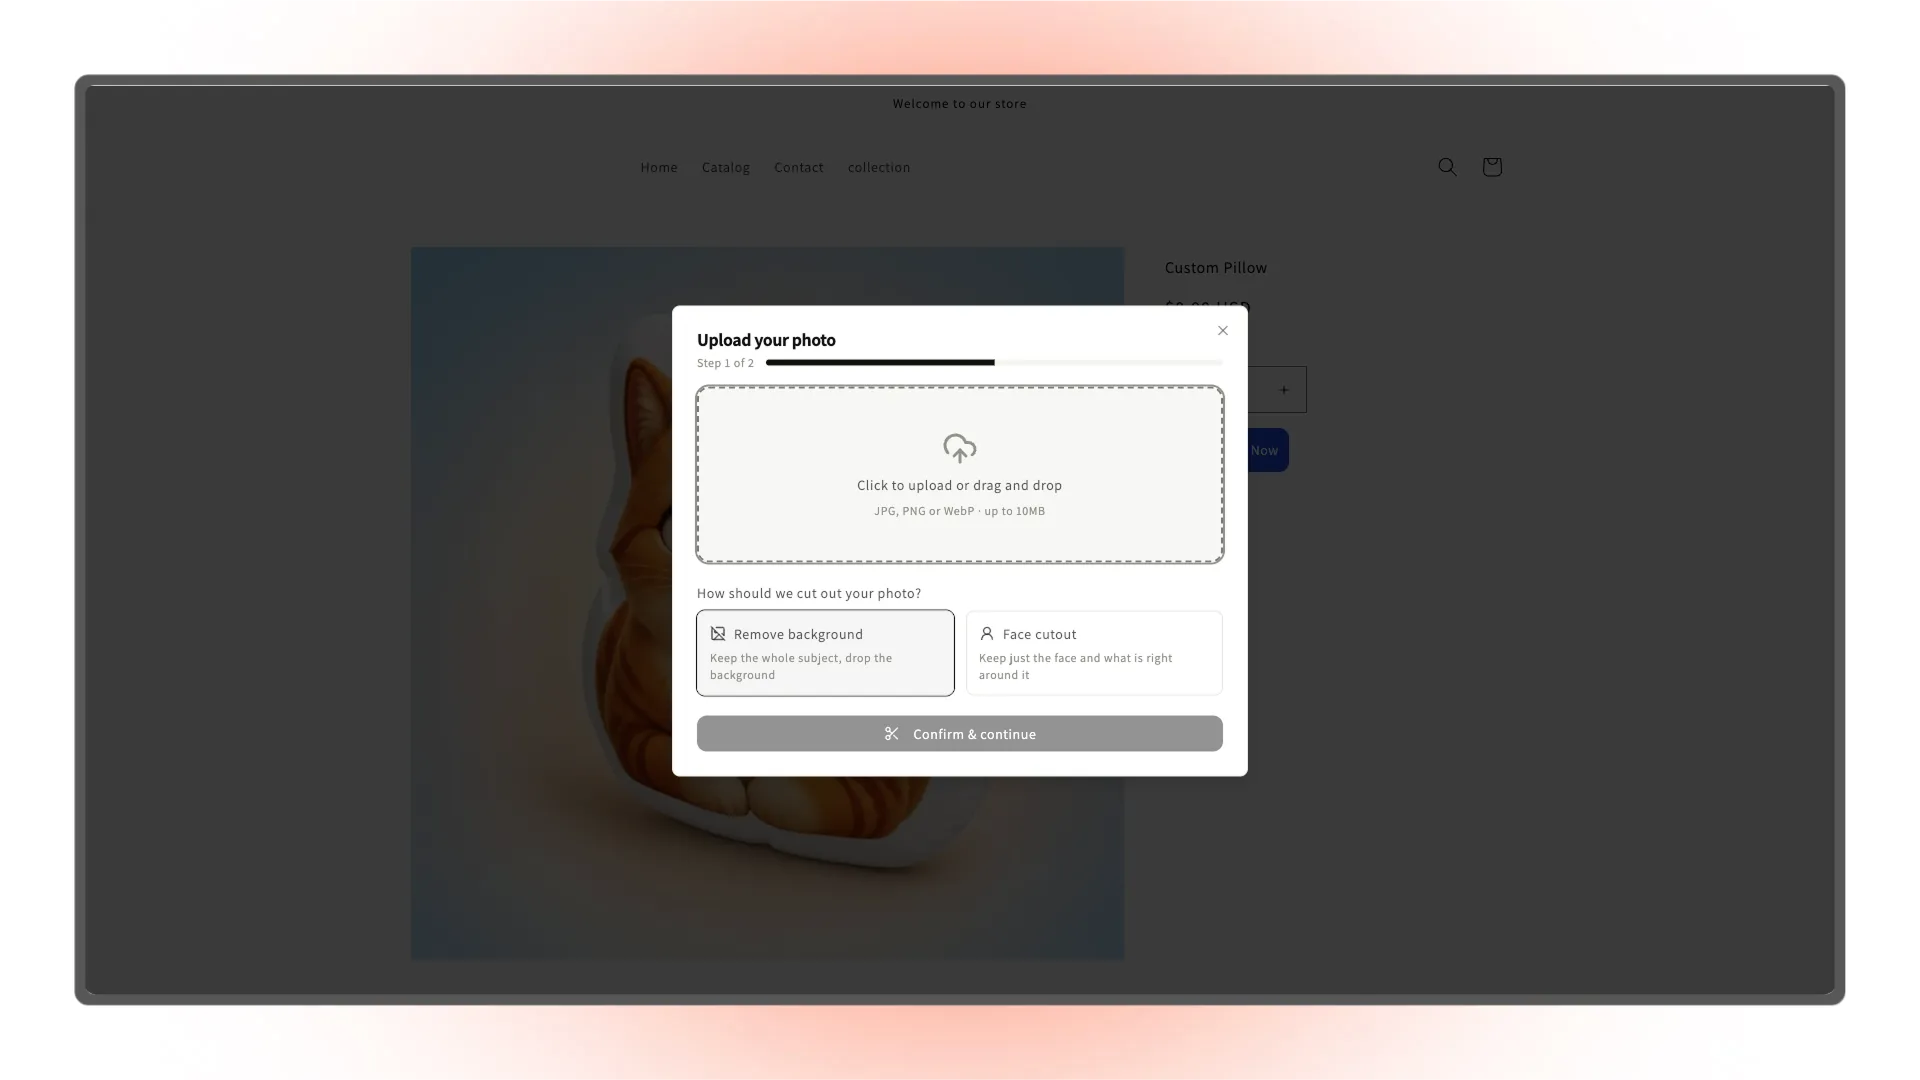
3. Adjust the crop and processing method
Drag the crop frame to select the part of the image you want to keep. Choose Remove background or Face cutout based on the product, then click Confirm & continue.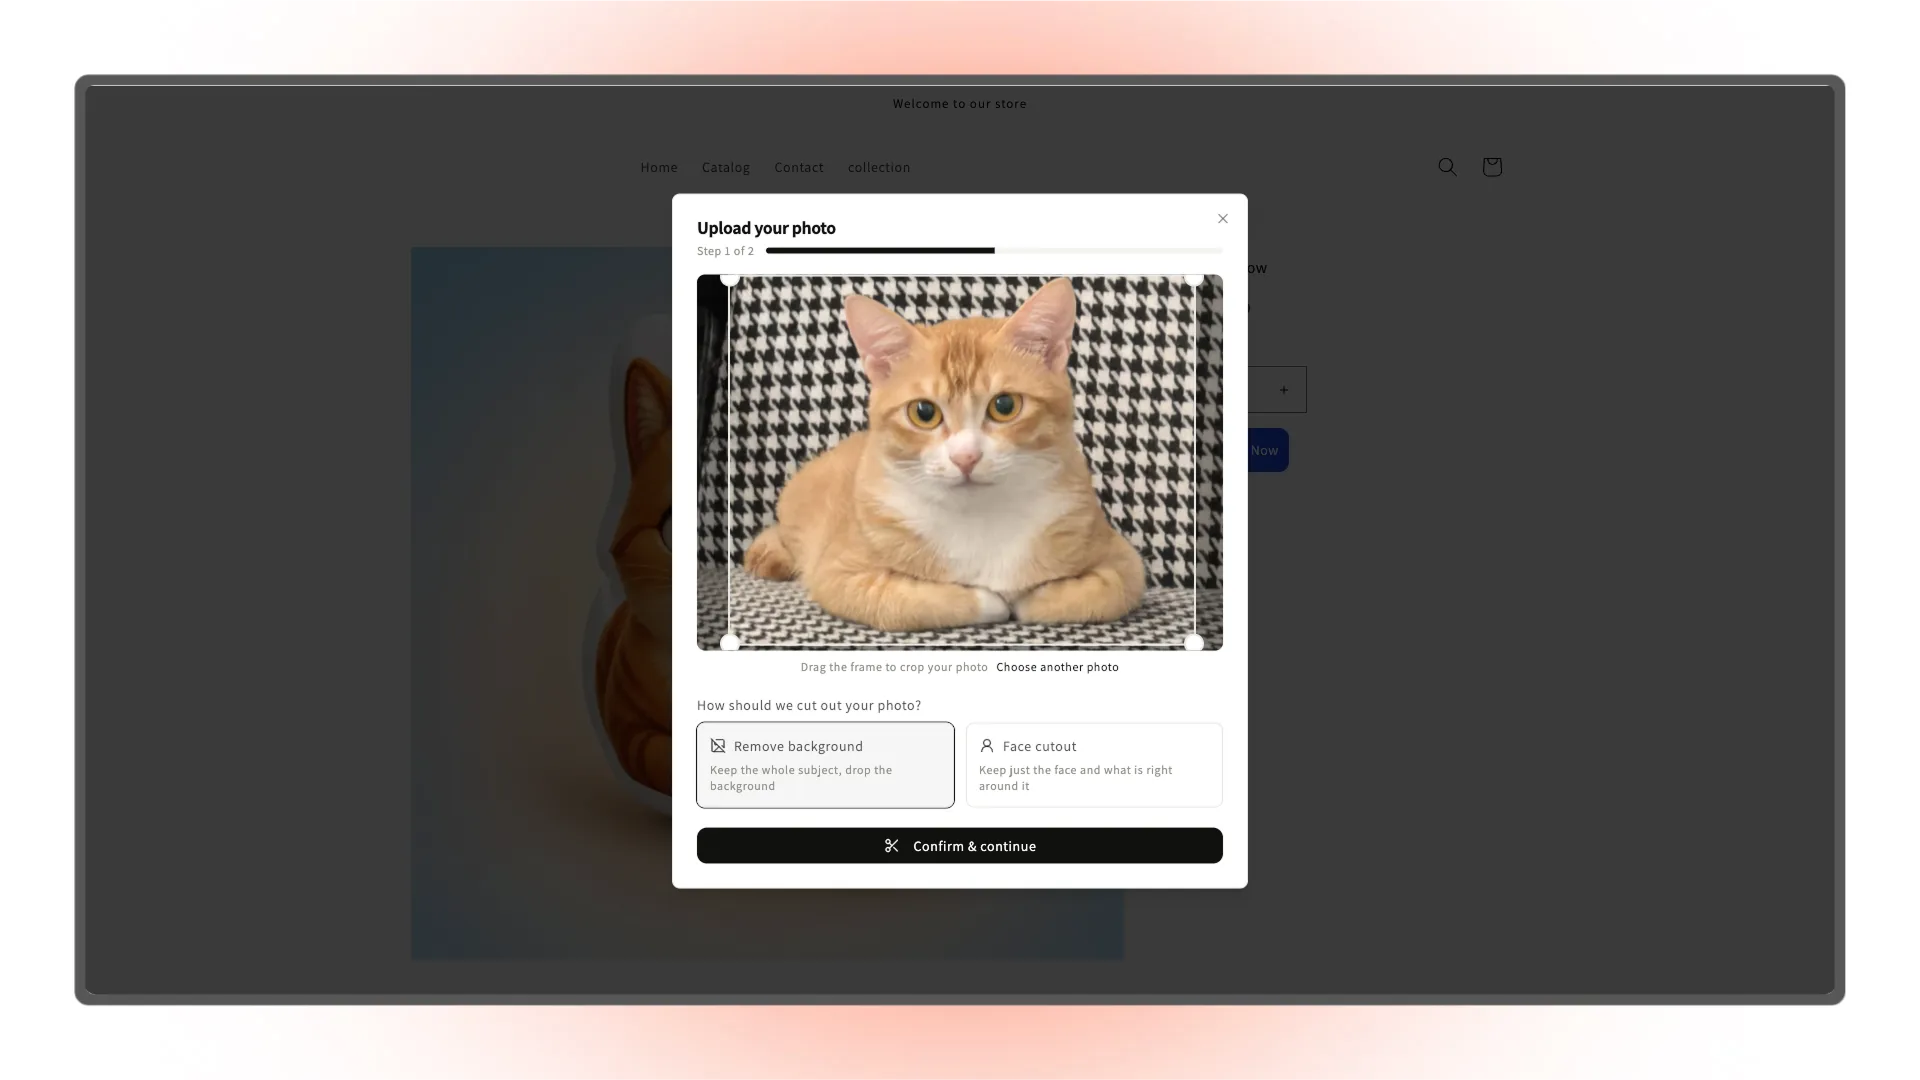
4. Adjust the preview and add the product to the cart
After the preview loads, adjust the outline width and color, then click Confirm & add to cart.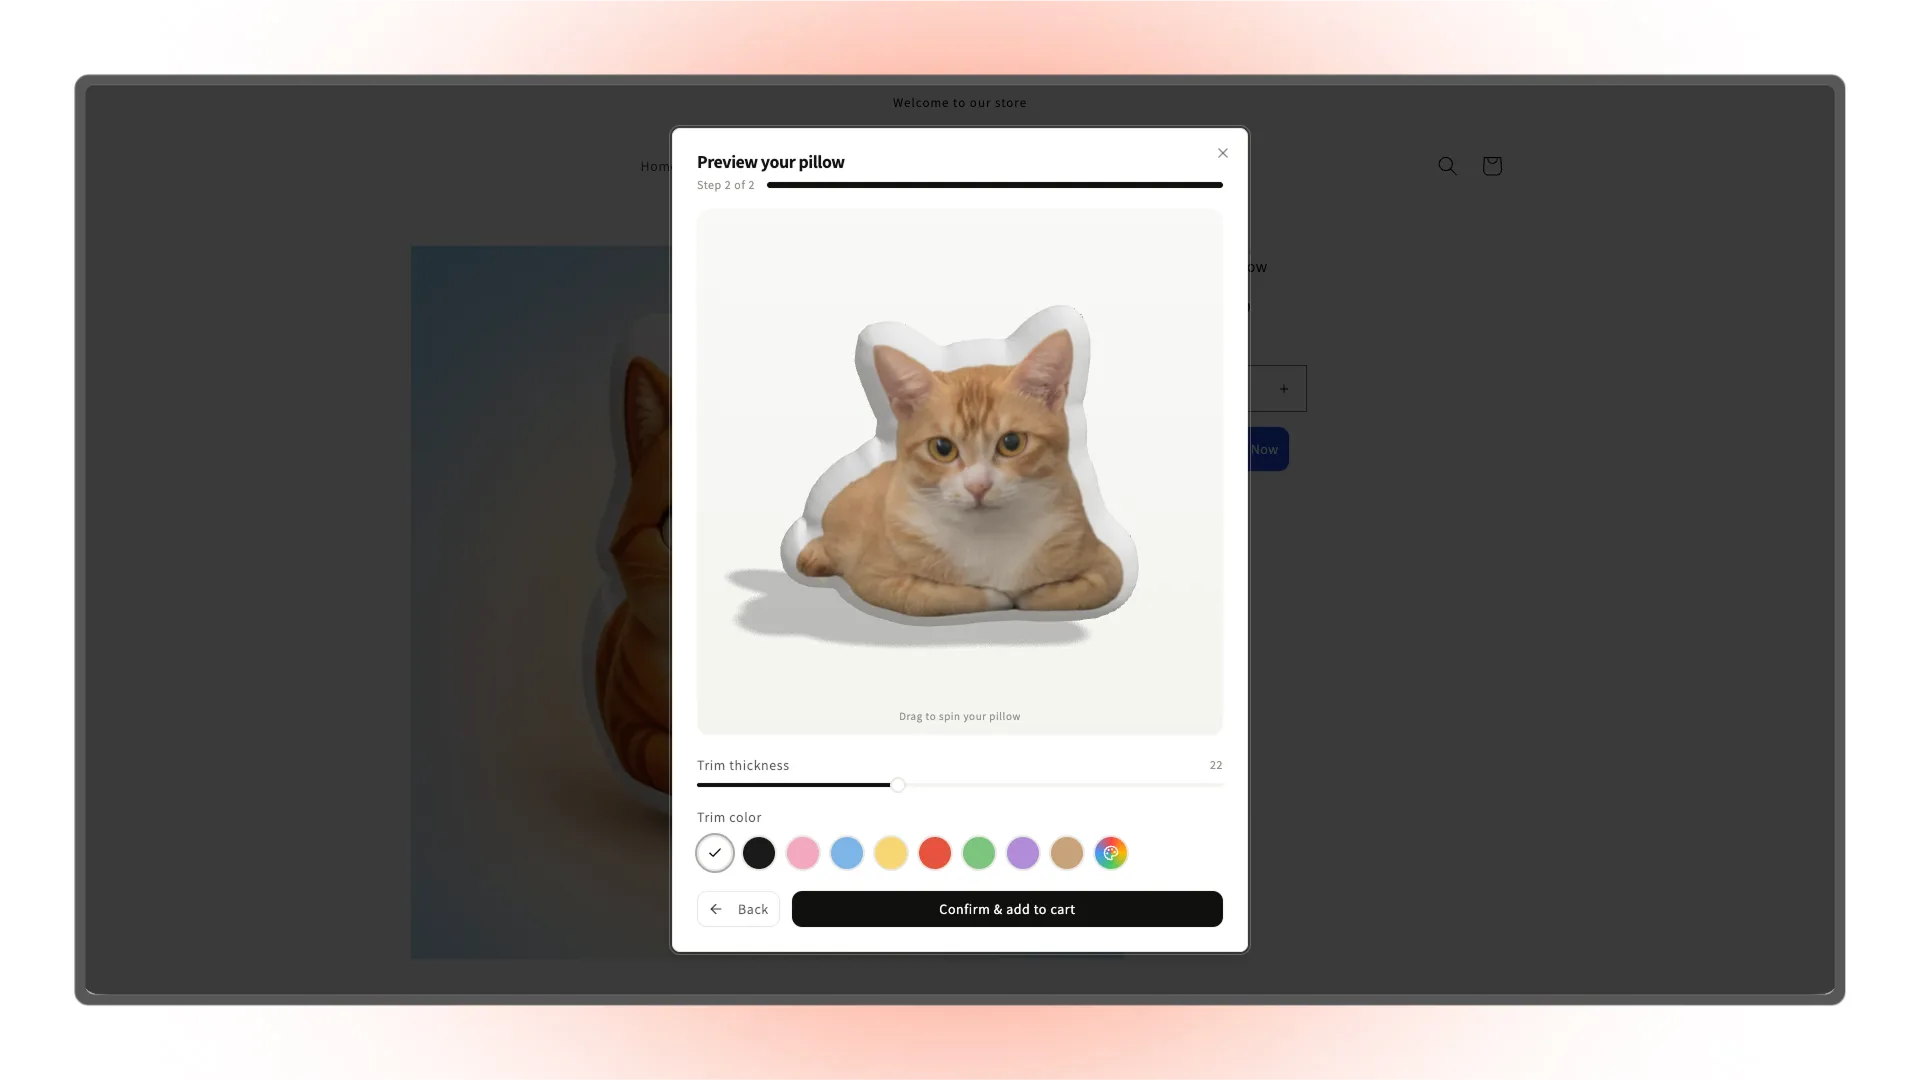
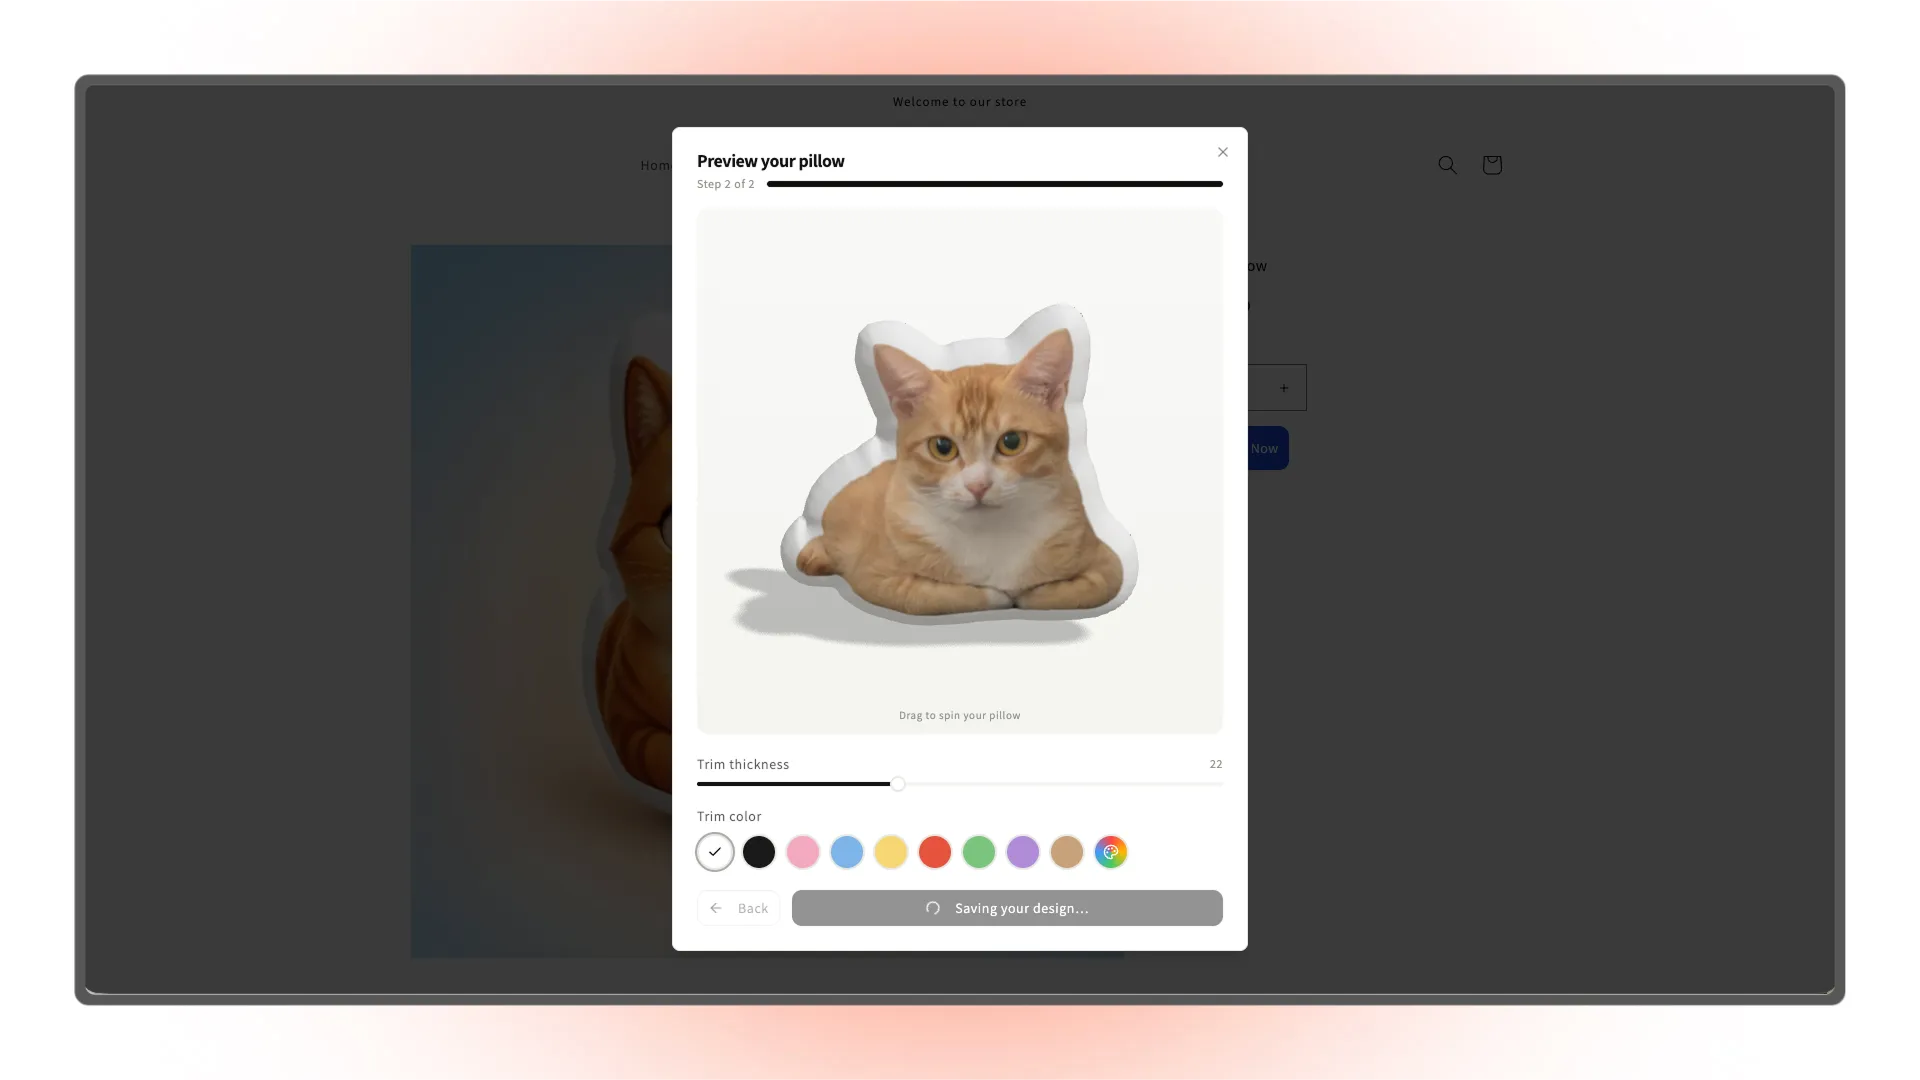
Wait for the system to save the design. Do not close the page or click the button again until saving is complete.
5. Confirm the customization ID in the cart and order
Once the design is saved, a dialog displays the customization ID and confirms that the product has been added to the cart.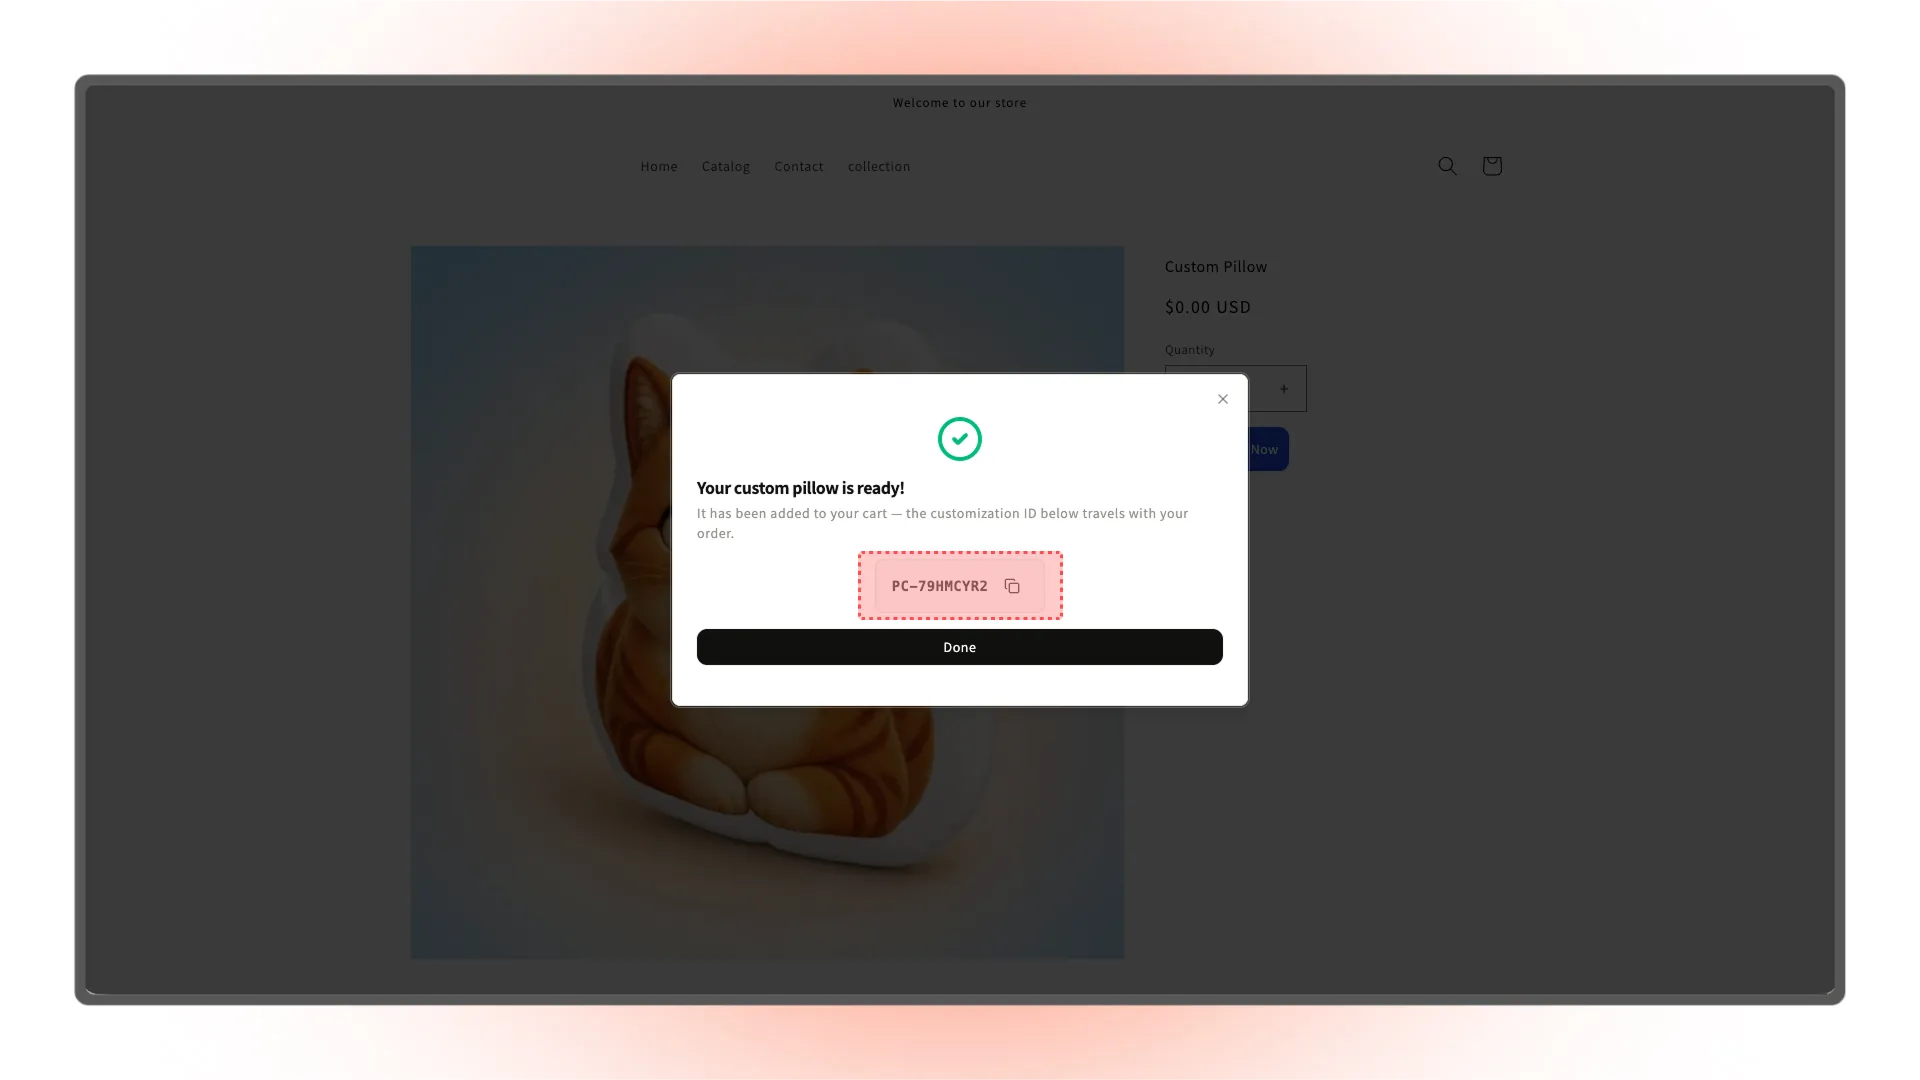
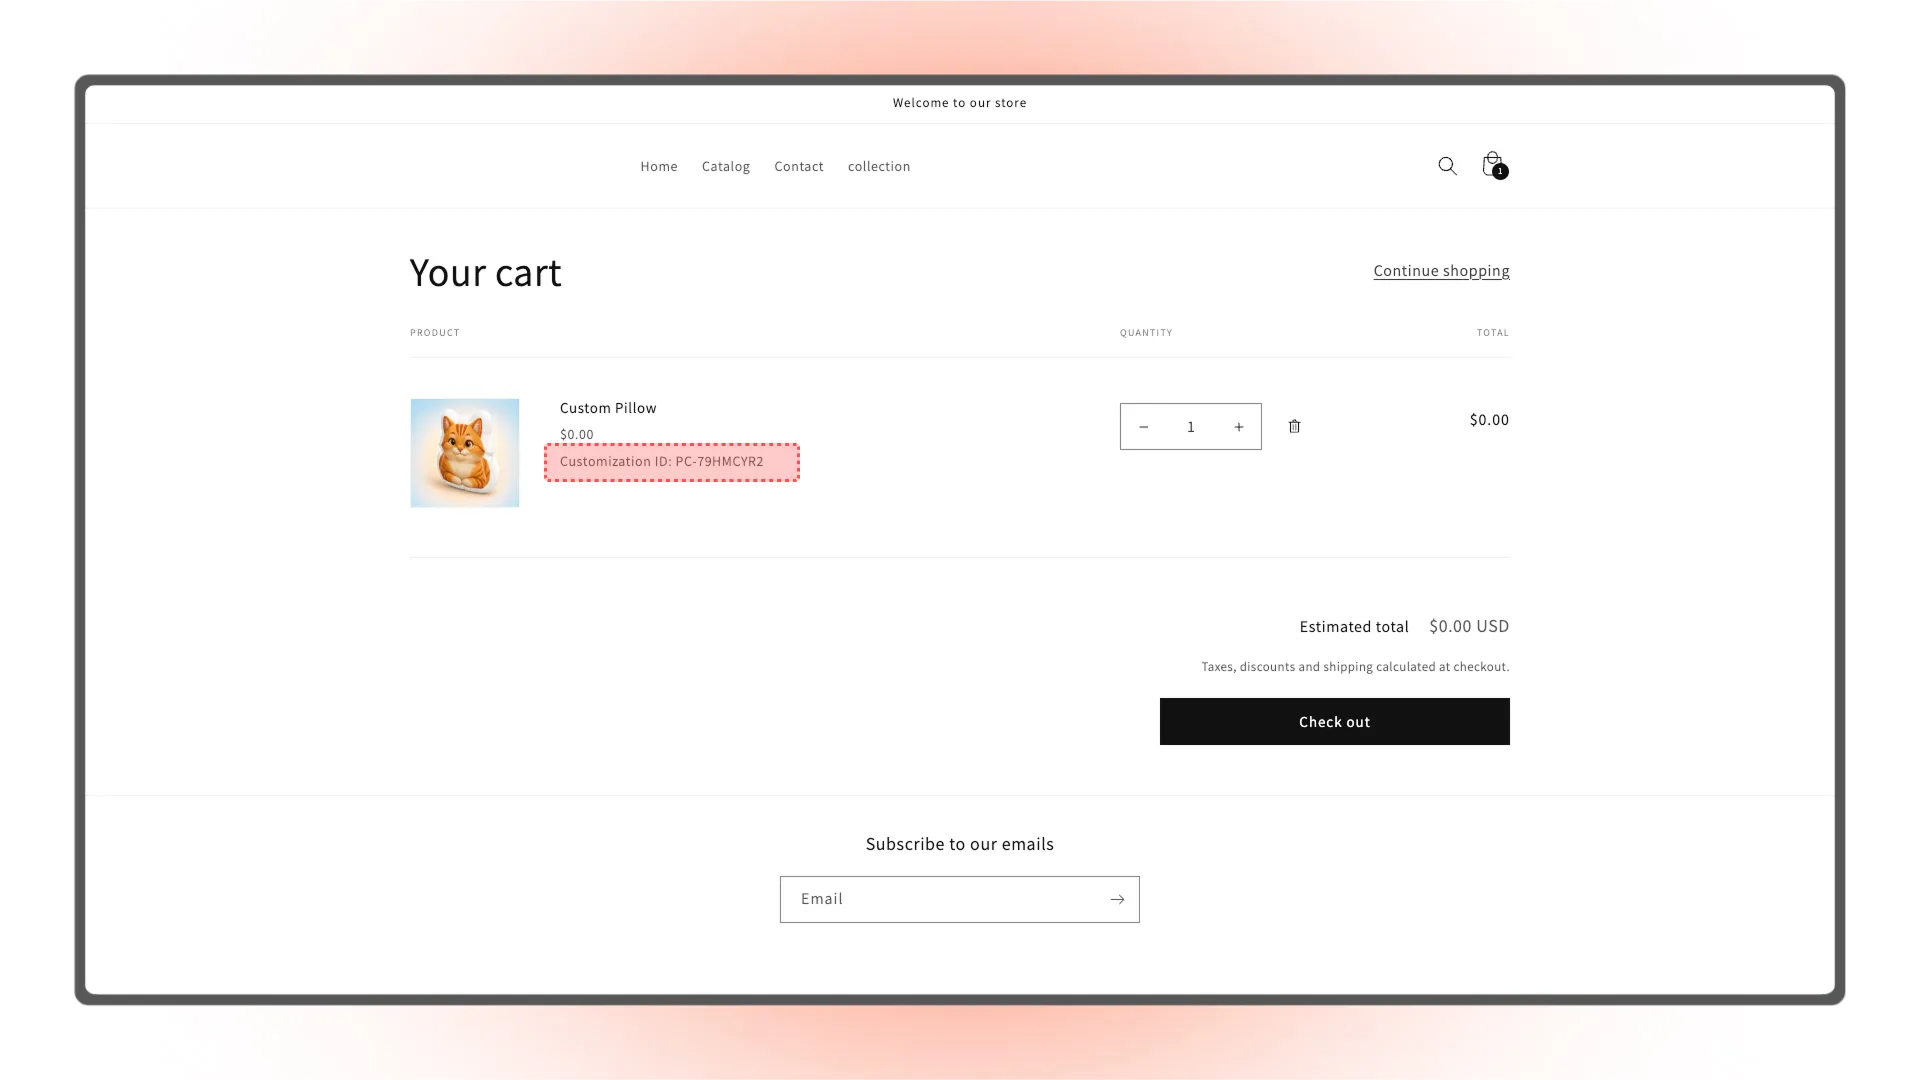
Open the cart and confirm that the same customization ID appears below the product.
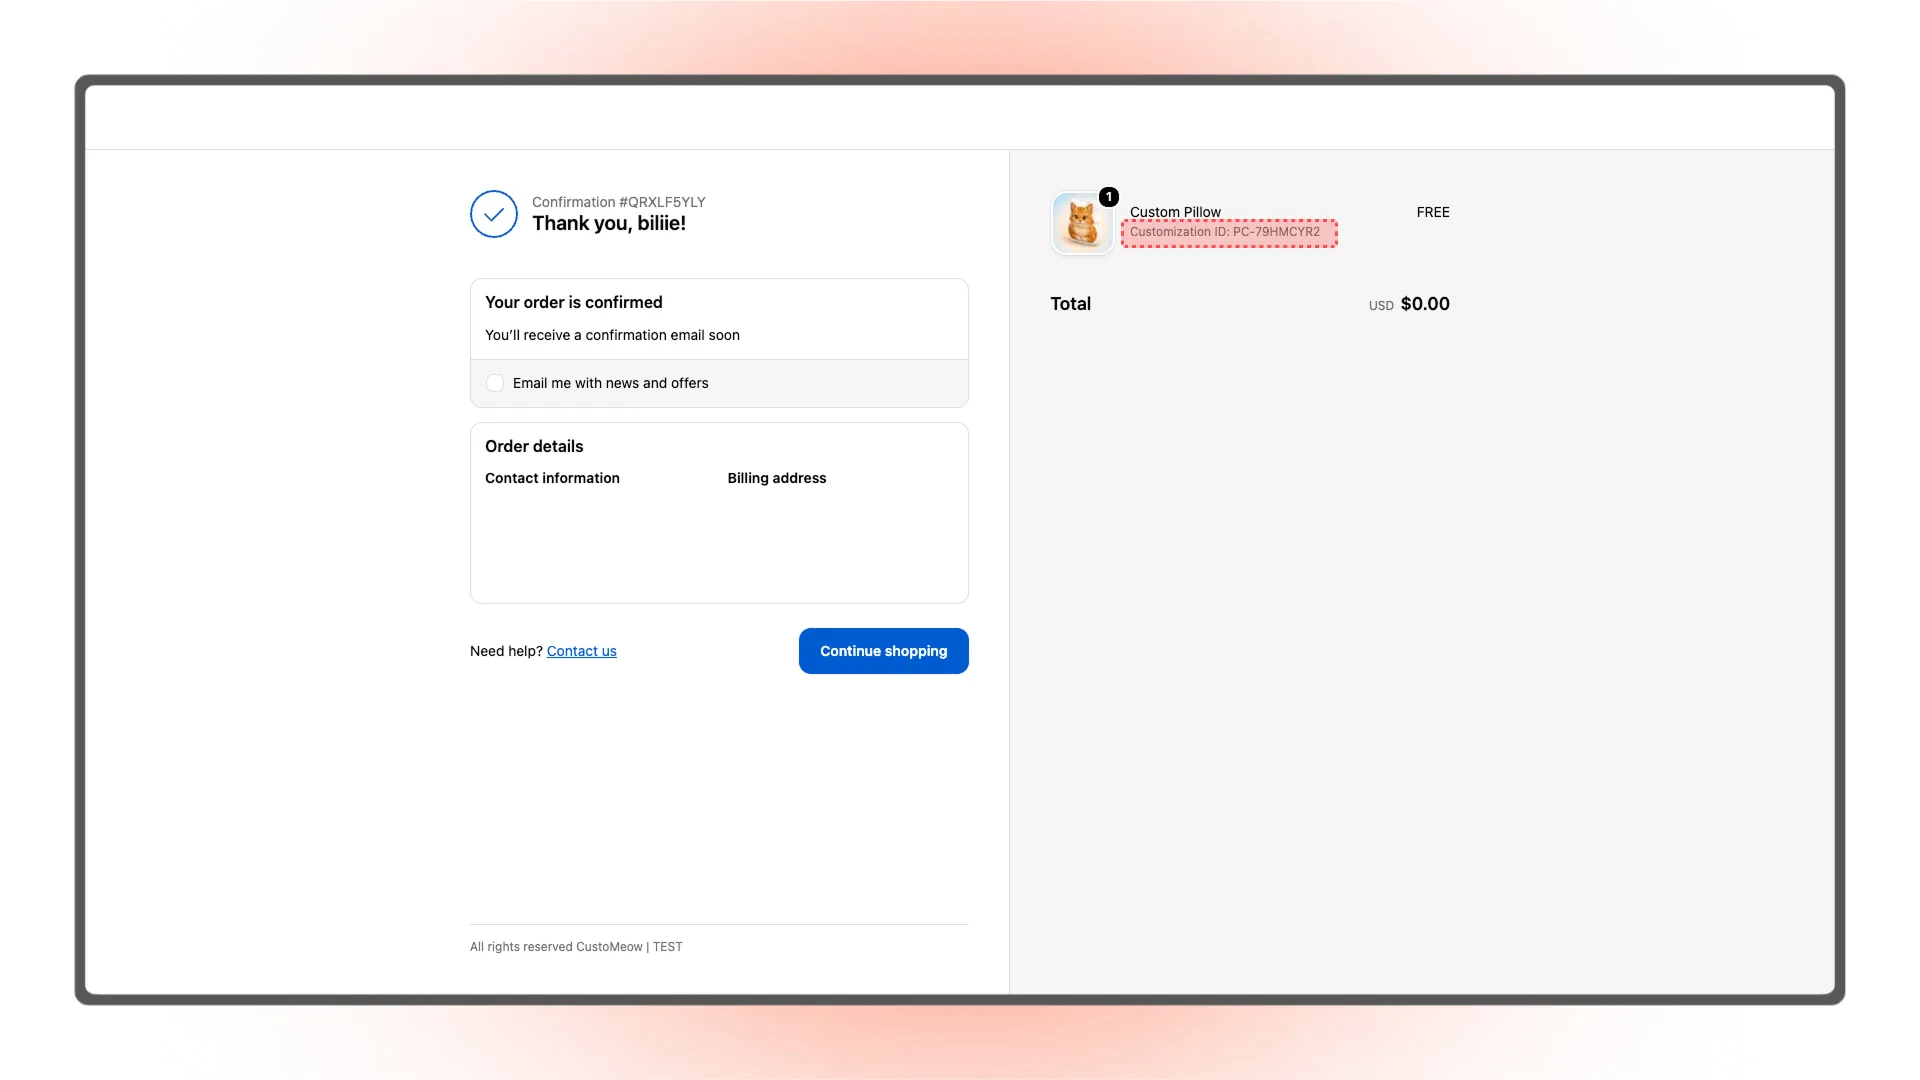
After checkout, check the customization ID on the order confirmation page.
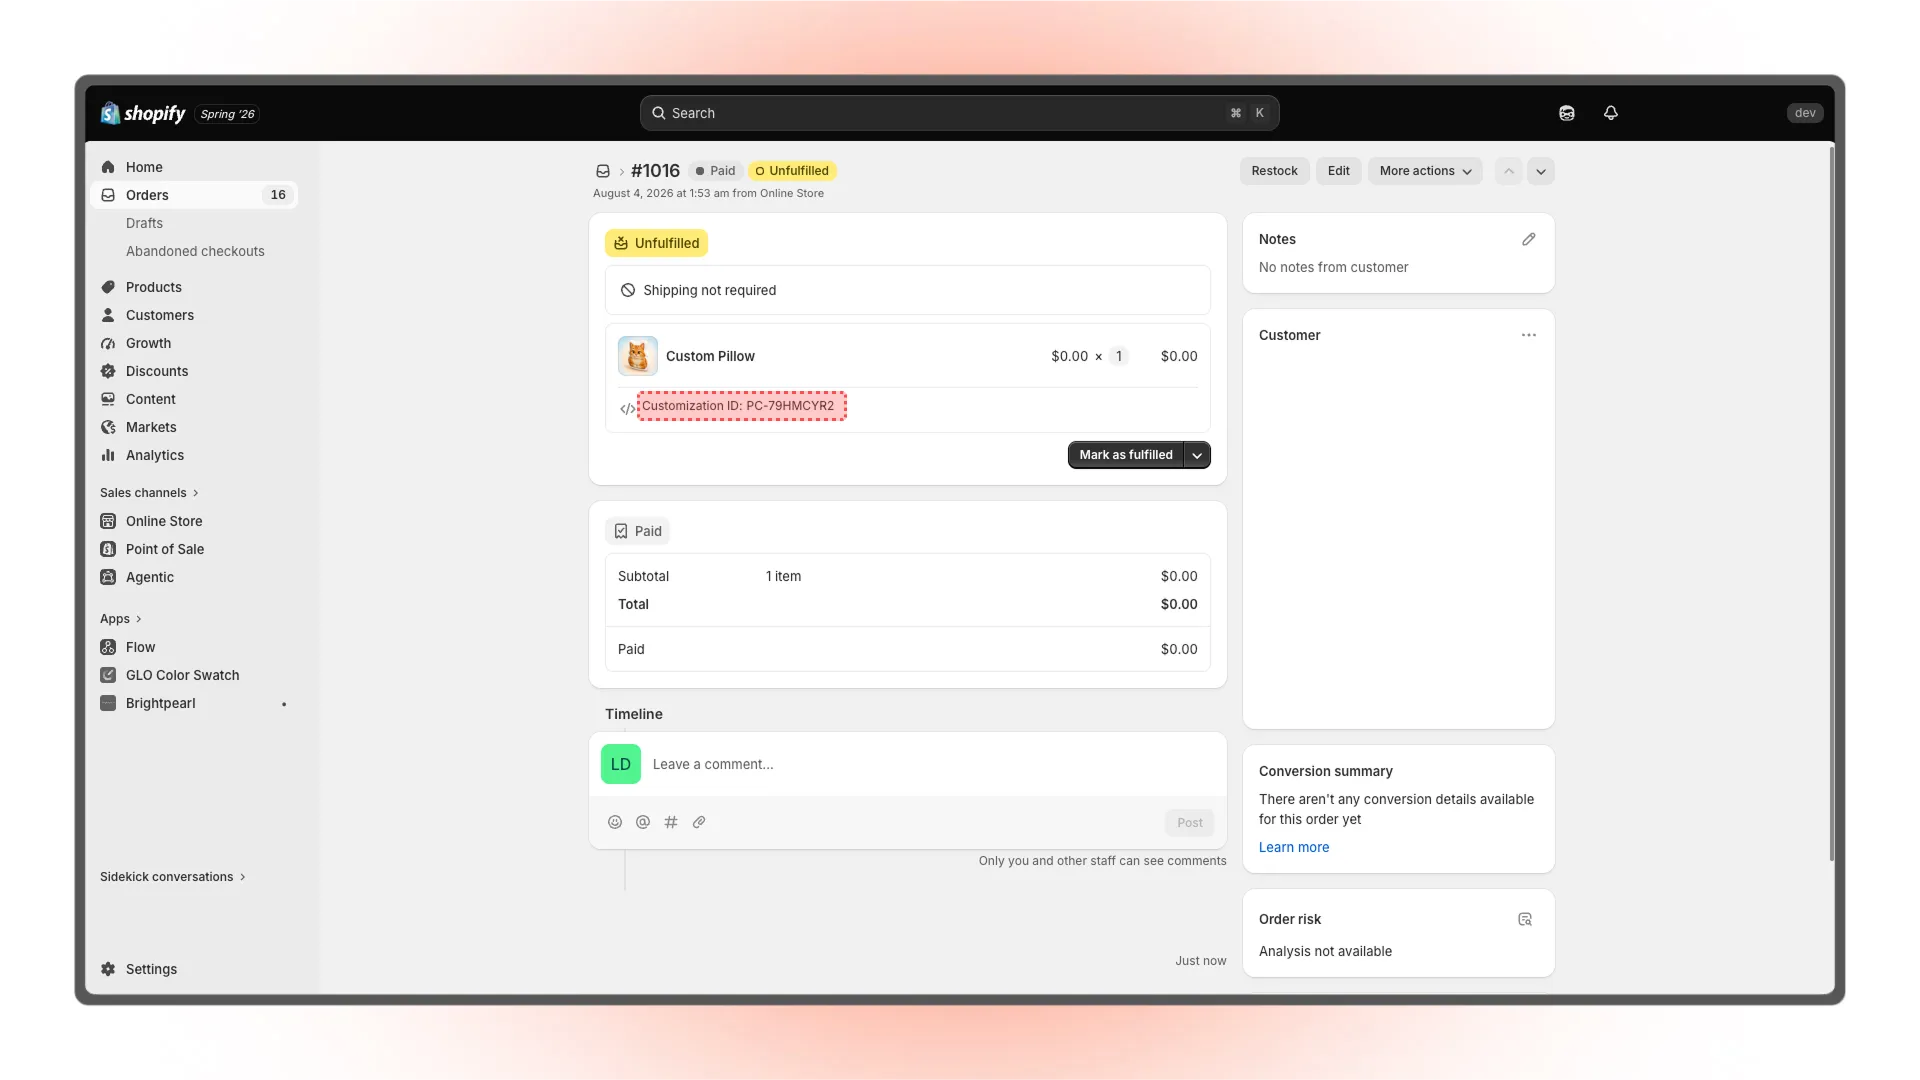
Open the corresponding order in the Shopify admin and confirm that the same ID appears below the product.
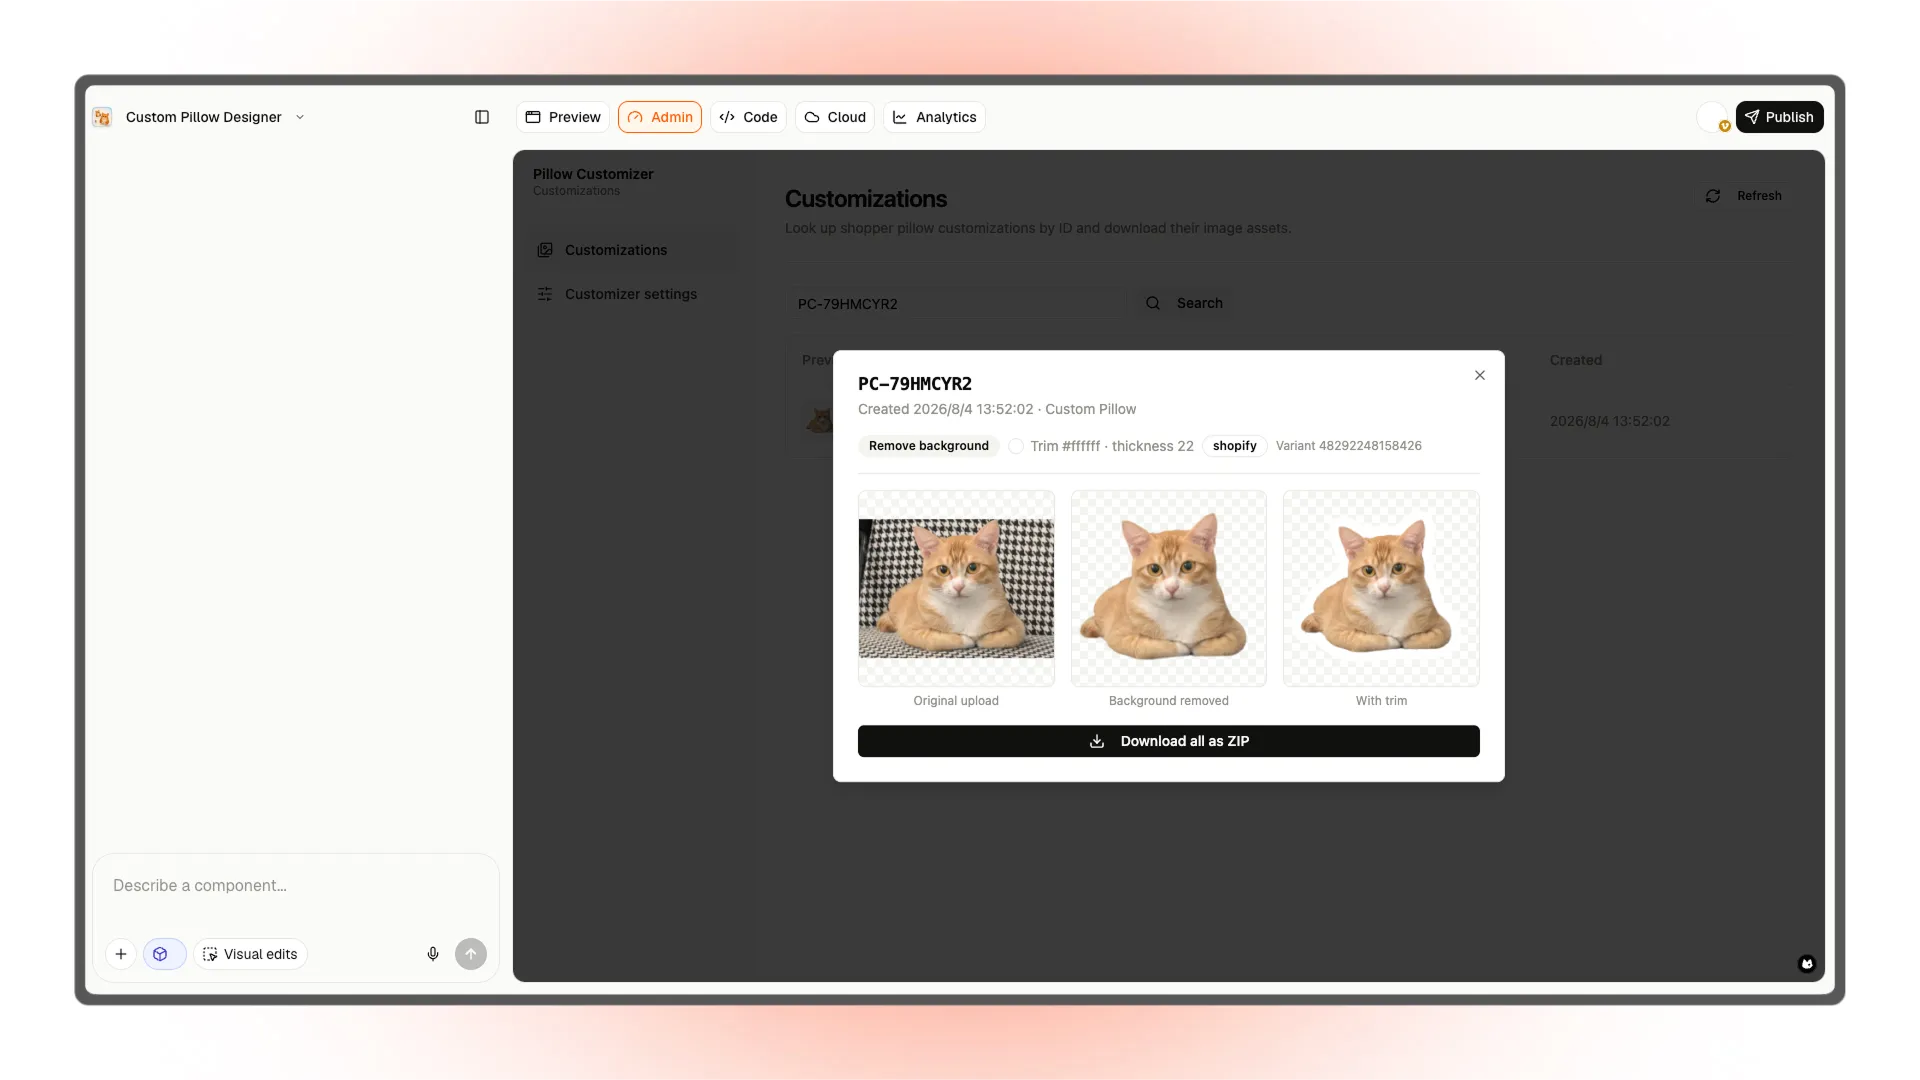
6. Look up the complete customization data by ID
Enter the customization ID from the order in the Meowgic app admin, then search for it.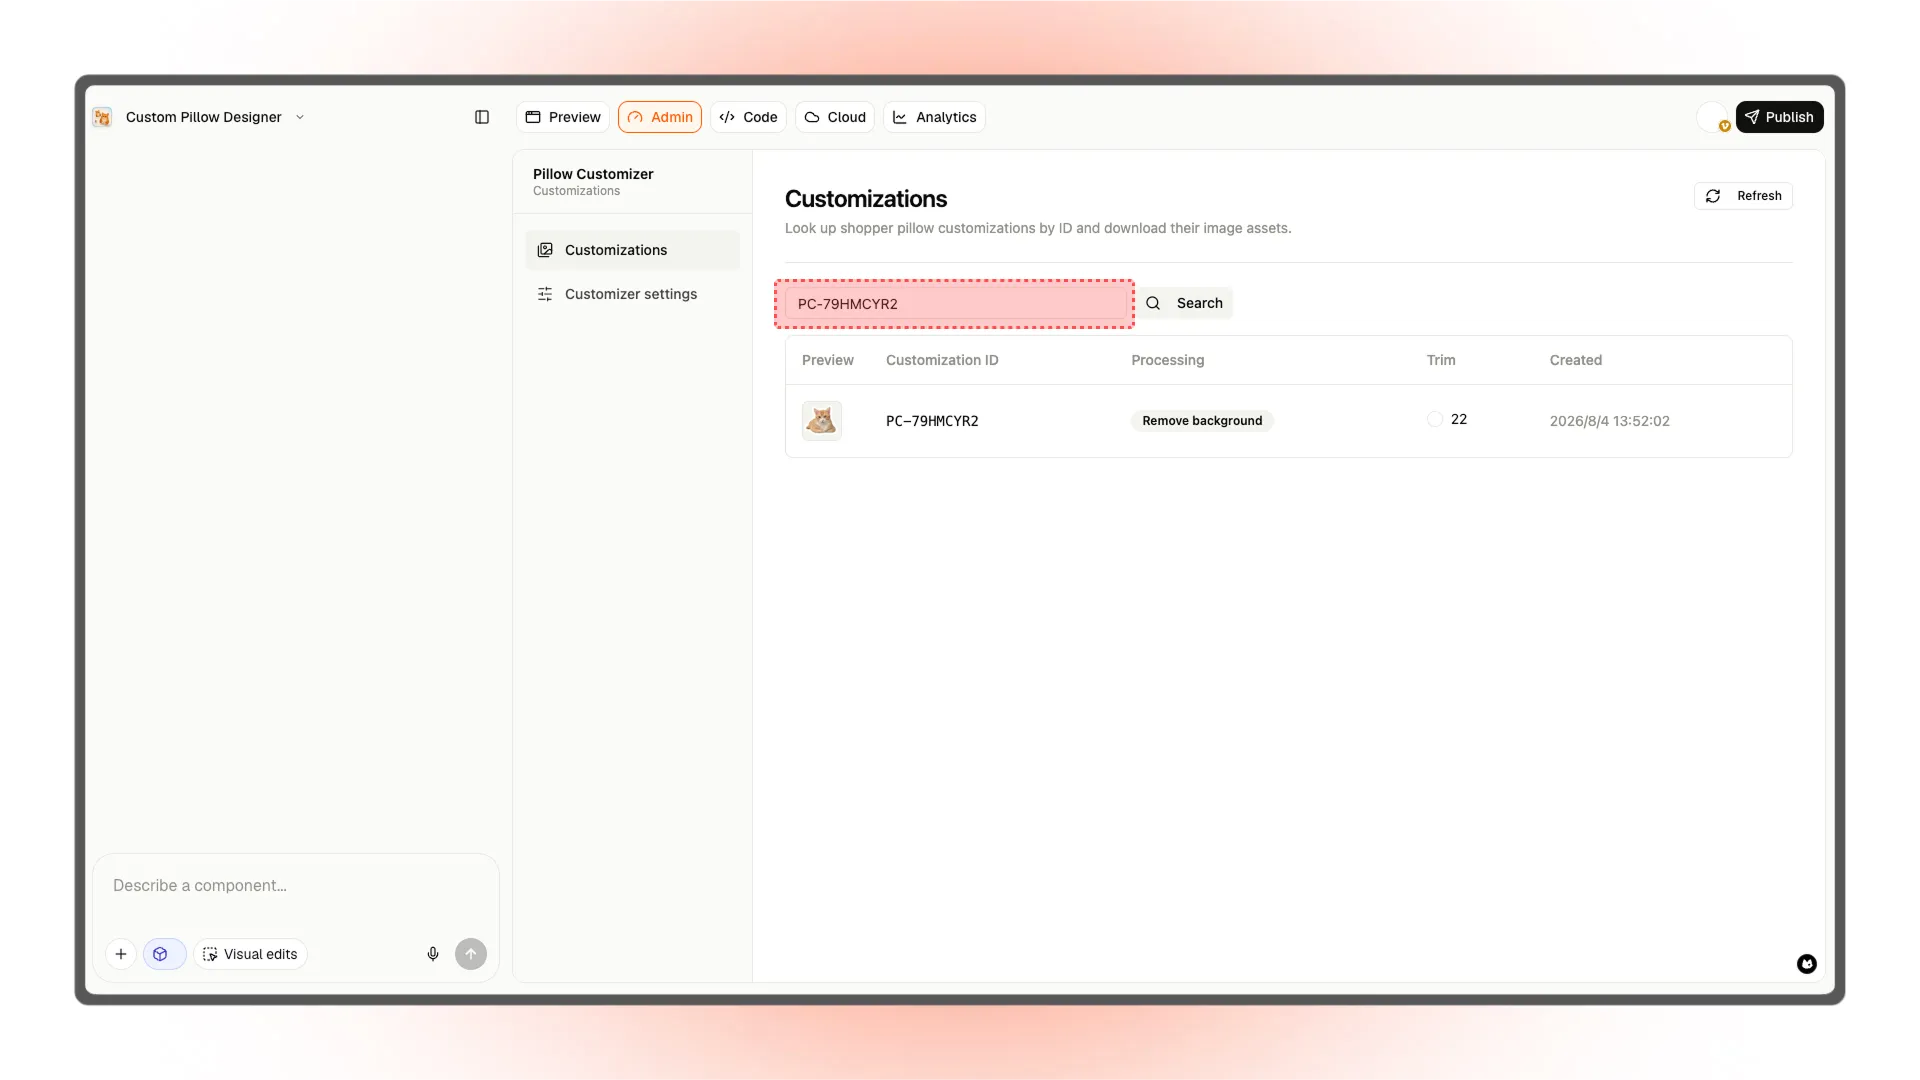
Open the result and confirm that you can view the complete customization data submitted by the customer.
7. Check the purchase flow for other products
Finally, open a product that does not use the customizable product template. Confirm that its original purchase buttons and order flow still work normally. If every check passes, your product customization order workflow is ready.Frequently asked questions
What steps are included in a Meowgic product customization order workflow?
What steps are included in a Meowgic product customization order workflow?
The complete workflow includes collecting the customer’s customization content, saving the data in the app admin, generating a unique customization ID, linking the ID to the product, adding the product to the cart and order, and using the ID to retrieve the complete data.
What does the customization ID do?
What does the customization ID do?
The customization ID is the unique link between the customer’s customization data and the Shopify order. The complete data stays in the Meowgic app admin, while the cart and order store only the ID. Merchants use the ID to retrieve what the customer submitted.
Is the customer's complete customization data saved in the Shopify order?
Is the customer's complete customization data saved in the Shopify order?
With the approach described in this guide, the complete customization data is not written directly to the Shopify order. The cart and order store only the customization ID, while images, text, previews, and other details stay in the Meowgic app admin.
Will product customization affect regular products in my store?
Will product customization affect regular products in my store?
Using a separate product template and assigning it only to customizable products limits the changes to those products. Regular products can continue using their original purchase flow.
Can the product be added to the cart if saving the customization data fails?
Can the product be added to the cart if saving the customization data fails?
No. With the workflow described in this guide, the app must not add the product to the cart when saving fails. This prevents orders whose complete customization data cannot be retrieved.
What should I test before publishing a product customization feature?
What should I test before publishing a product customization feature?
Complete a realistic order as a customer. Confirm that only customizable products display Custom Now, regular products still work normally, the app generates a customization ID, the cart and order display the same ID, and you can use that ID to retrieve the complete data in the Meowgic app admin.
Related reading
Use Task
Learn how to use Meowgic Task to put an AI e-commerce team to work.
Create and install an app
Learn how to create, publish, and install a Meowgic app in your store.
Build a product customization order flow
Learn how customization details move from the product page to the cart and order.
Submit an app to the App Store
Learn how to prepare and submit an app to the Meowgic App Store.