> ## Documentation Index
> Fetch the complete documentation index at: https://docs.meowgic.ai/llms.txt
> Use this file to discover all available pages before exploring further.

# How to create, publish, and install a Meowgic app in your store

> This tutorial walks you through creating an app in Meowgic, confirming requirements, previewing the app, configuring publish settings, uploading and integrating theme files, and finally installing the generated app in a Shopify, SHOPLINE, or Shoplazza store.

<Note>
  This tutorial uses a customizable FAQ section as the example. It does not cover app generation tips or adjustment methods.
</Note>

## Completion path

<CardGroup cols={3}>
  <Card title="Create the app" icon="square-pen">
    Enter your idea and let Meowgic build the first version.
  </Card>

  <Card title="Publish the app" icon="rocket">
    Publish your own app.
  </Card>

  <Card title="Integrate it into your store" icon="upload">
    Upload the theme and complete installation.
  </Card>
</CardGroup>

# 1. Create the app

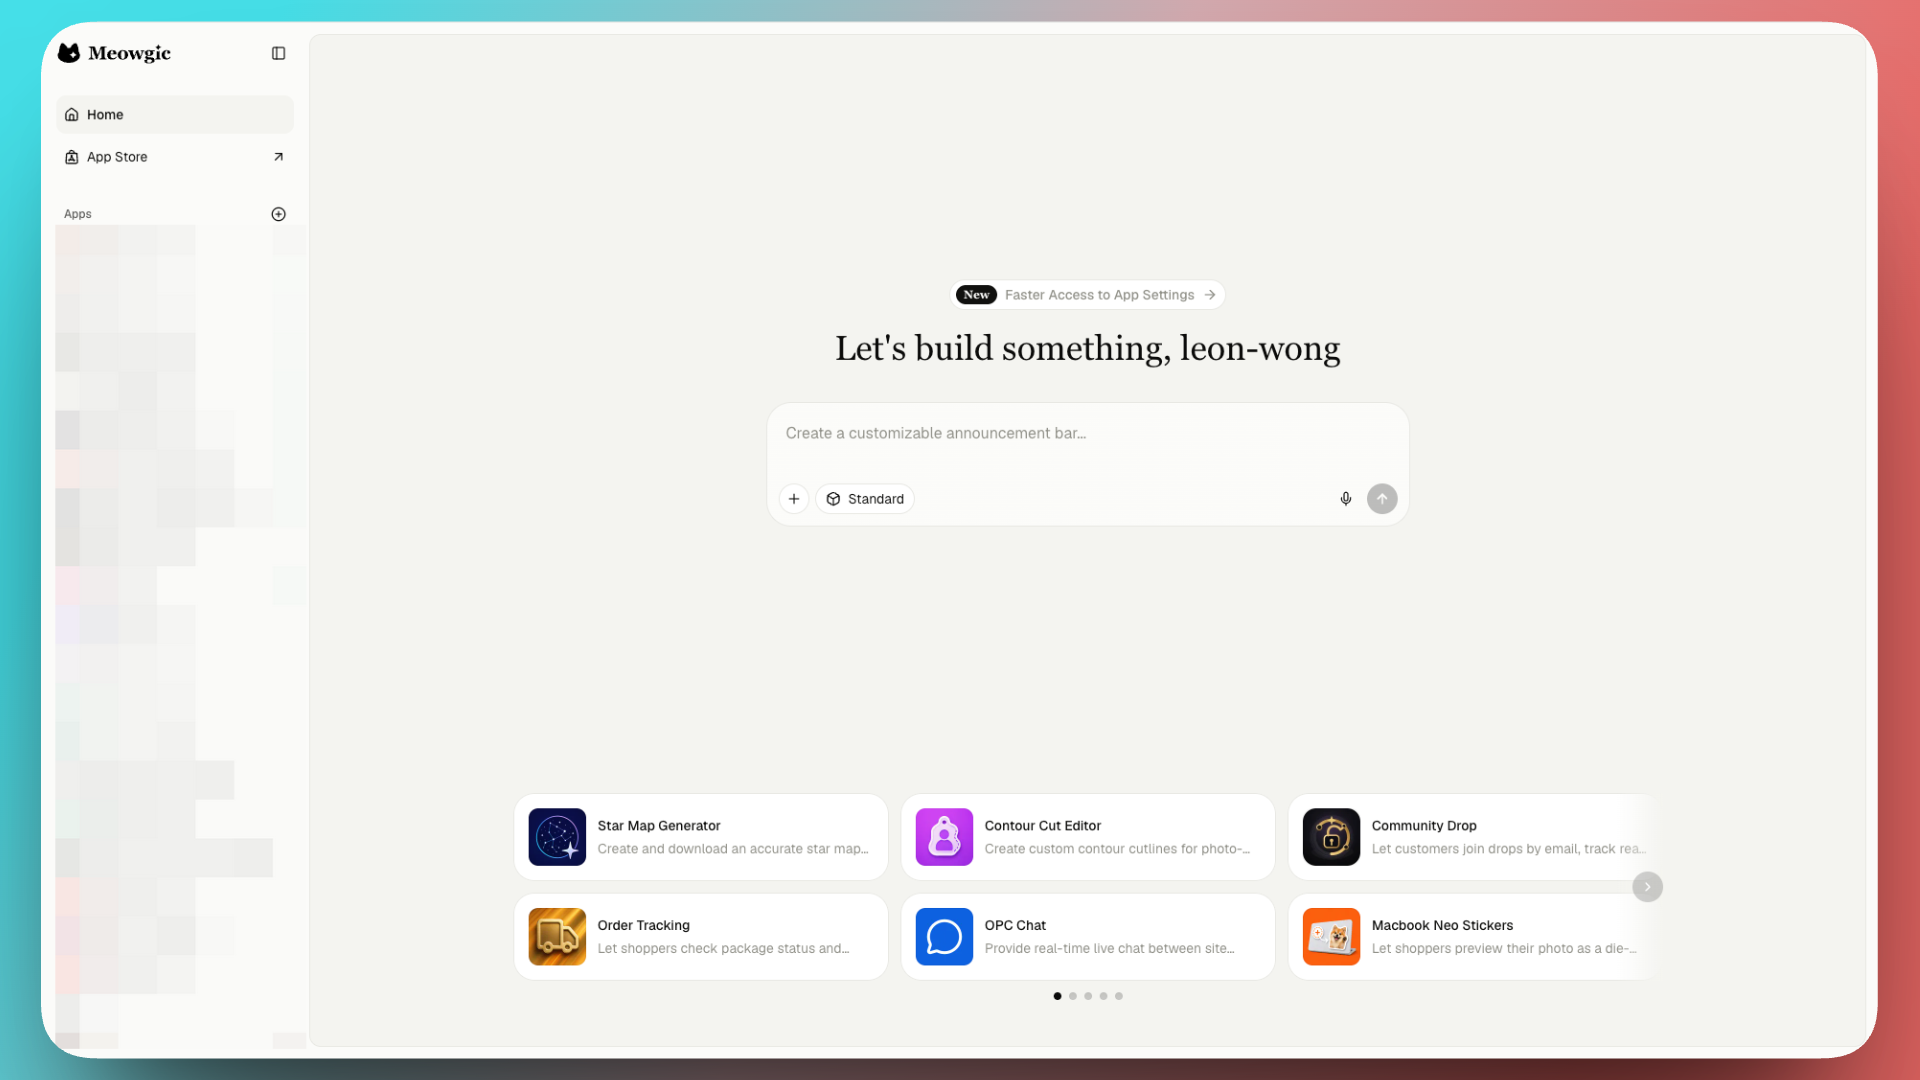
First, go to the [Meowgic homepage](https://app.meowgic.ai/en).
<Frame>
  <img src="https://assets.staticmeow.com/meowgic/static/images/20260703/96daffc3-4fa4-4211-98e7-d7041a9d6008.png" alt="Meowgic homepage with the app prompt box and suggested app templates." />
</Frame>

<br />

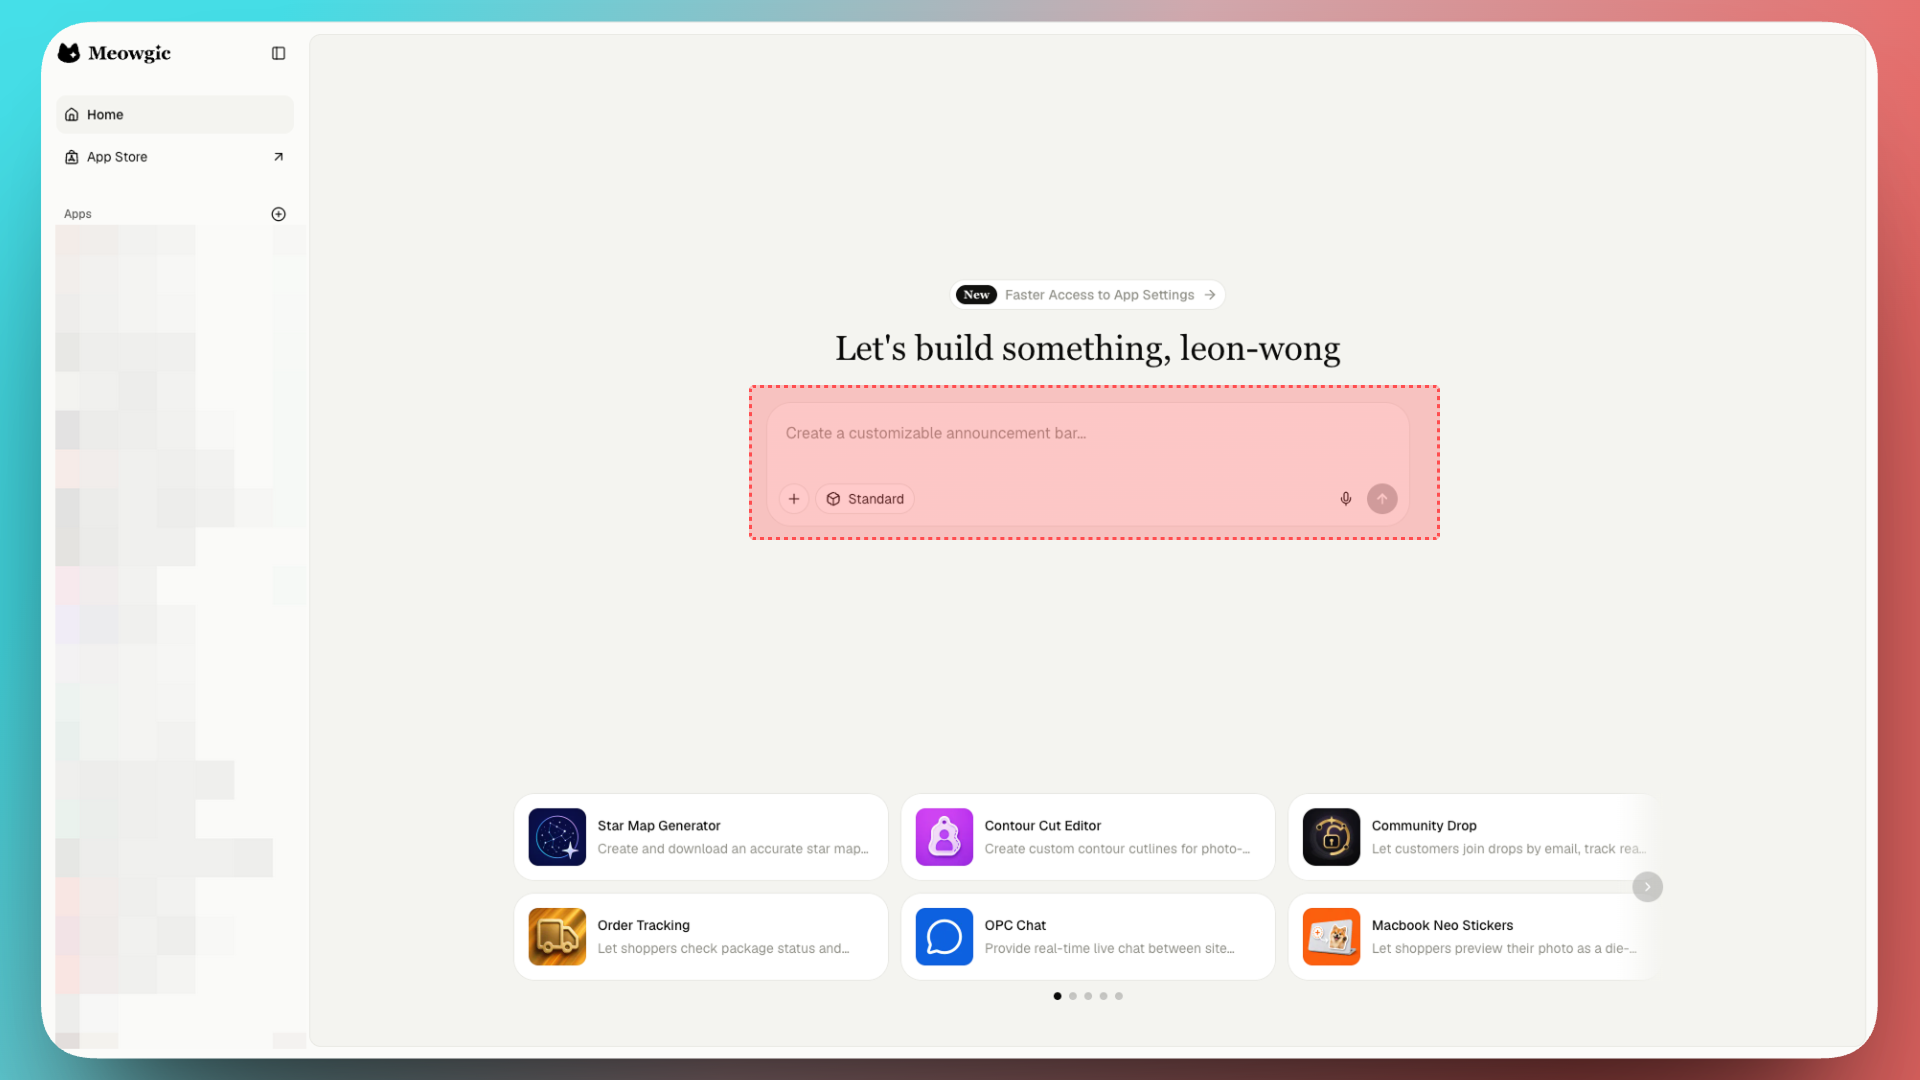
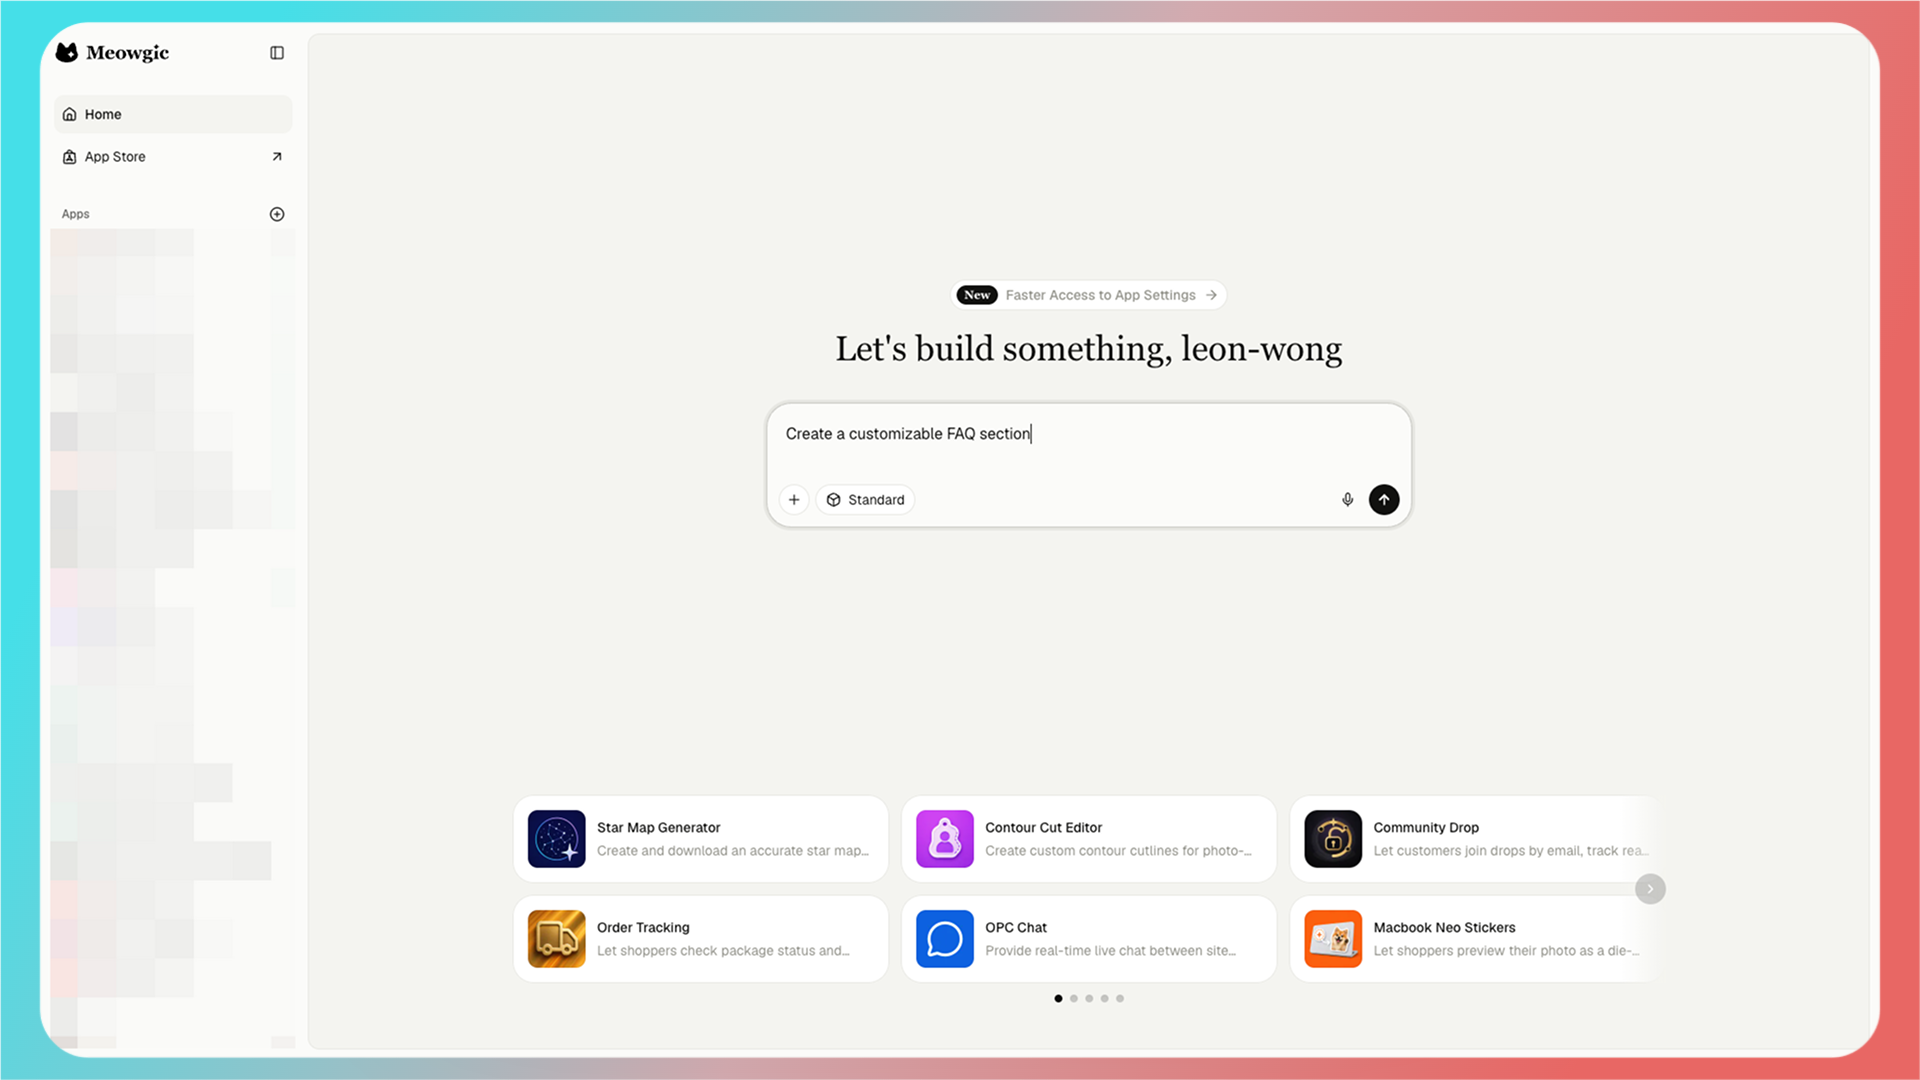
Enter the app you want to create in the **Meowgic prompt box**, just like writing a prompt for an AI image generator.
<Frame>
  <img src="https://assets.staticmeow.com/meowgic/static/images/20260706/29fd2b7f-fa58-409a-95ea-46328744d12b.png" alt="User enters an app idea in the Meowgic homepage prompt box." />
</Frame>

<br />

For example: create a customizable FAQ section.
<Frame>
  <img src="https://assets.staticmeow.com/meowgic/static/images/20260706/8290d9a0-35f1-4d20-955b-8ff58675afbb.png" alt="Screenshot of the Custom FAQ Section editor with the Publish panel open, highlighting the publish URL and Publish button." />
</Frame>

<br />

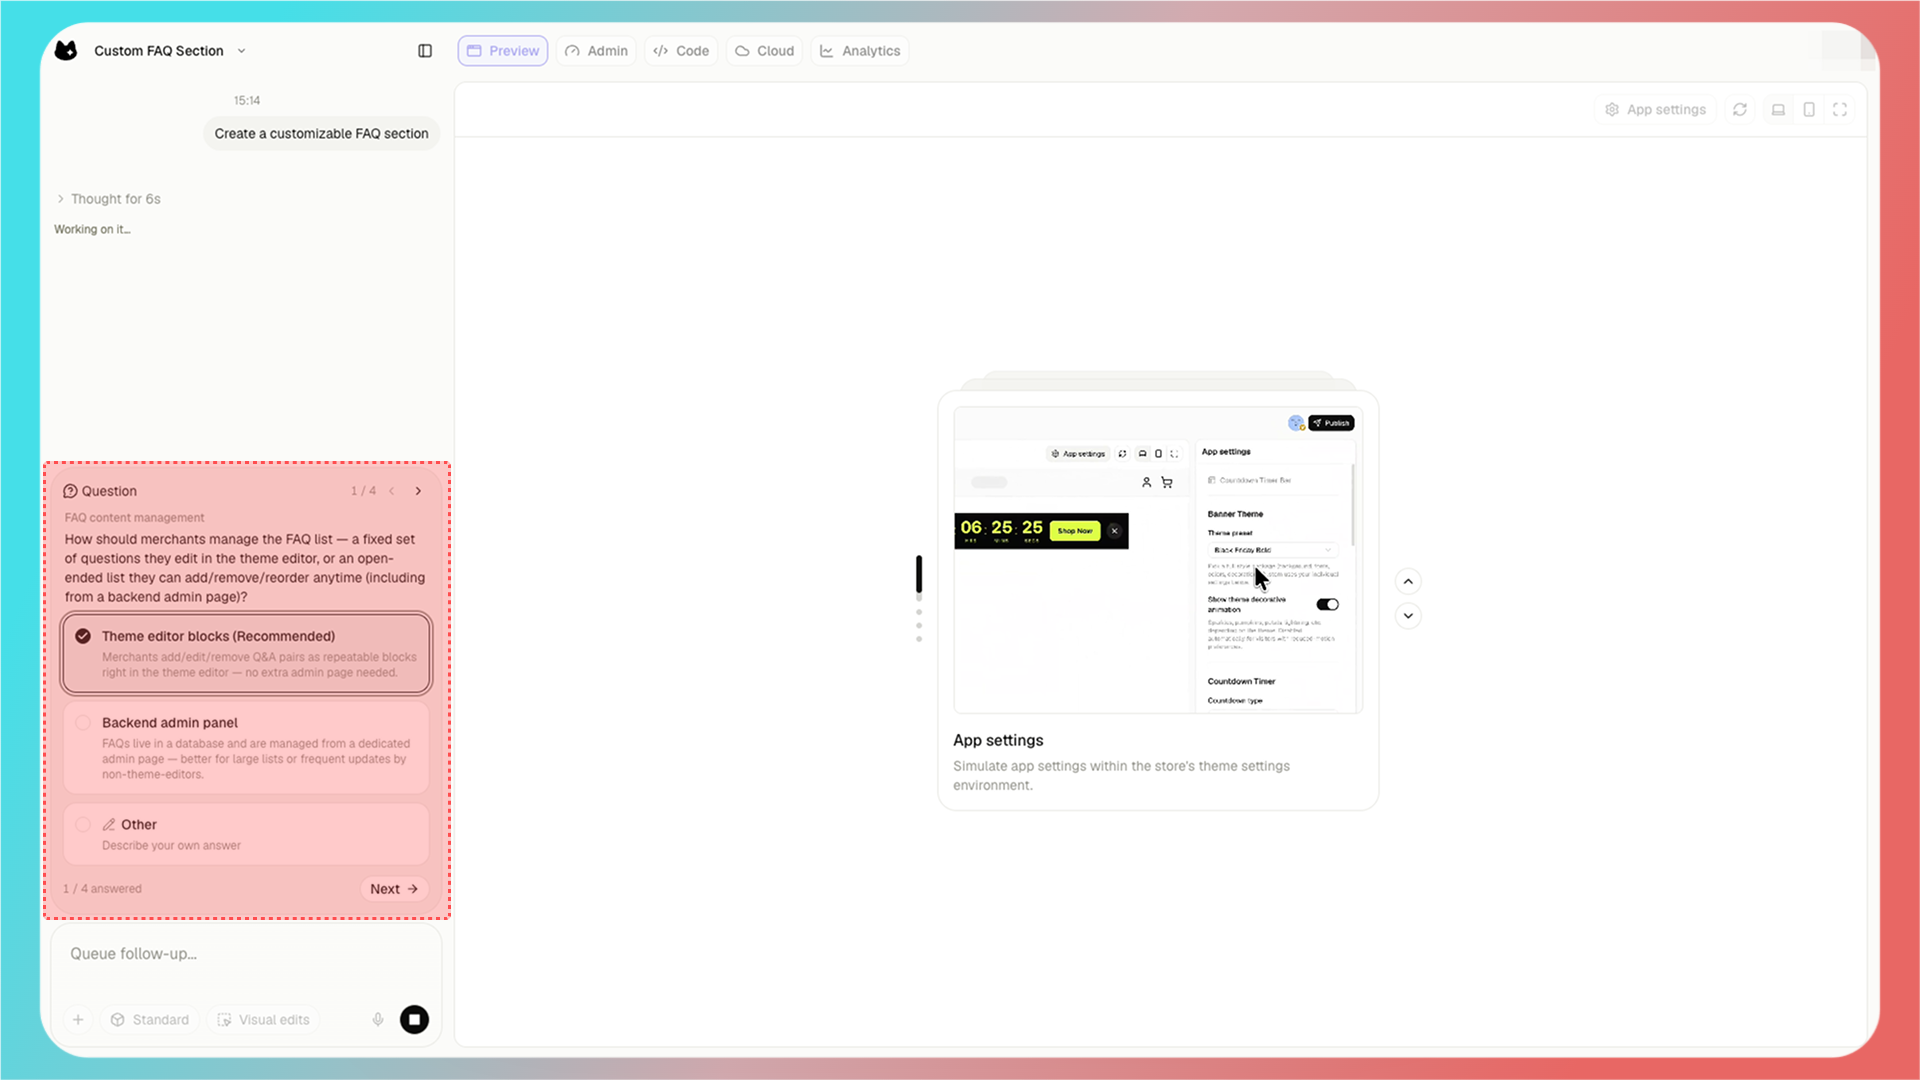
After you finish entering the prompt and press Enter, Meowgic will analyze your requirements and ask follow-up questions. Choose or answer based on what you have in mind.
<Frame>
  <img src="https://assets.staticmeow.com/meowgic/static/images/20260706/2a1cba2c-839b-41dc-bf15-f4b78ae1b910.png" alt="Meowgic asks how FAQ content should be managed, with theme editor blocks selected." />
</Frame>

<br />

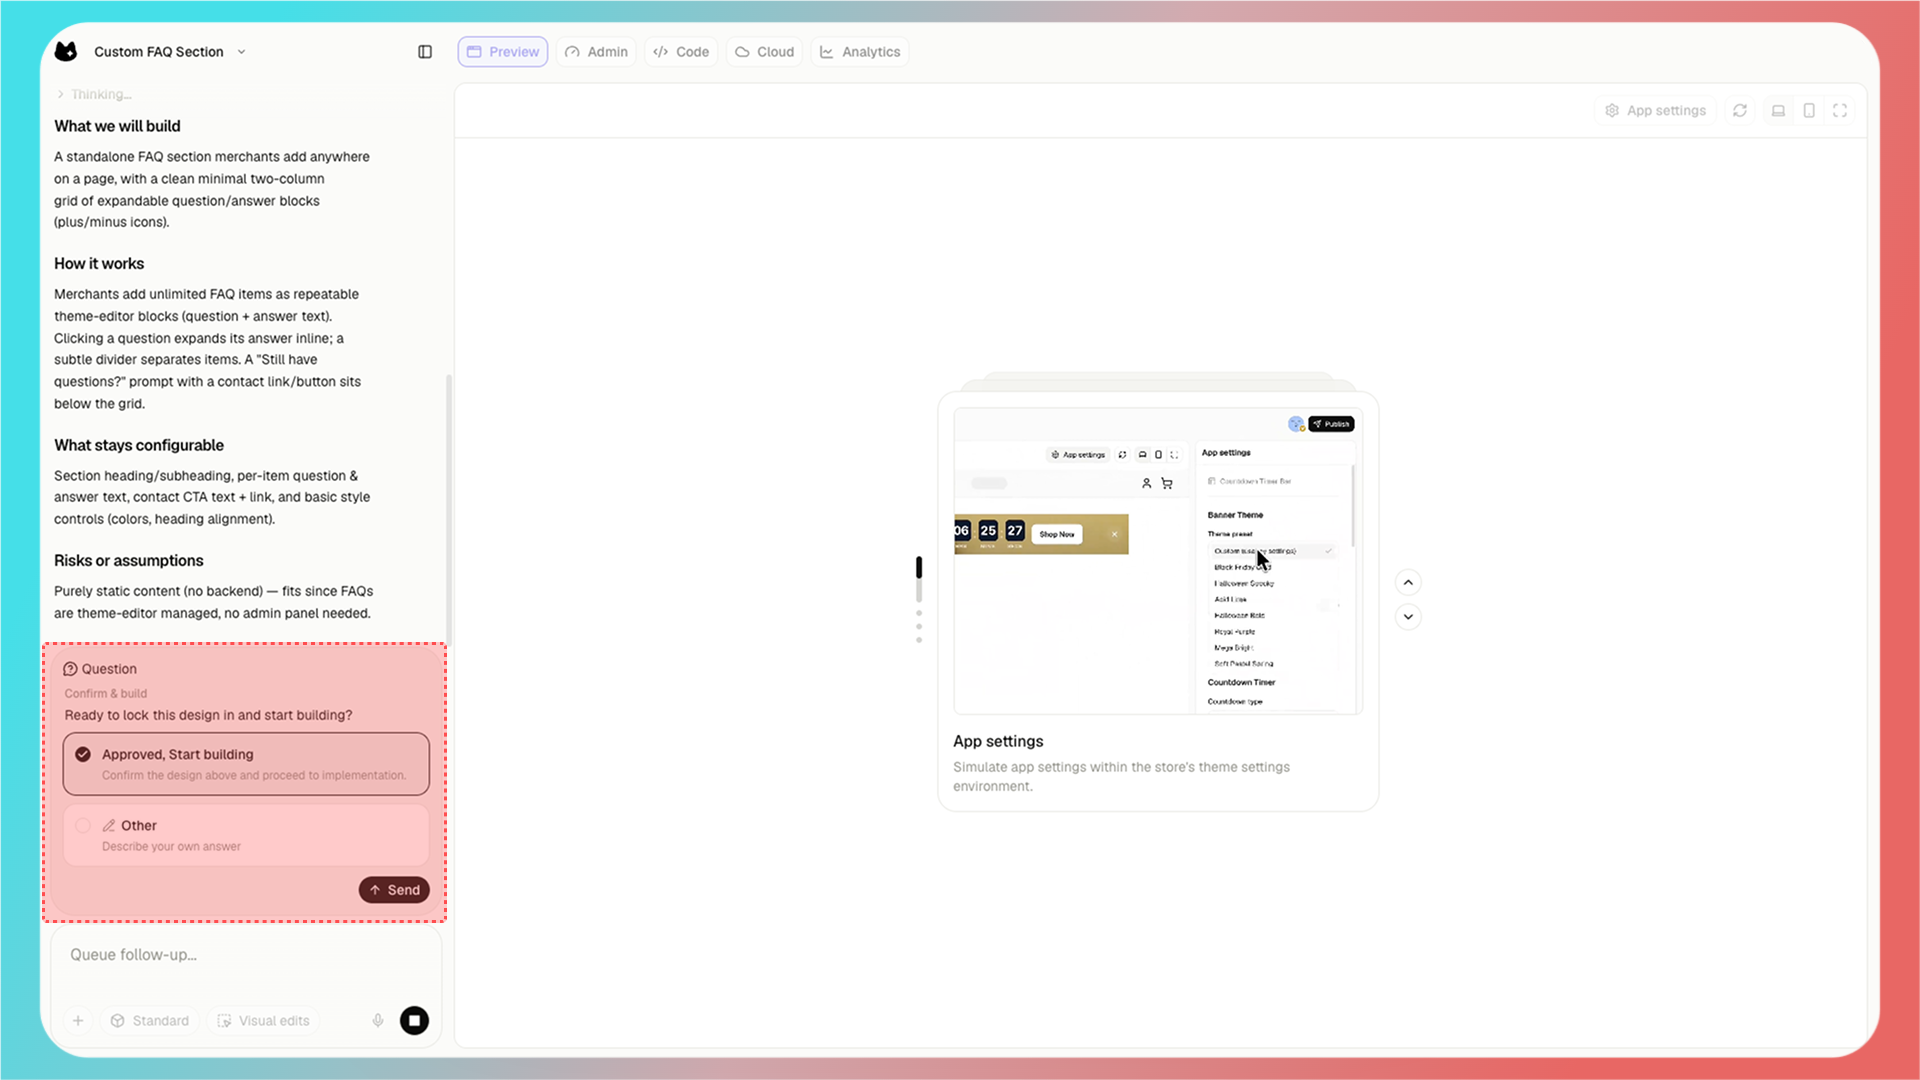
After the requirements plan is complete, Meowgic will generate a design checklist for you to confirm.
<Frame>
  <img src="https://assets.staticmeow.com/meowgic/static/images/20260706/b24b0971-b376-4c82-8766-d35391a4f79e.png" alt="Meowgic shows the planned FAQ section design and the Approved, Start building option." />
</Frame>

<br />

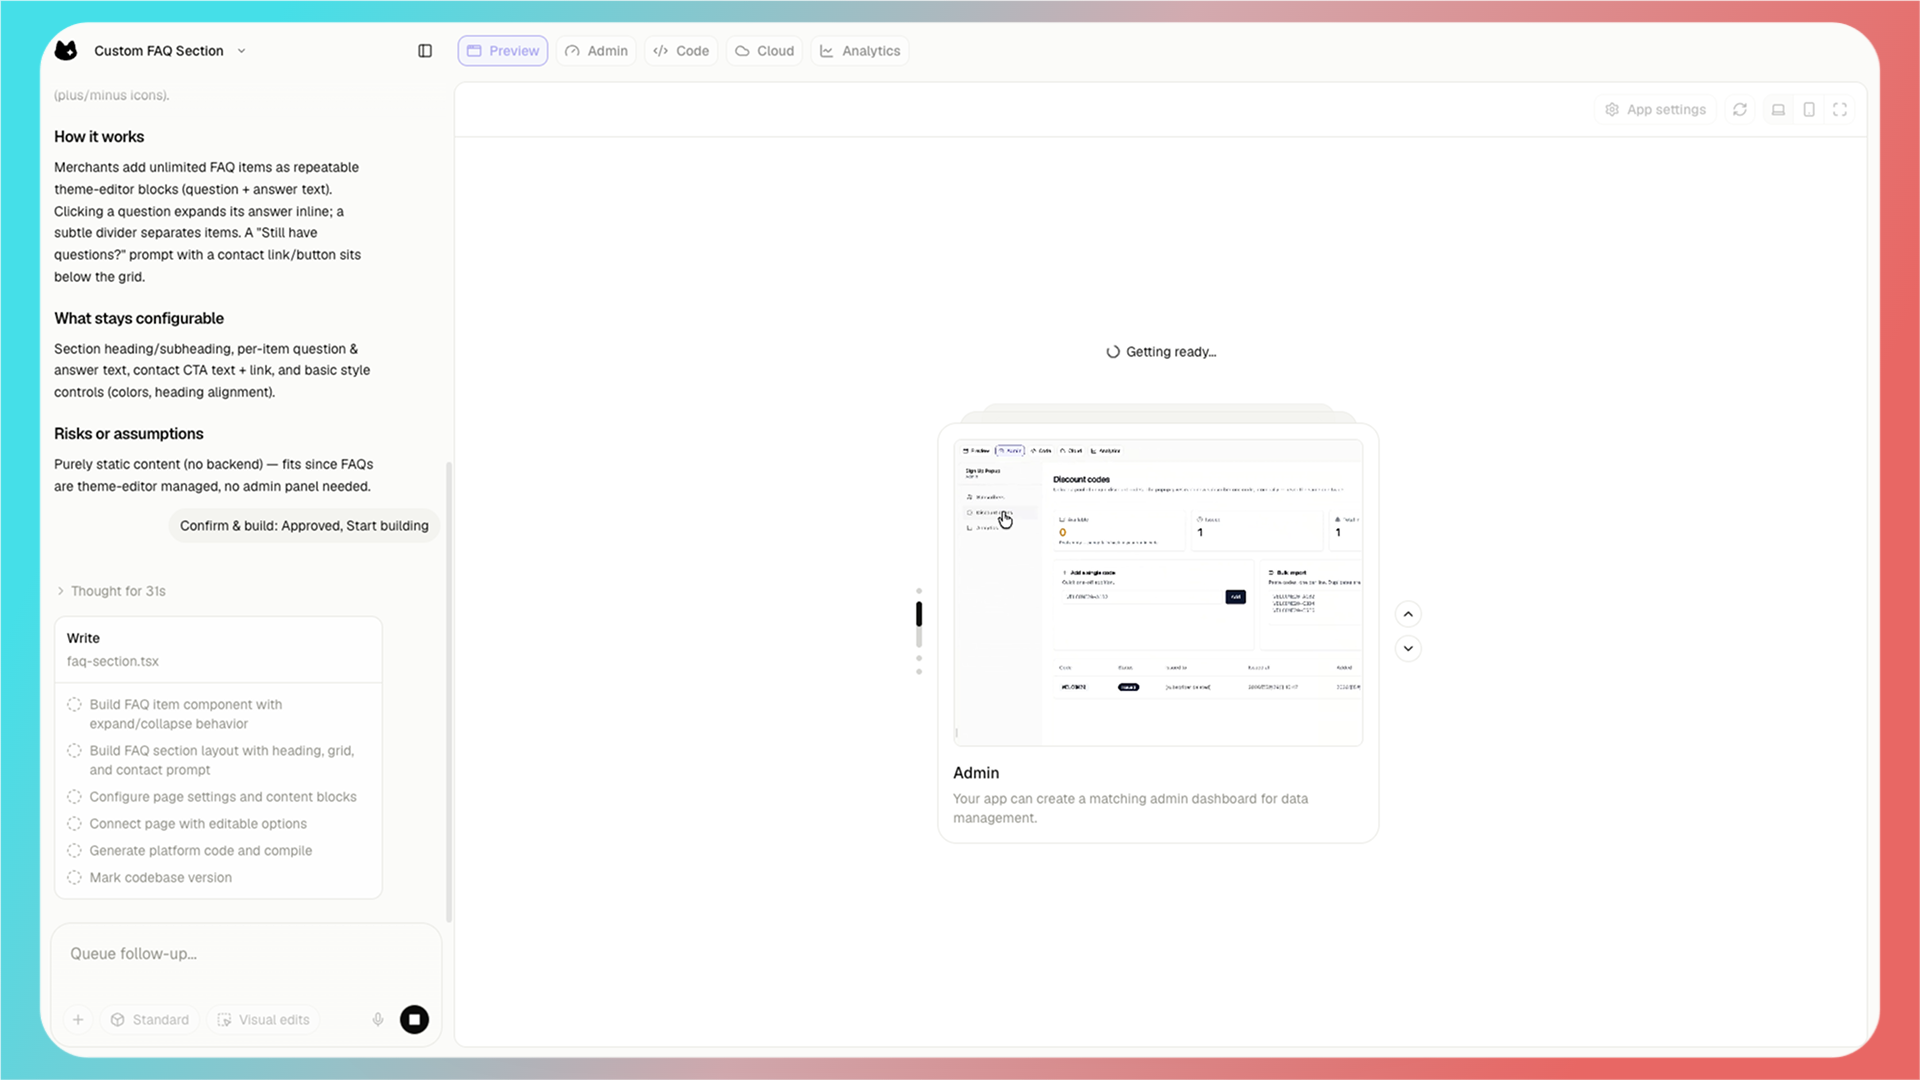
After you confirm, Meowgic will list the to-do items and start building your app.
<Frame>
  <img src="https://assets.staticmeow.com/meowgic/static/images/20260706/80216e04-fadd-46c5-8cab-16fb258a5b31.png" alt="Meowgic displays a build to-do list while generating the FAQ section app." />
</Frame>

<br />

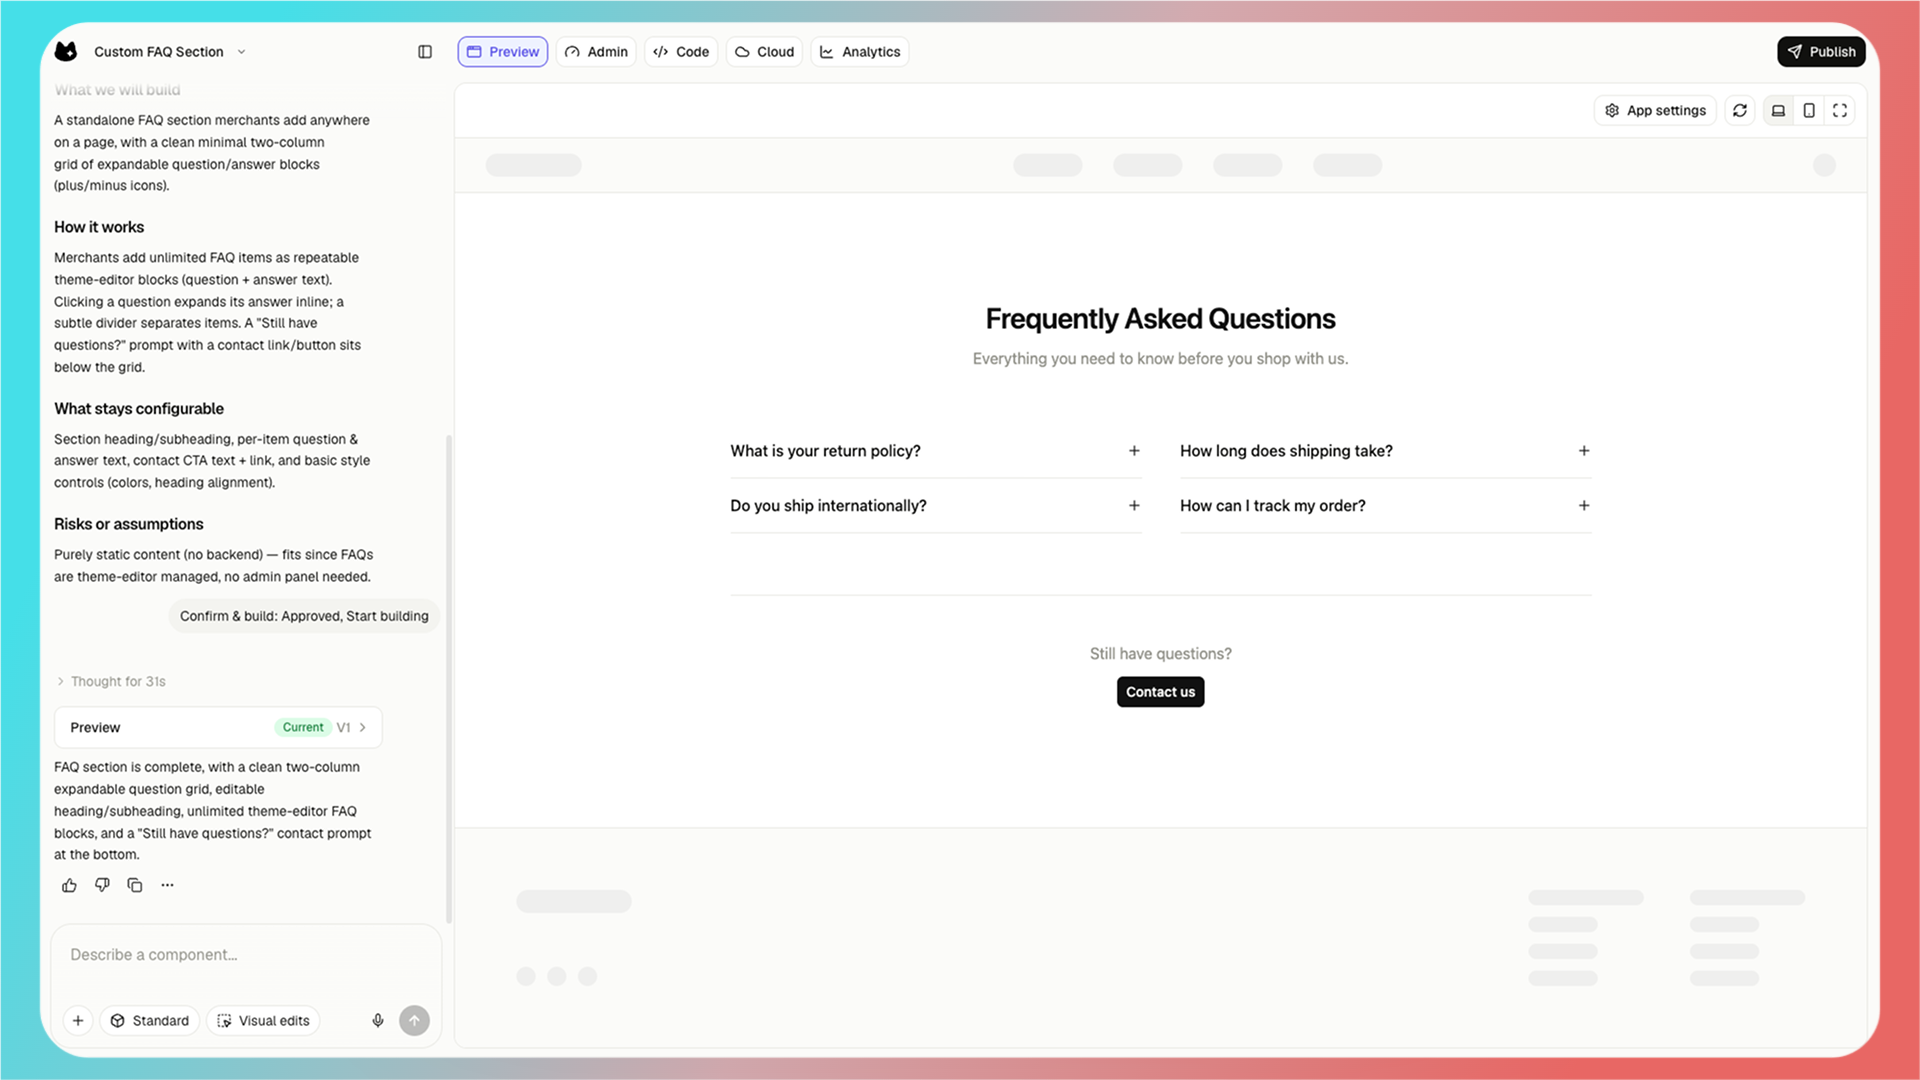
When the build is complete, Meowgic will send you a message in the chat, and the app will appear in the preview area.
<Frame>
  <img src="https://assets.staticmeow.com/meowgic/static/images/20260706/b3bd3472-dd23-473c-81b0-7bfbea032f60.png" alt="Completed FAQ section preview with a two-column question grid and a contact button." />
</Frame>

<br />

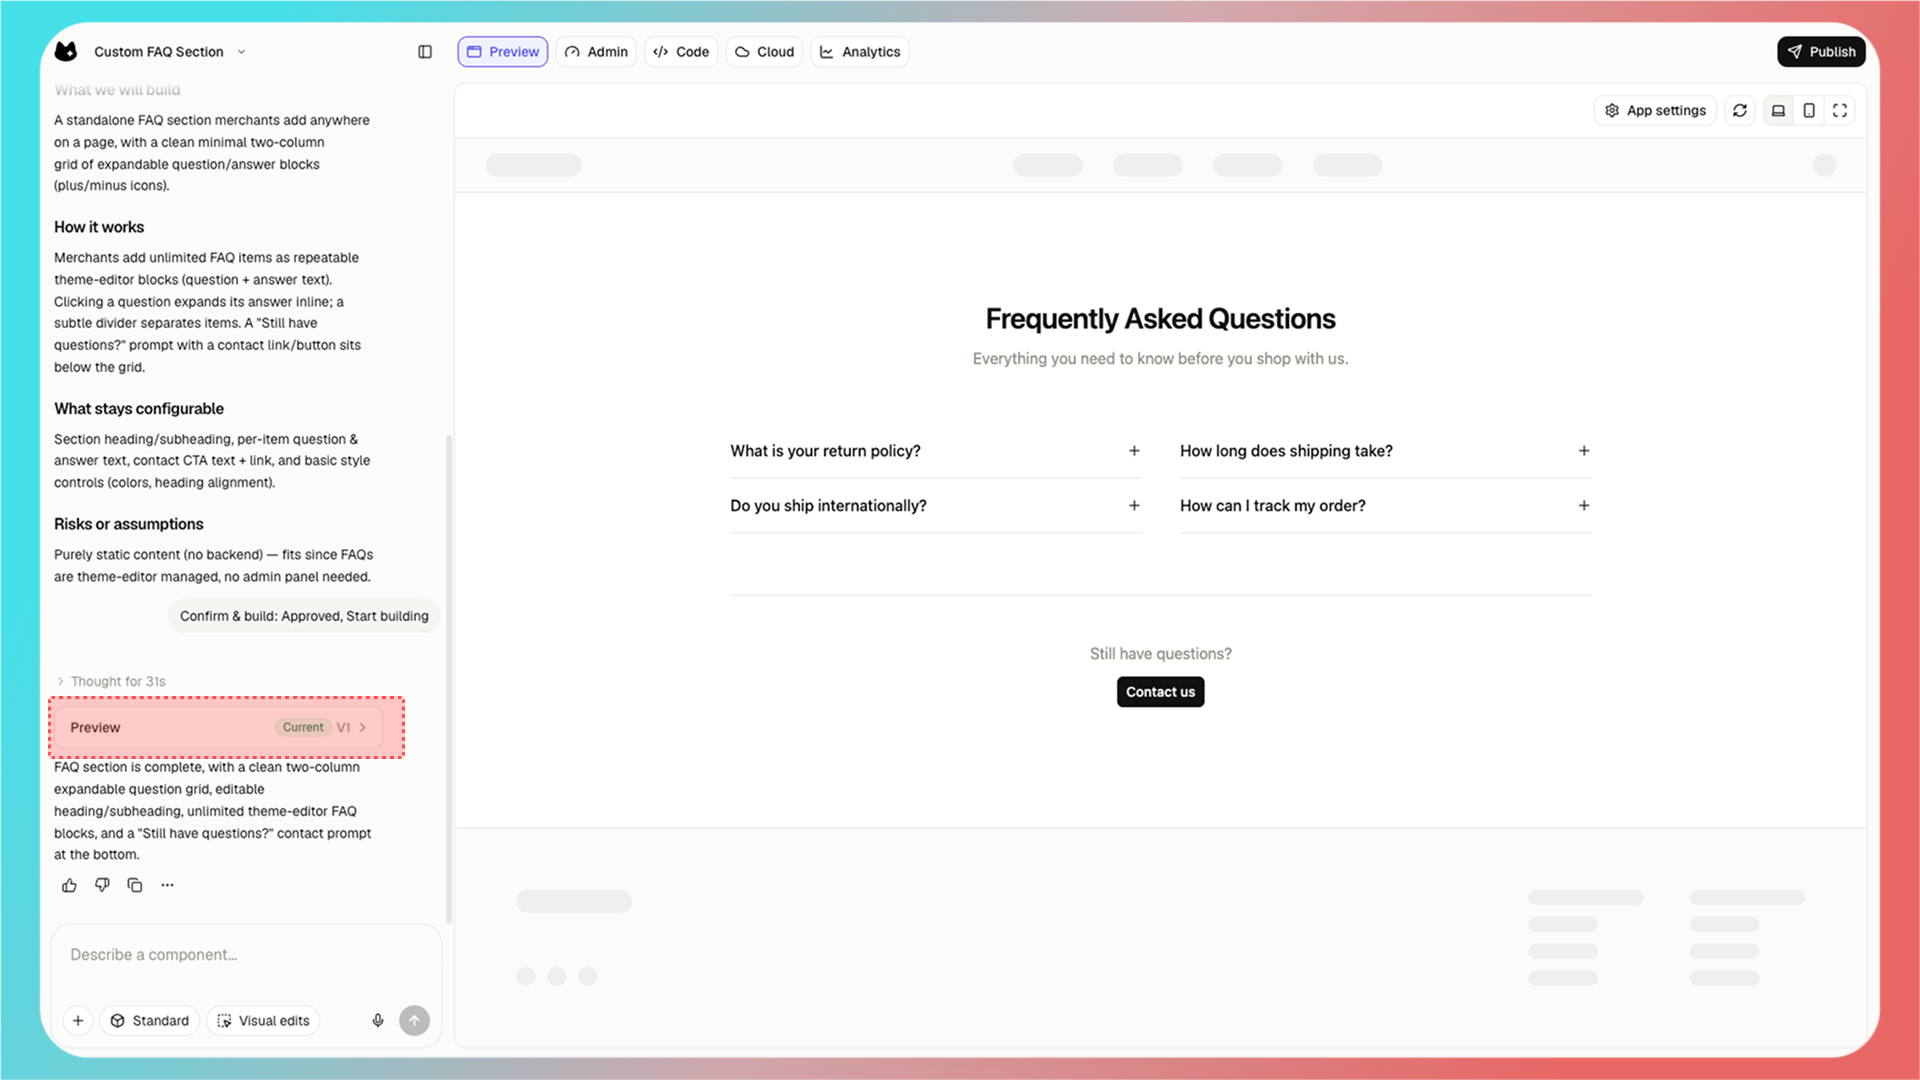
For the first app build, **Preview V1** appears in the left-side generation result panel.

Each build creates a new version, such as V2, V3, V4, and so on.
<Frame>
  <img src="https://assets.staticmeow.com/meowgic/static/images/20260706/b070ebd4-5f84-44cc-934b-fc5d7a37bbd6.png" alt="Meowgic preview panel showing the completed FAQ section as the current V1 version." />
</Frame>

<br />

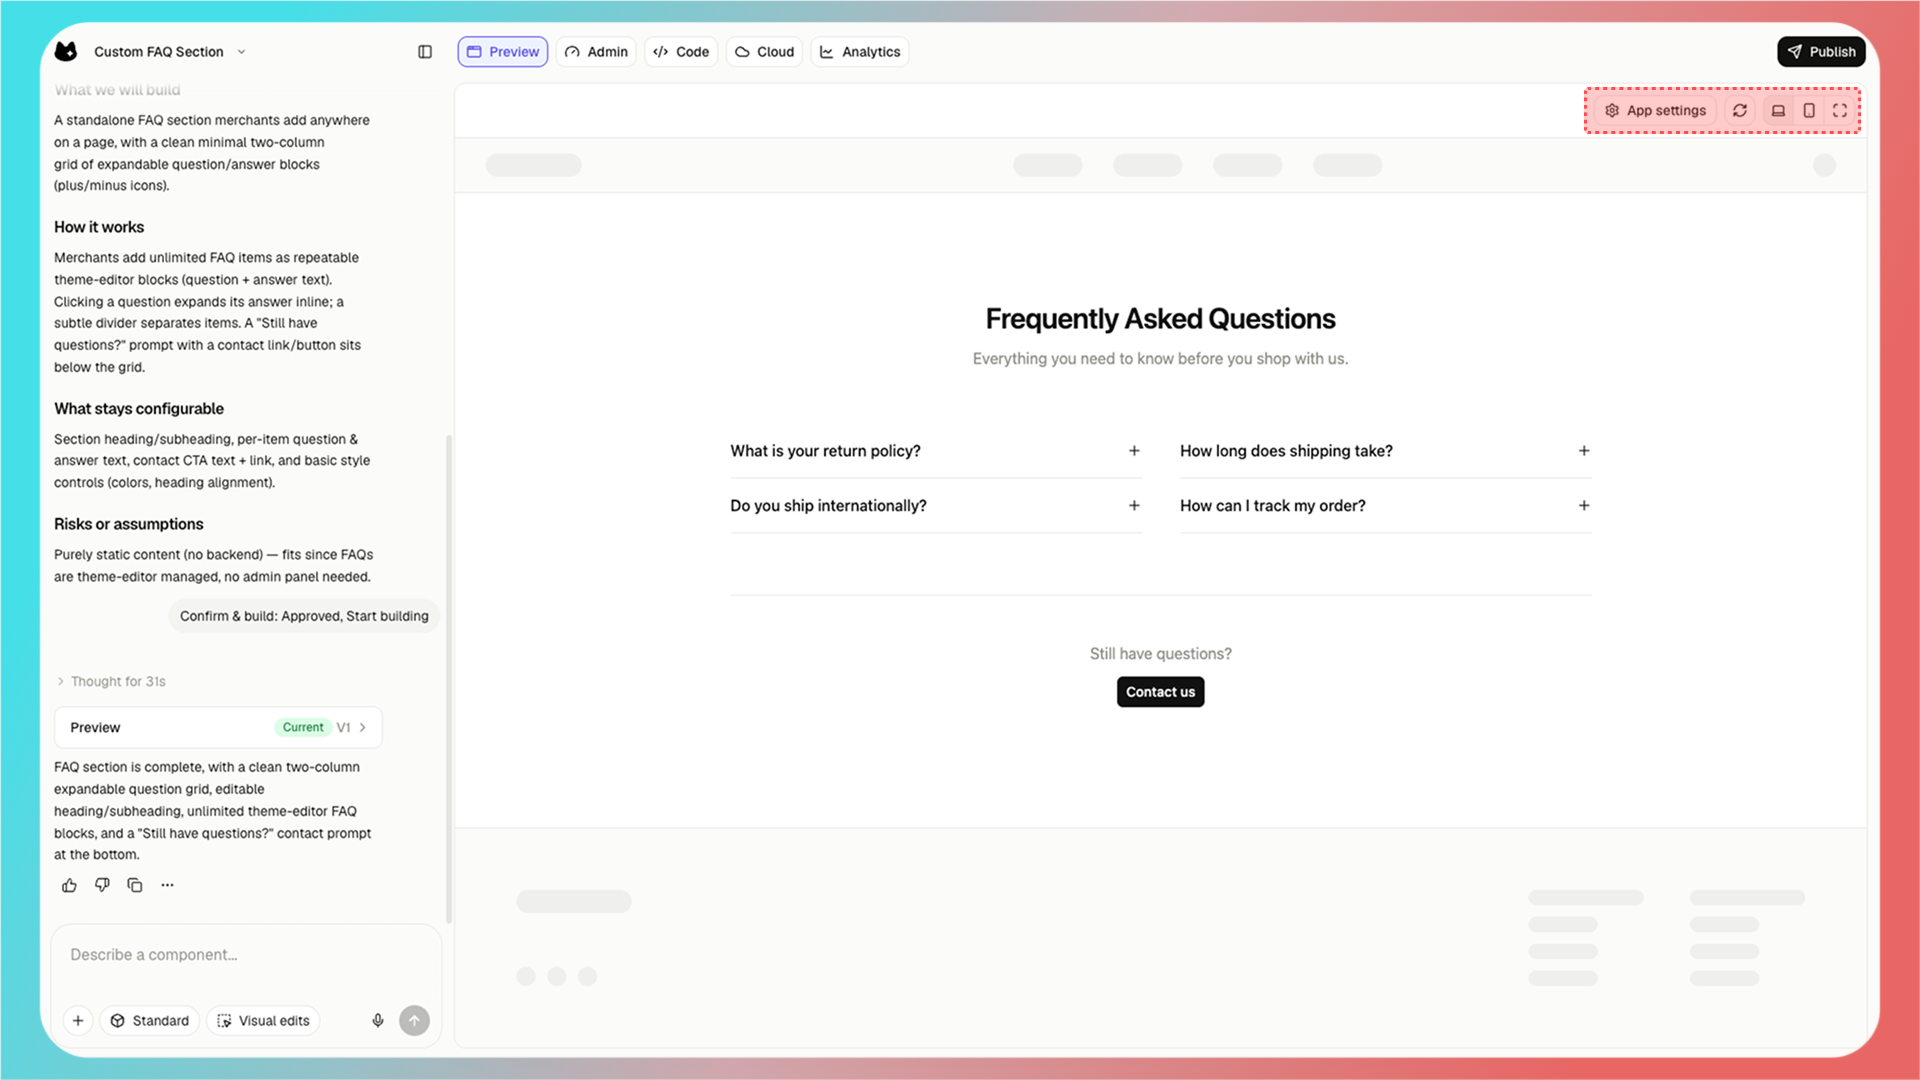
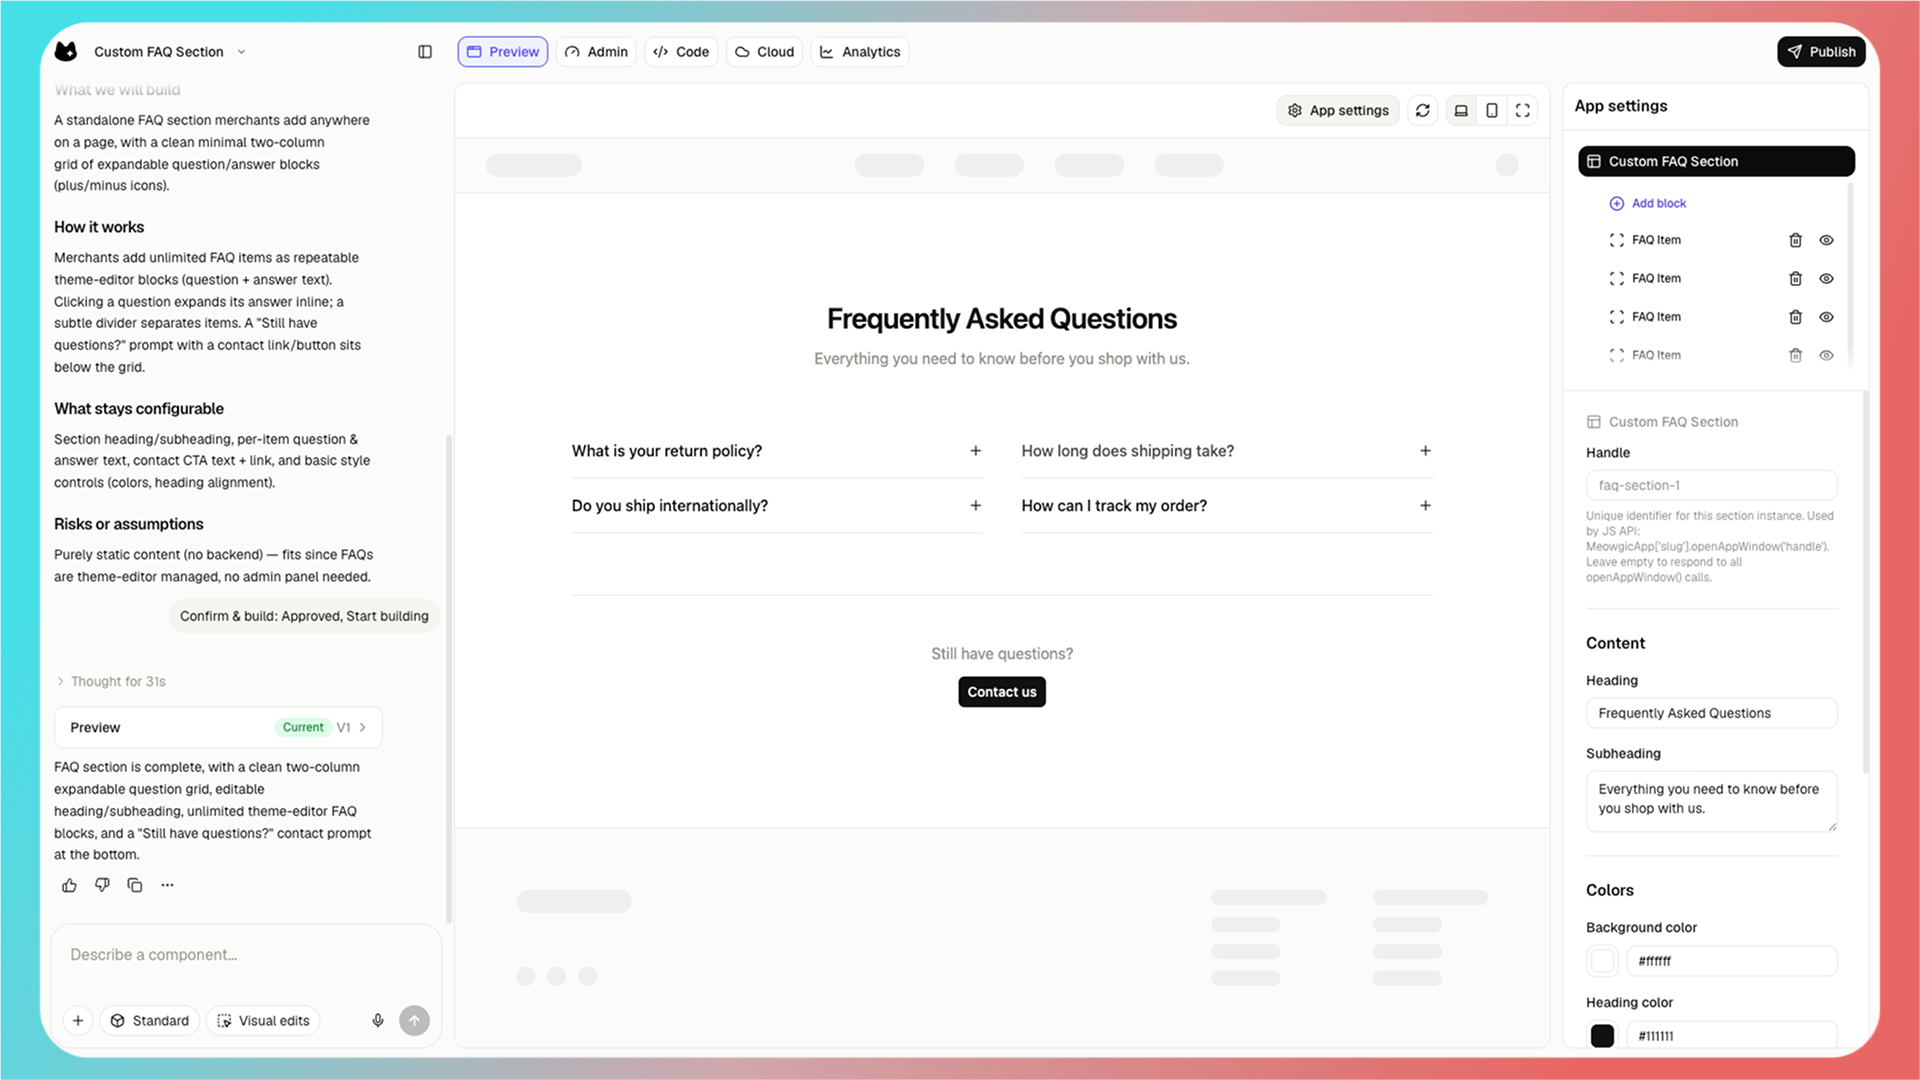
Use **App Settings** in the upper-right preview toolbar to edit the app, just like editing a theme template. You can also use the same toolbar to switch between desktop, mobile, and full-screen previews.
<Frame>
  <img src="https://assets.staticmeow.com/meowgic/static/images/20260706/05f60b37-9a94-4d46-b5e9-c6483038214a.png" alt="Top-right preview controls for app settings, desktop view, mobile view, and full screen." />
</Frame>

<Frame>
  <img src="https://assets.staticmeow.com/meowgic/static/images/20260706/bfbed718-1141-4338-8f59-210a2f080549.png" alt="App settings sidebar for editing FAQ items, heading text, colors, and contact prompt settings." />
</Frame>

<br />

# 2. Publish the app

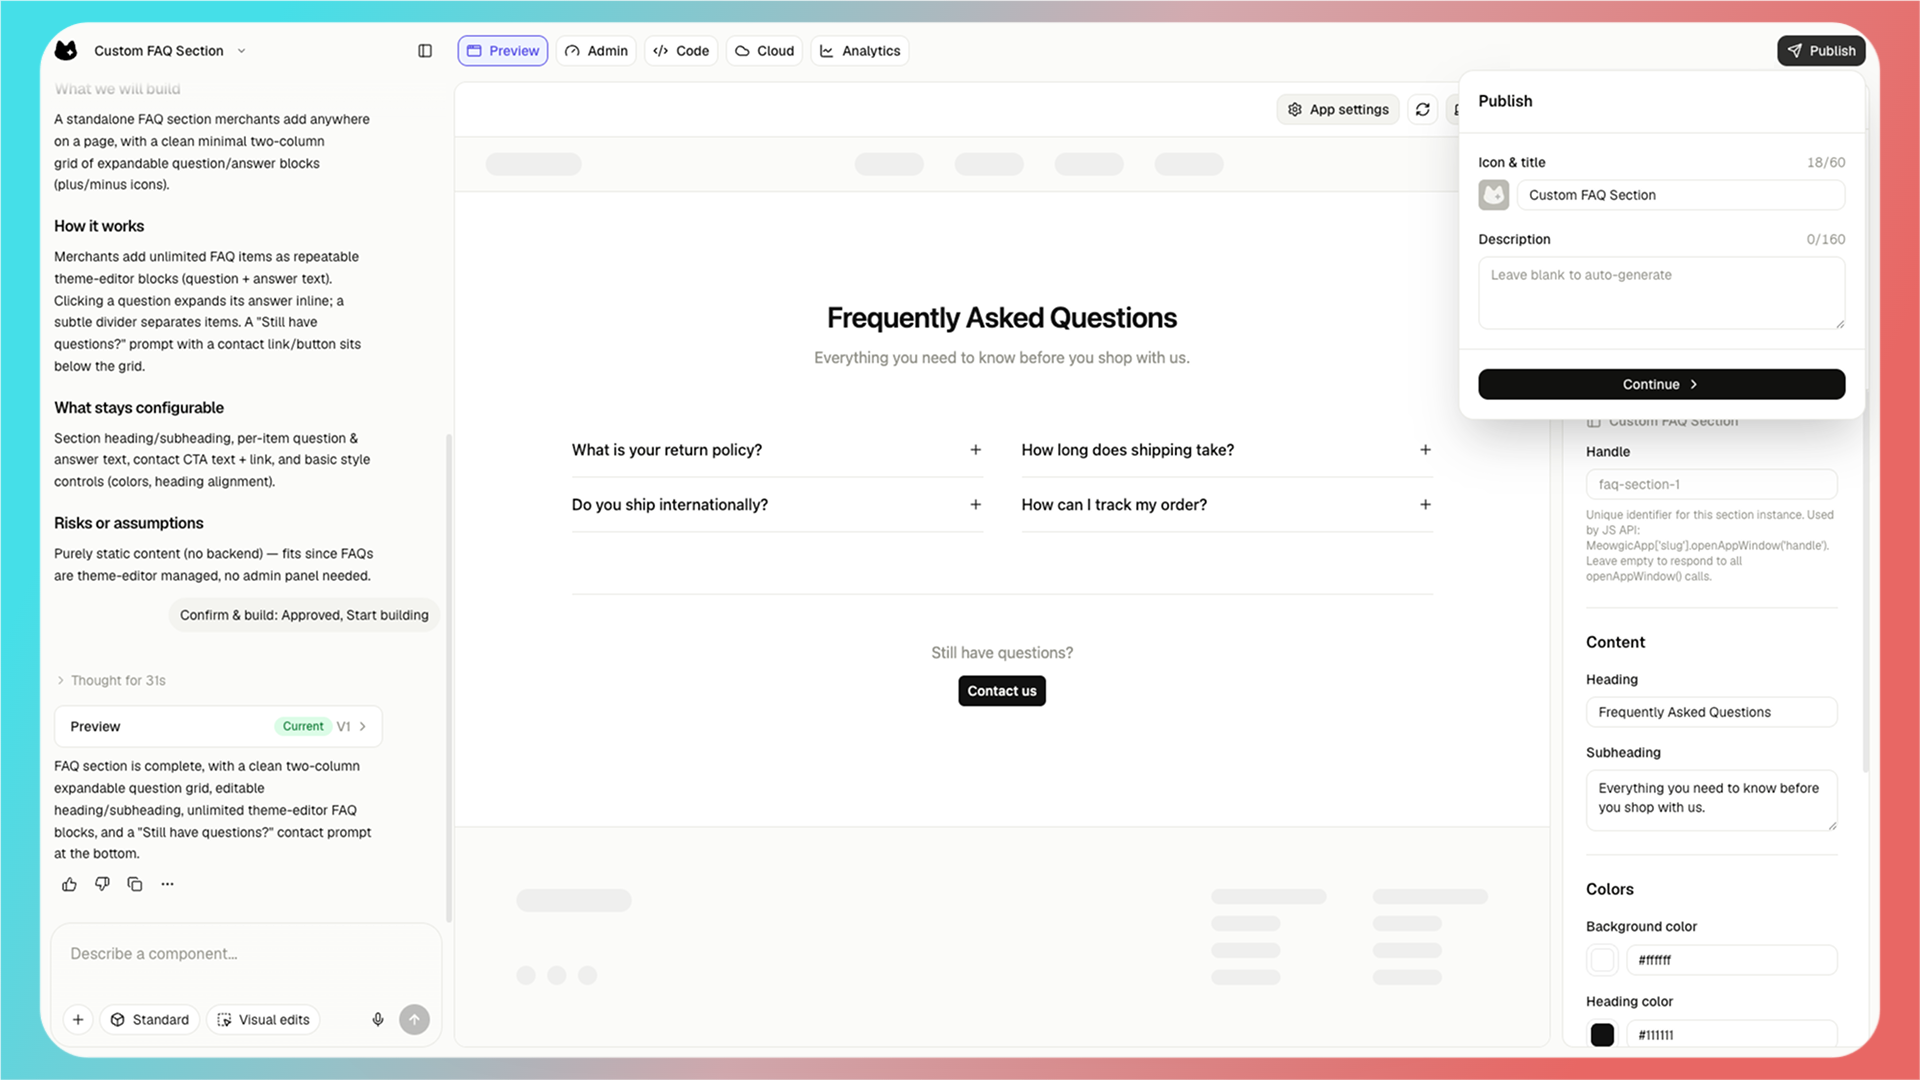
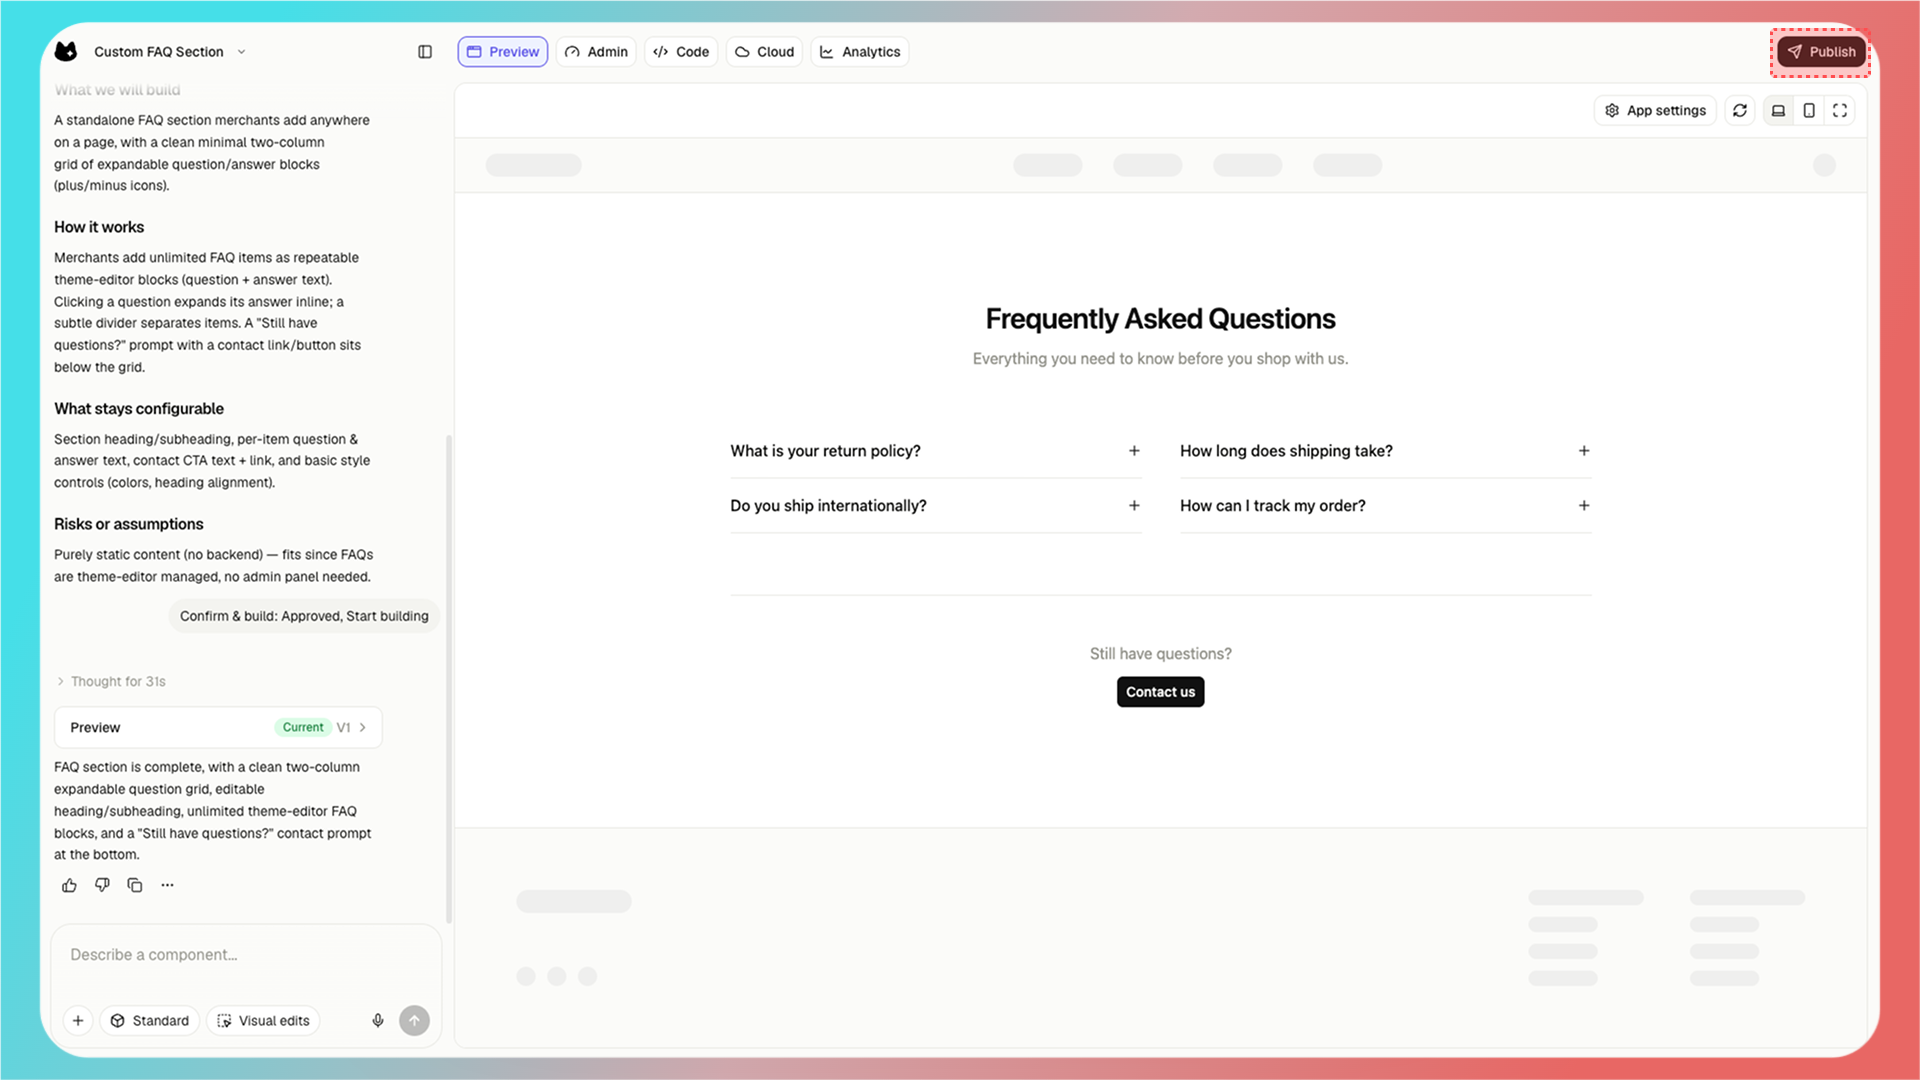
After you finish testing the app, click **Publish** in the upper-right corner to publish it.
<Frame>
  <img src="https://assets.staticmeow.com/meowgic/static/images/20260706/b5e58b0b-7c2d-4a98-8897-a4d141b824ee.png" alt="Publish button in the top-right corner of the Meowgic preview workspace." />
</Frame>

<Frame>
  <img src="https://assets.staticmeow.com/meowgic/static/images/20260706/c0f27250-ffbb-4004-8dcc-9185ab15f77b.png" alt="Publish dialog with fields for the app icon, title, and optional description." />
</Frame>

<br />

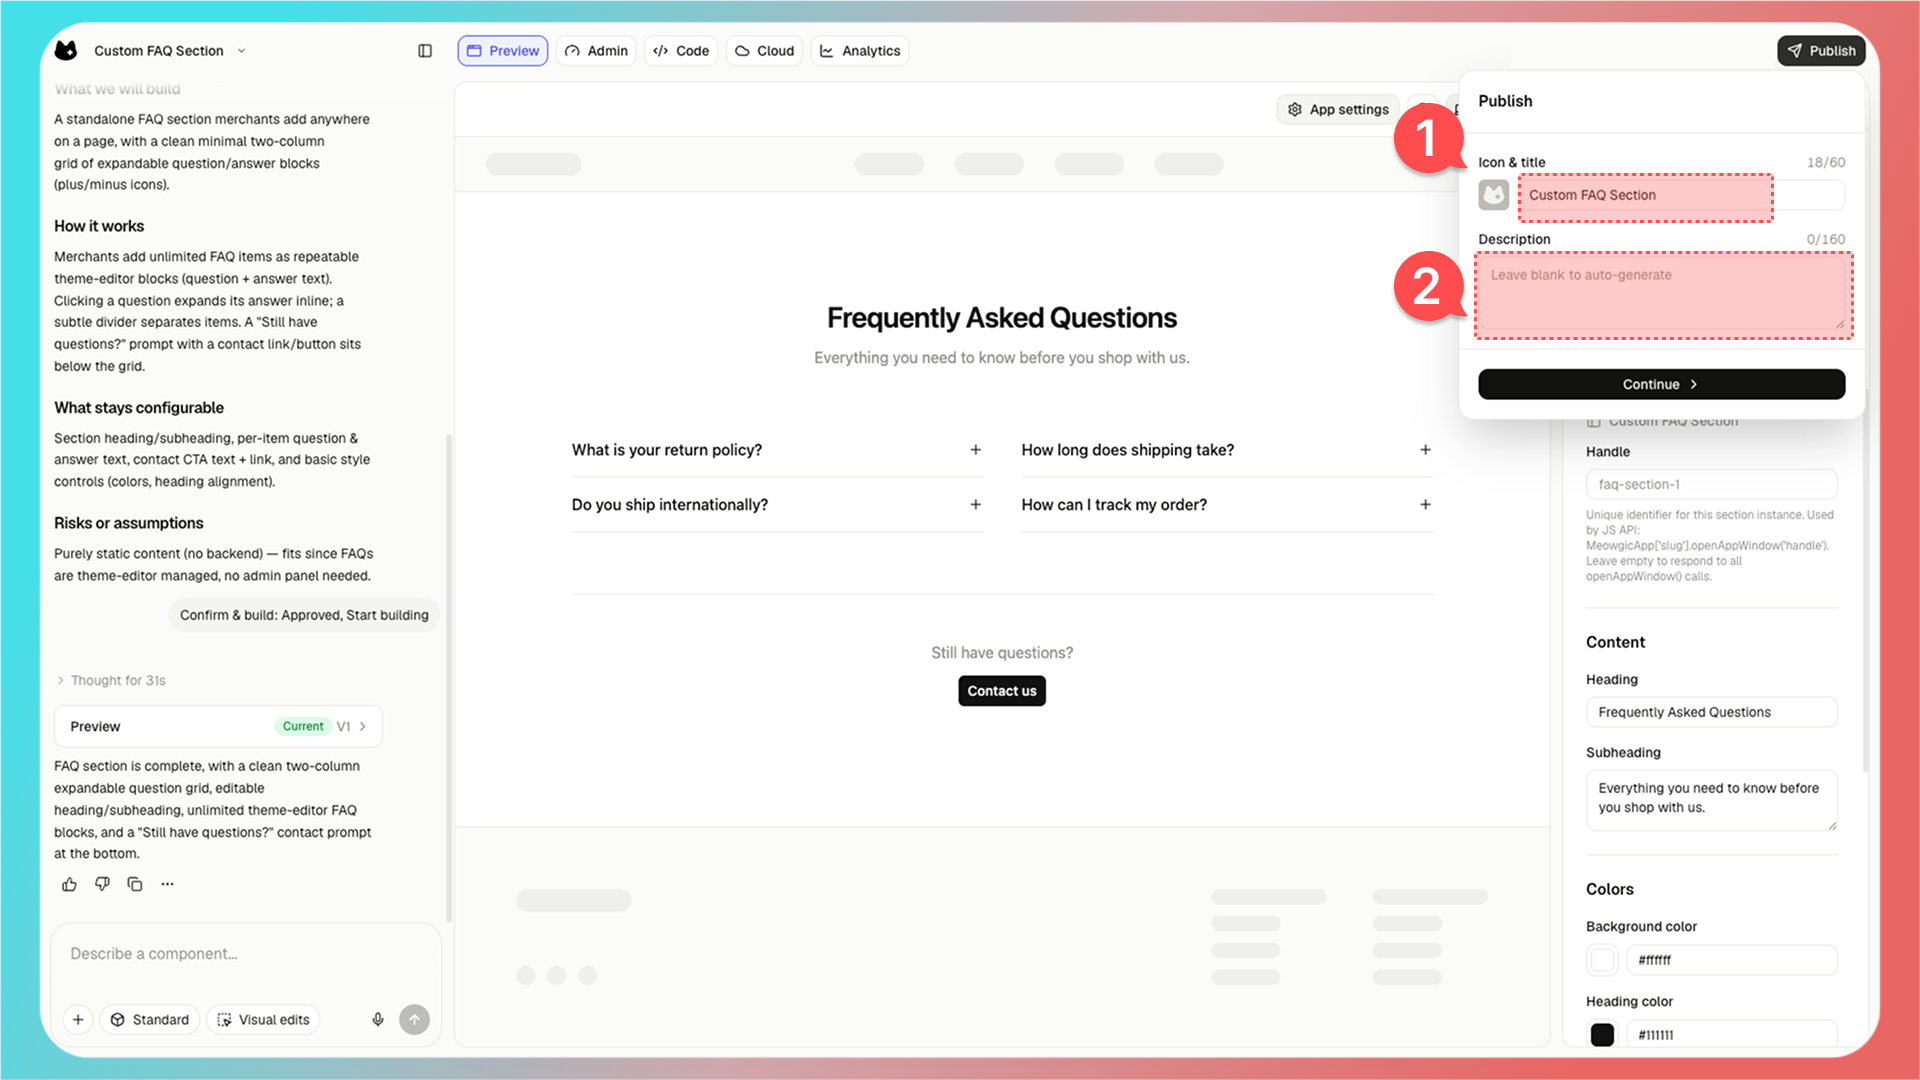
1. Enter the app name.

2. Enter the app description. If you leave it blank, AI will generate one automatically.

After filling in the fields, click **Continue** at the bottom of the publish dialog.
<Frame>
  <img src="https://assets.staticmeow.com/meowgic/static/images/20260706/cbbd5db2-4aed-4cc2-bc4e-33d9a078aca2.png" alt="Publish form for entering the app name and optional description before continuing." />
</Frame>

<br />

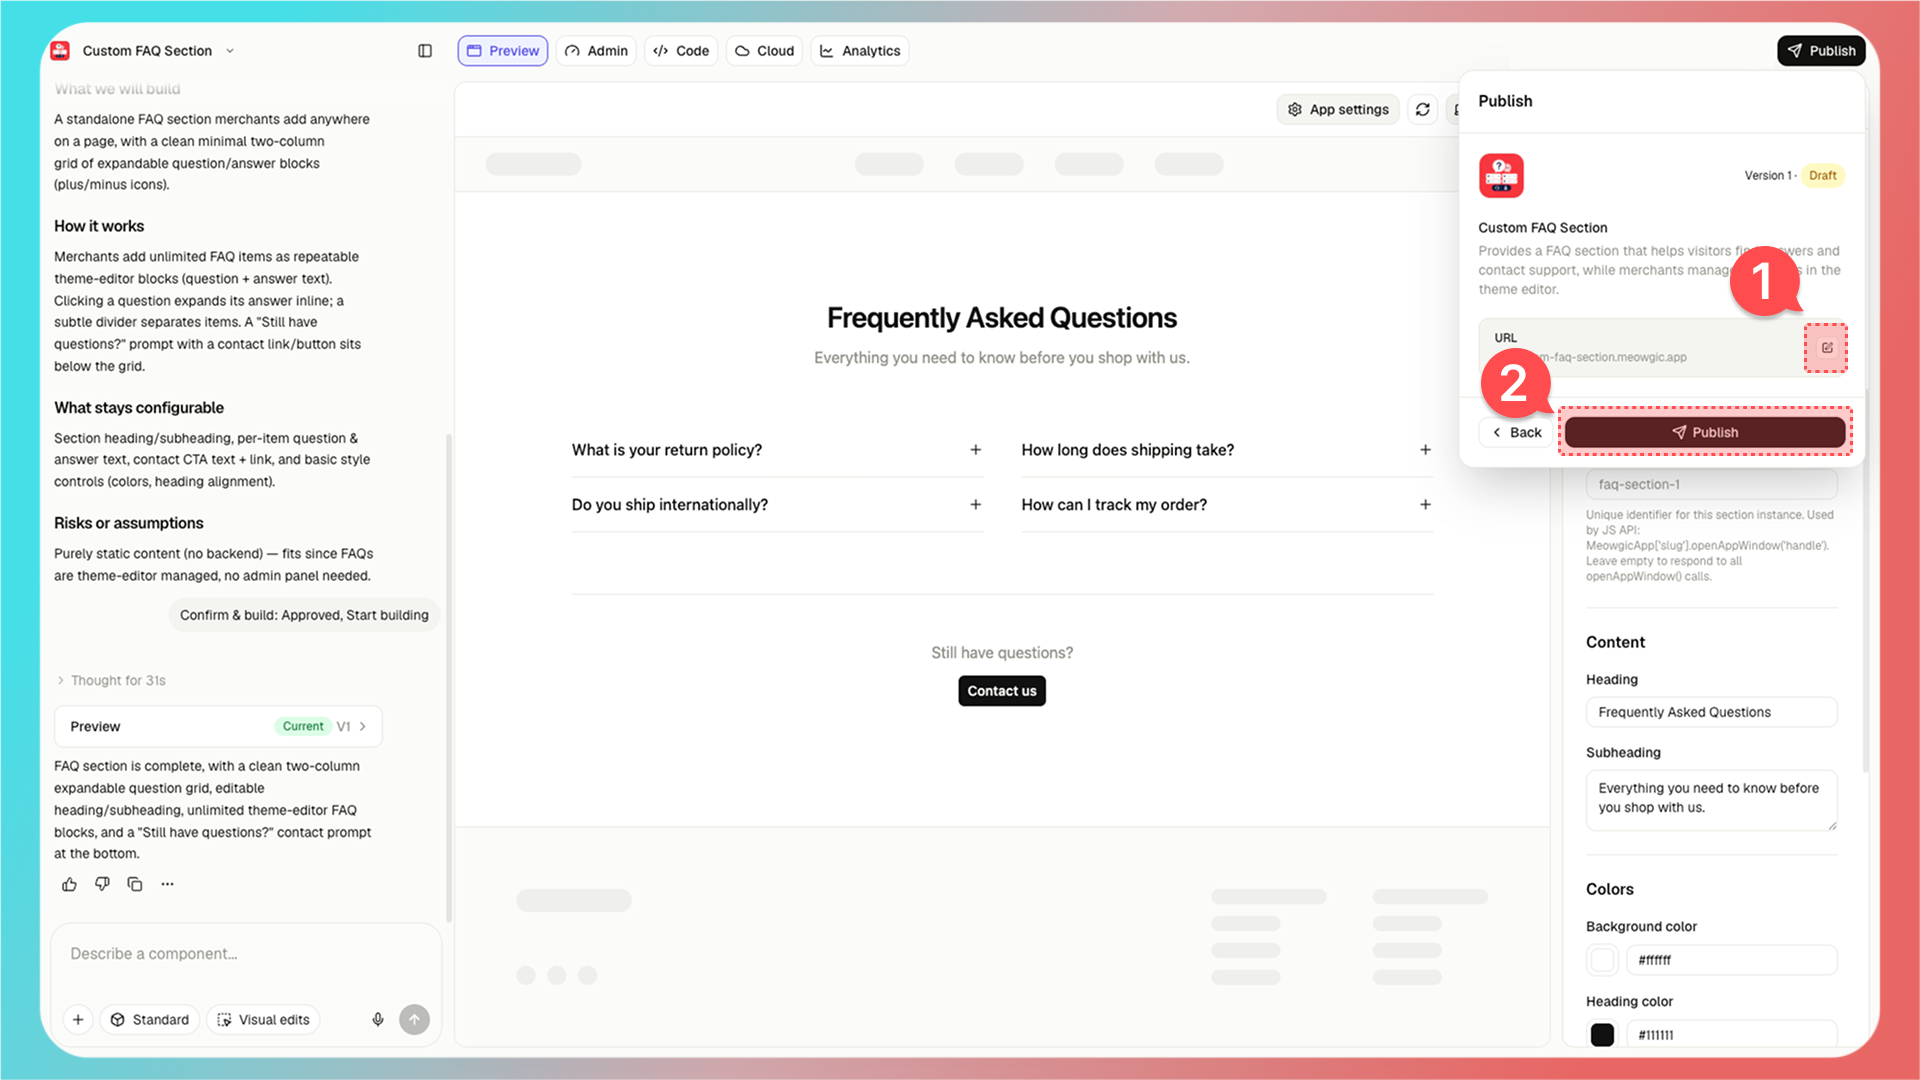
1. Meowgic will automatically generate an app link for you. You can open this link in a browser to preview the app, and you can also customize the link prefix.

2. After you click the publish button, this app version will be officially published.
<Frame>
  <img src="https://assets.staticmeow.com/meowgic/static/images/20260706/d230a5c0-f2d4-4d87-8242-b0890739abed.png" alt="Publish dialog showing the generated app URL and the final Publish button." />
</Frame>

<br />

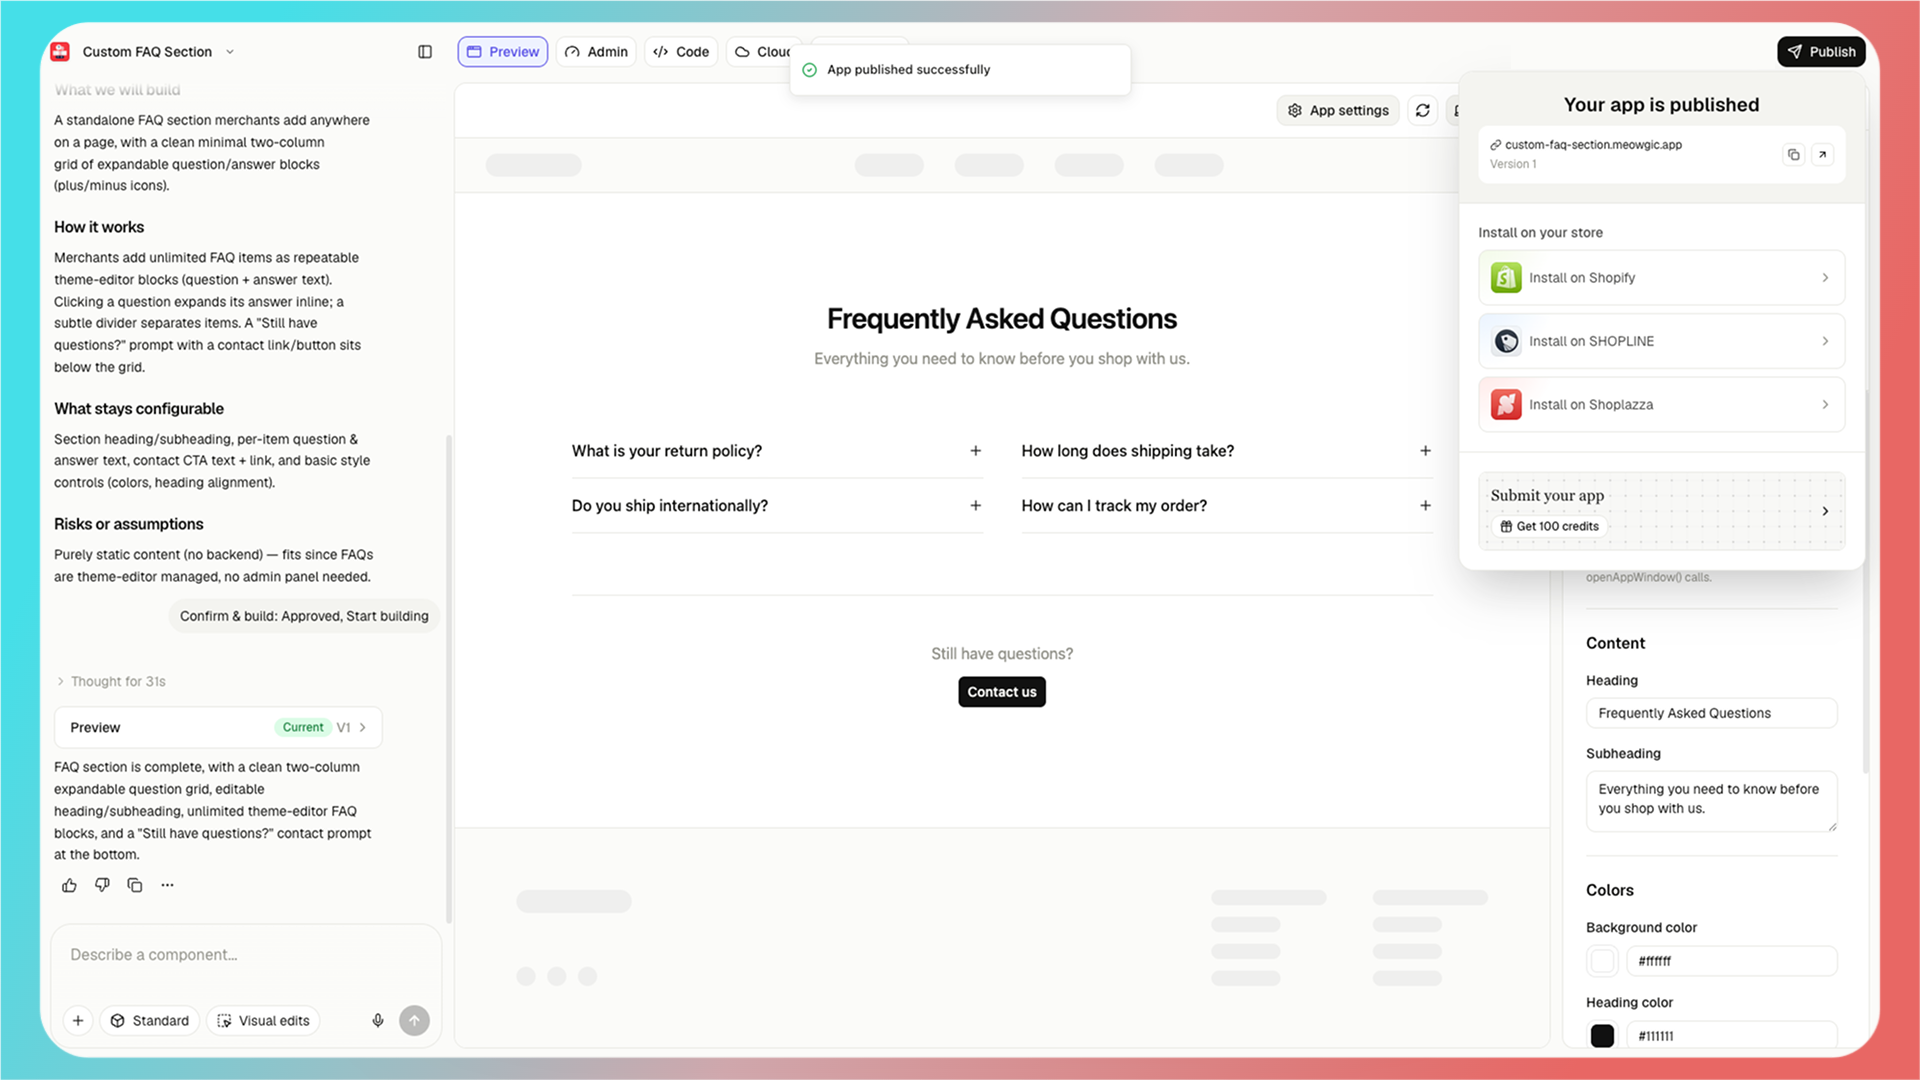
After the app is published, you can choose how to install it.

If your store is built on Shopify, SHOPLINE, or Shoplazza, choose the matching platform option in the published app panel to start the integration process.

Self-hosted site users can copy the app link and embed it into their own site.
<Frame>
  <img src="https://assets.staticmeow.com/meowgic/static/images/20260706/d998a715-8938-4f10-8ae9-b4bcda8ffd7b.png" alt="Published app panel with the app link and store installation options." />
</Frame>

<Tip>
  If you only want to quickly check the result, open the app link first. When you are ready to install it in your store, continue with the theme integration.
</Tip>

<Note>
  If you update or modify the app after publishing it, publish it again. Otherwise, the integration or preview link will not use the latest version.
</Note>

<br />

# 3. Integrate your app into your store

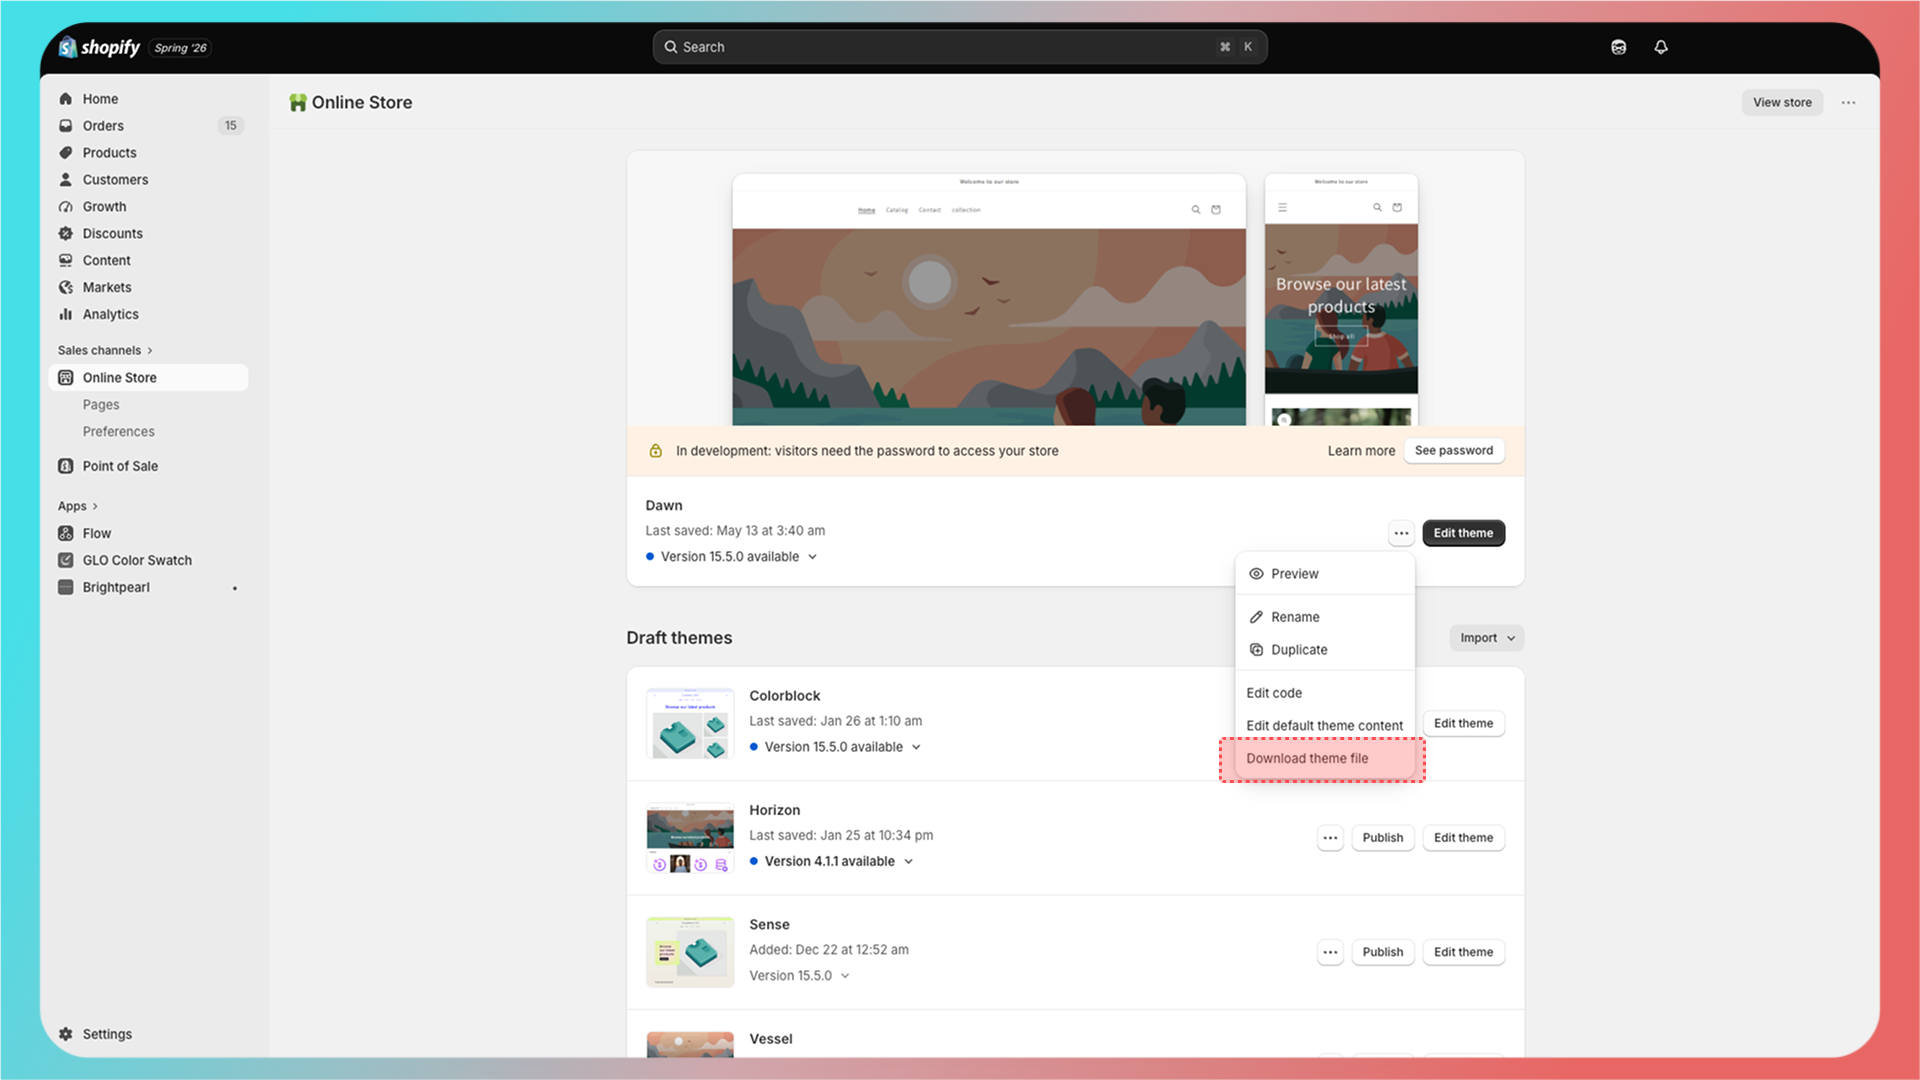
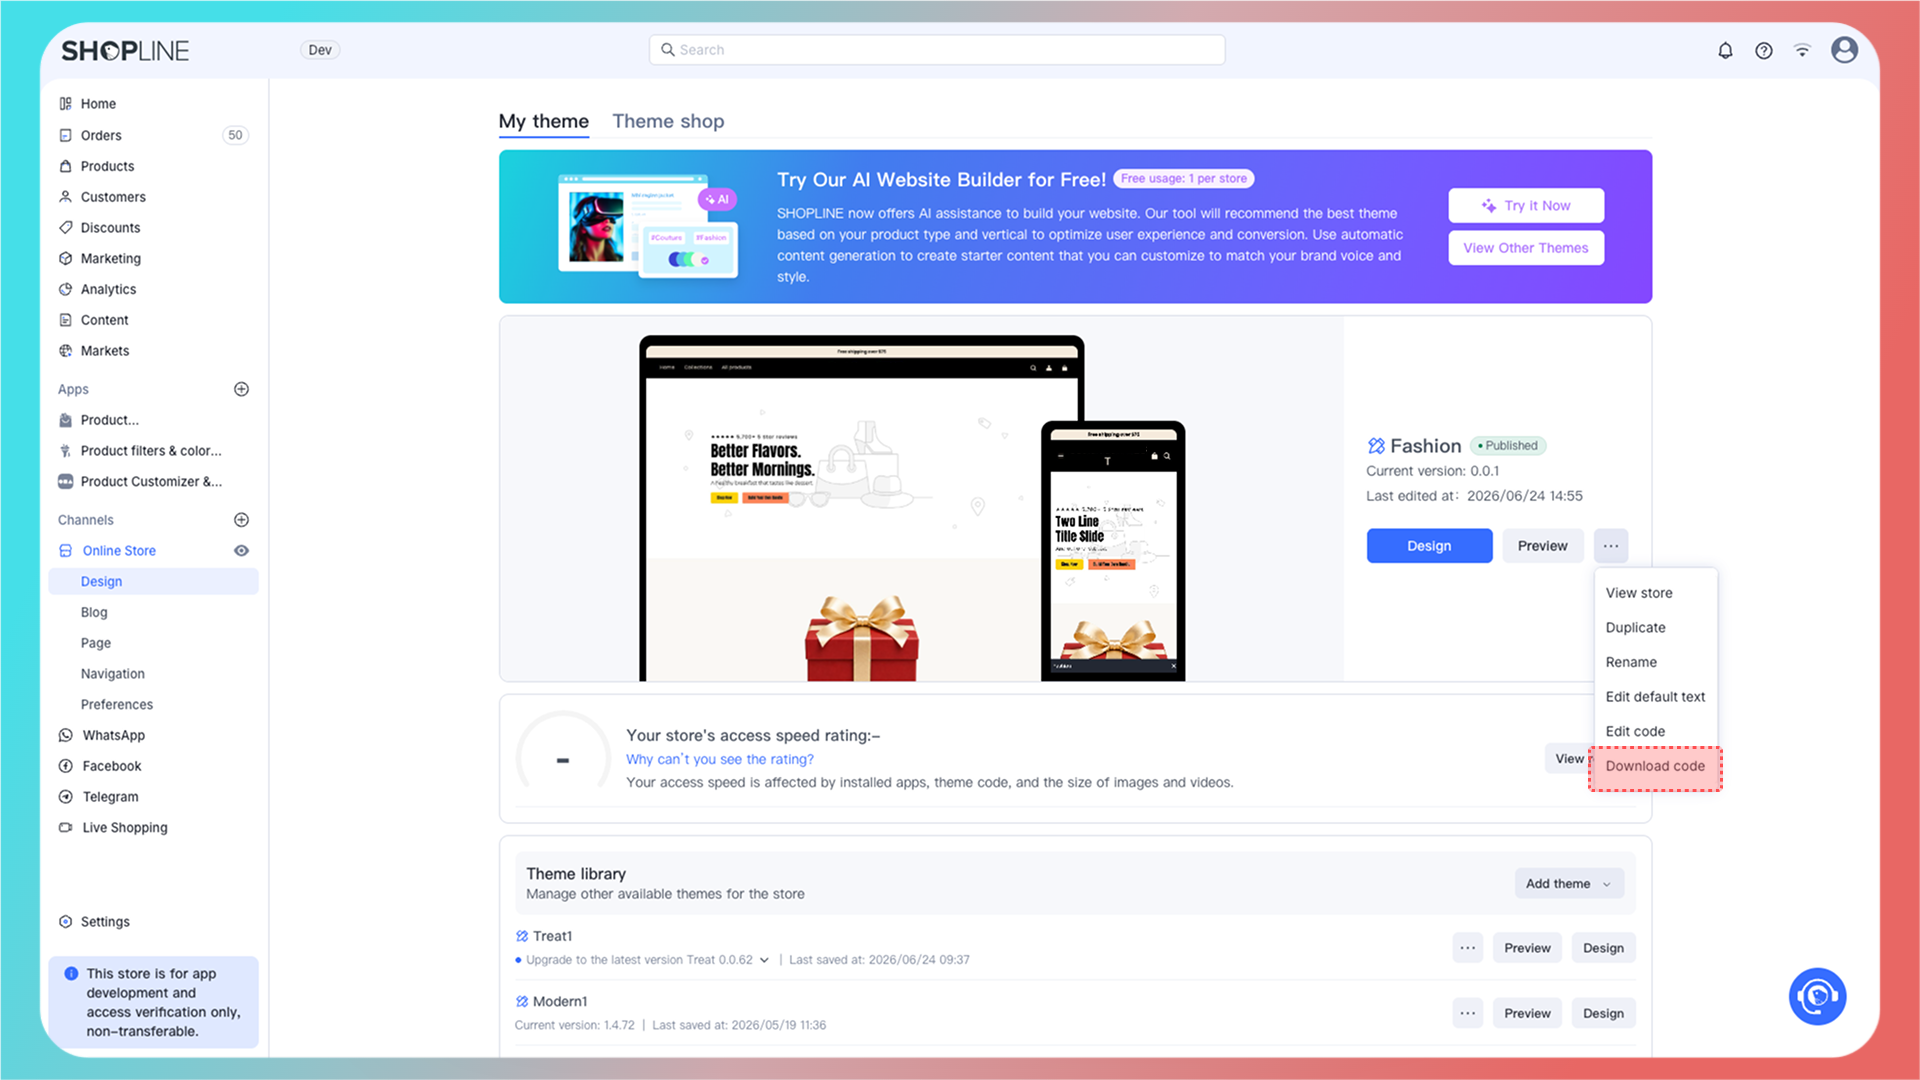
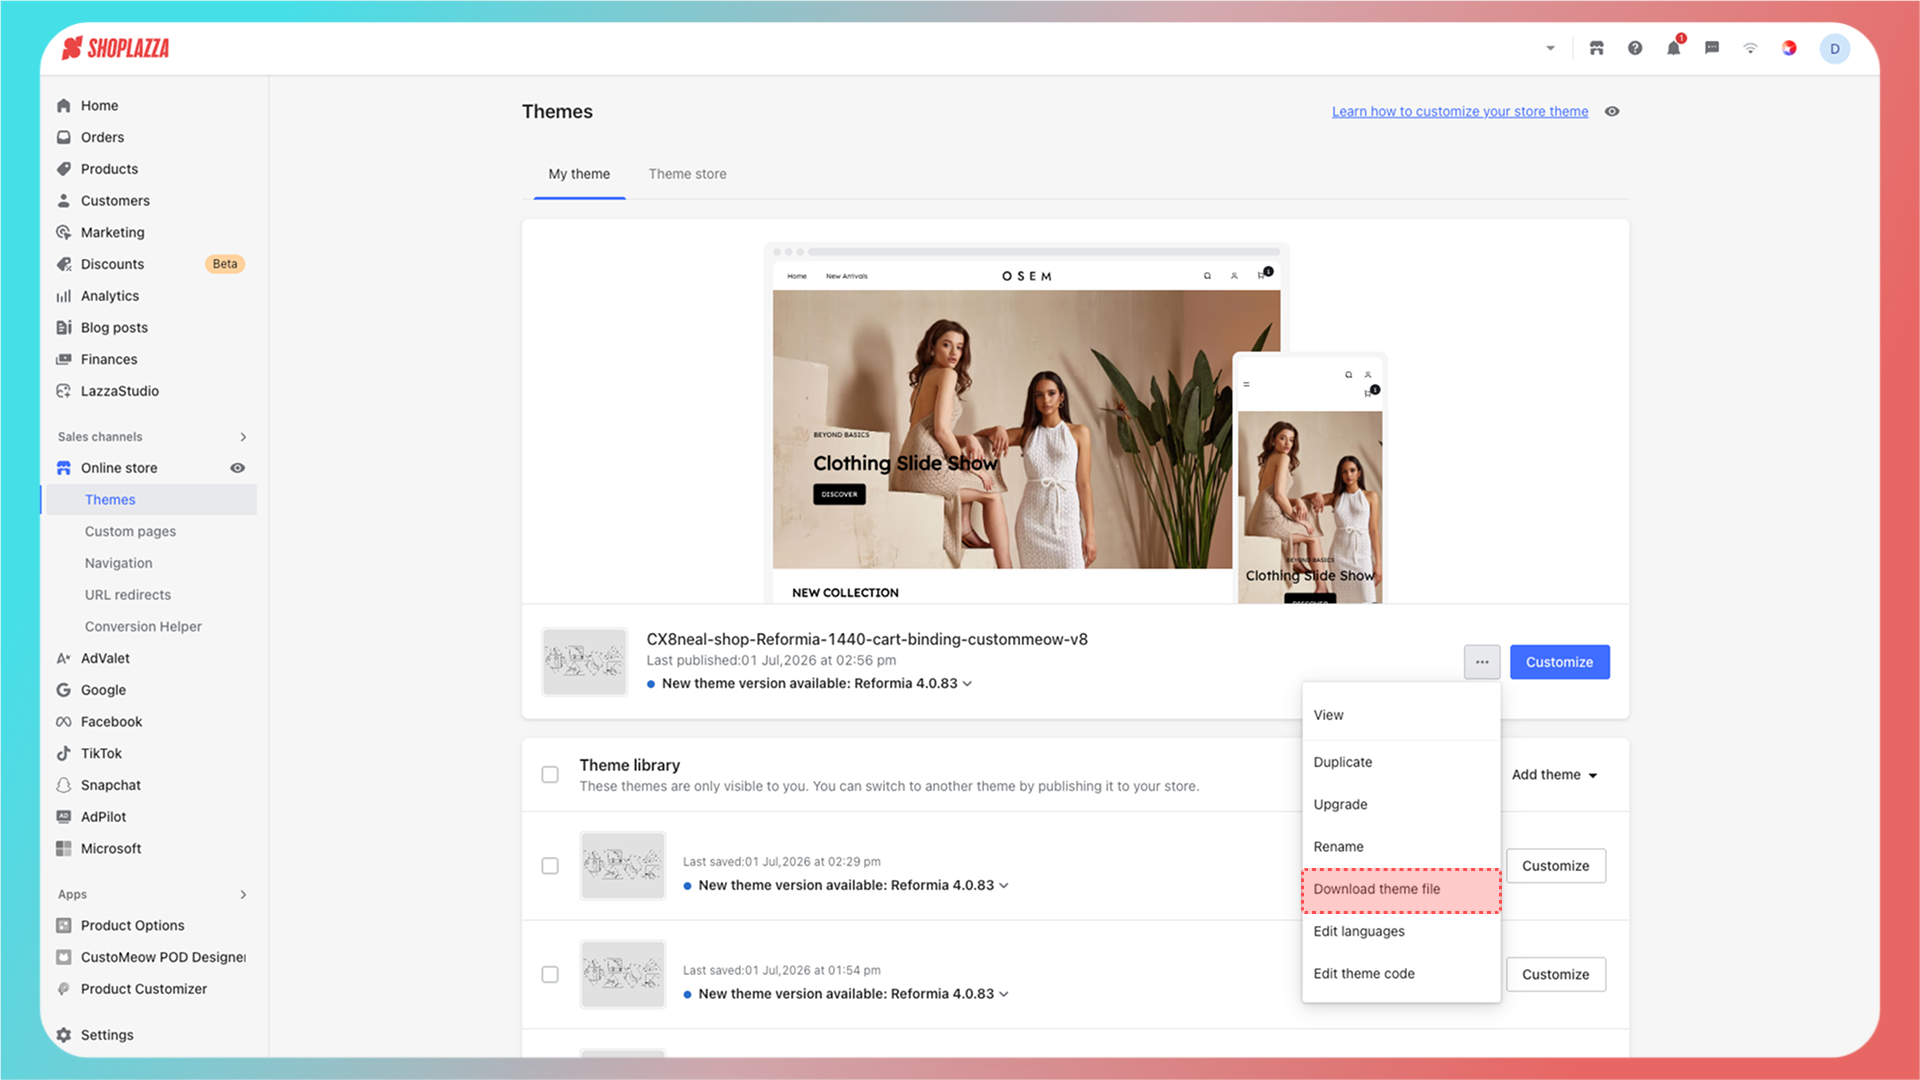
After entering the integration page, first download the theme template you are currently using, then upload it to Meowgic.

<Warning>
  When downloading the theme template, choose the theme your store is currently using. Uploading the wrong theme file may make the integration result inconsistent with your live store.
</Warning>

Choose your store platform to find the download location:

<Tabs>
  <Tab title="Shopify">
    Shopify theme template download location:
    <Frame>
      <img src="https://assets.staticmeow.com/meowgic/static/images/20260706/d4fe834c-8d63-4760-81c6-7ca1ed44d4c5.png" alt="Shopify Online Store themes page with the theme actions menu open to Download theme file." />
    </Frame>
  </Tab>

  <Tab title="SHOPLINE">
    SHOPLINE theme template download location:
    <Frame>
      <img src="https://assets.staticmeow.com/meowgic/static/images/20260706/110e9ca4-36b3-48d7-86d6-fd79e291a2cc.png" alt="SHOPLINE theme page with the theme menu open to Download code." />
    </Frame>
  </Tab>

  <Tab title="Shoplazza">
    Shoplazza theme template download location:
    <Frame>
      <img src="https://assets.staticmeow.com/meowgic/static/images/20260706/2fdb6917-5077-442c-ae4d-08fce50af599.png" alt="Shoplazza Themes page with the theme menu open to Download theme file." />
    </Frame>
  </Tab>
</Tabs>

<br />

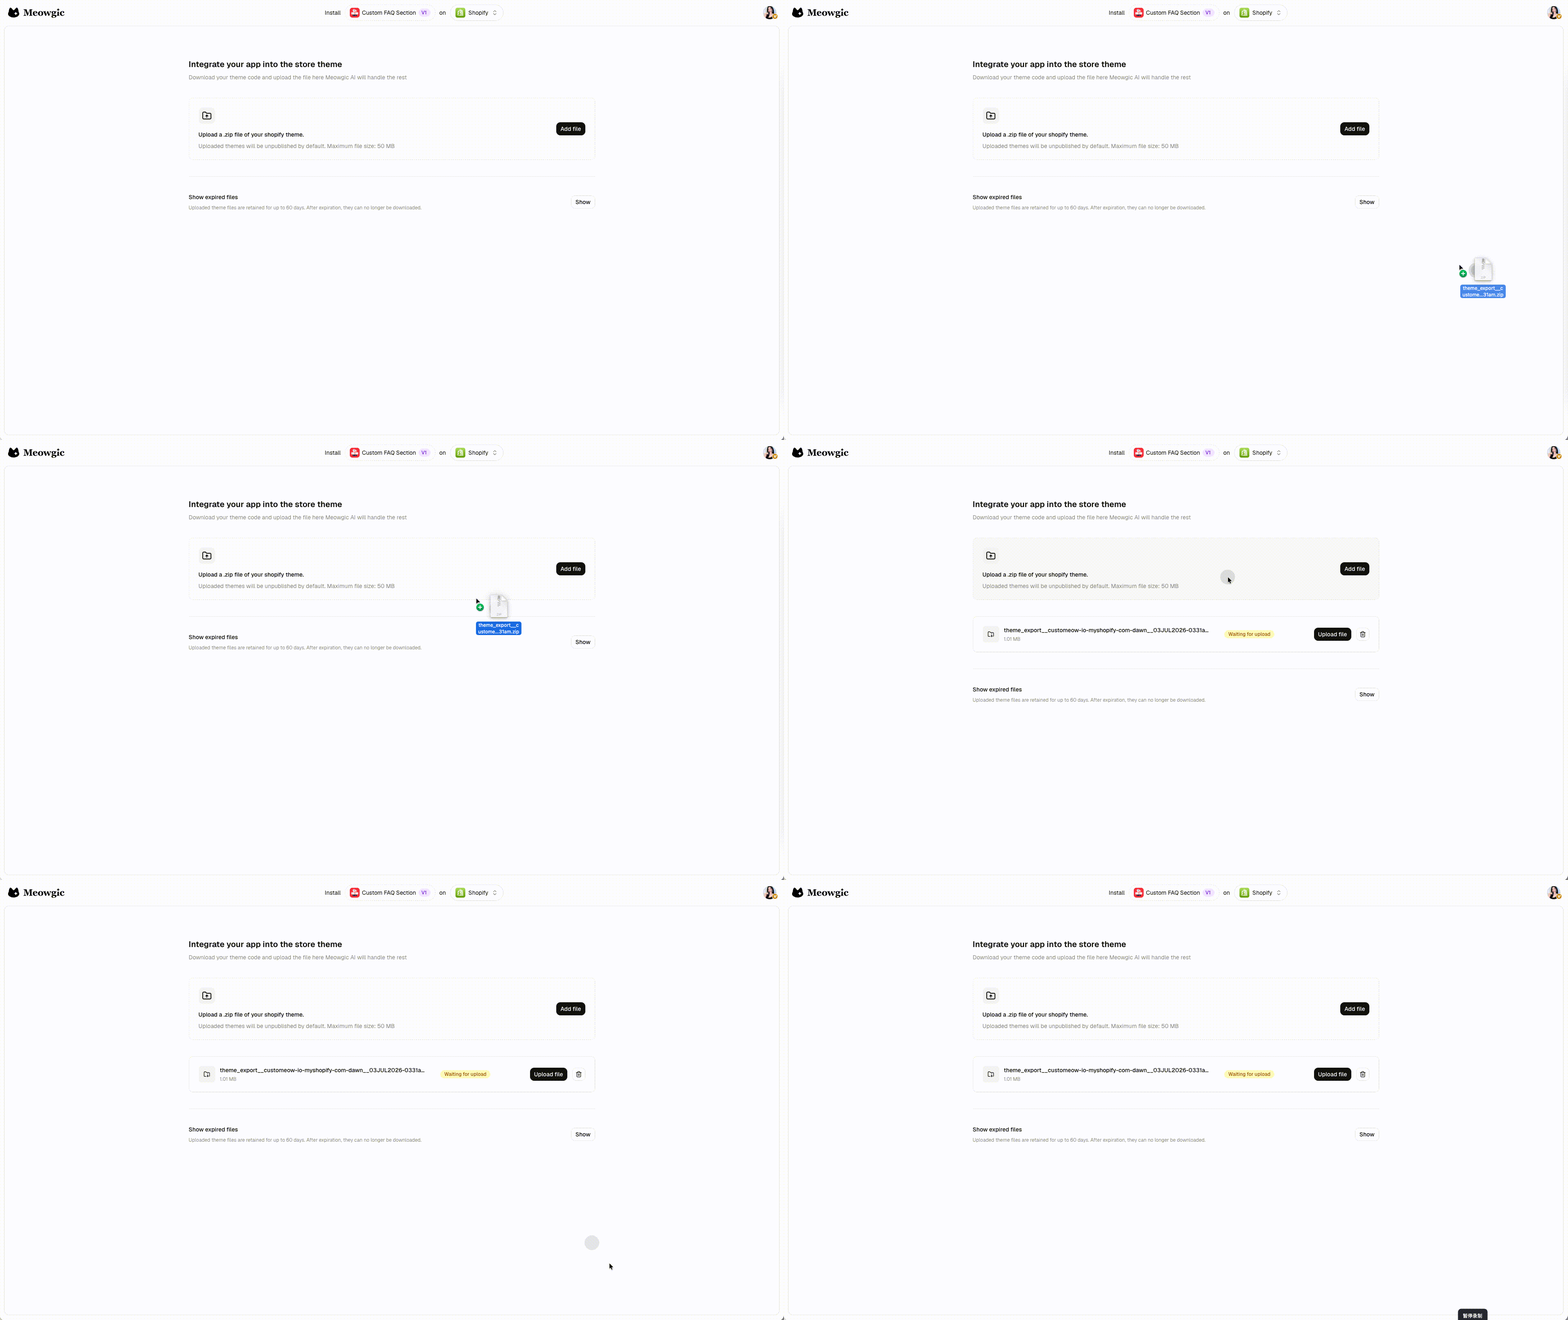
After the download is complete, click **Add file**, or drag and drop the theme file ZIP package directly into the upload area.
<Frame>
  <img src="https://assets.staticmeow.com/meowgic/static/images/20260706/73aad0ce-15ad-485a-8aa9-be60450f39ac.gif" alt="Meowgic integration page showing a theme ZIP file being added by Add file or drag and drop." />
</Frame>

<br />

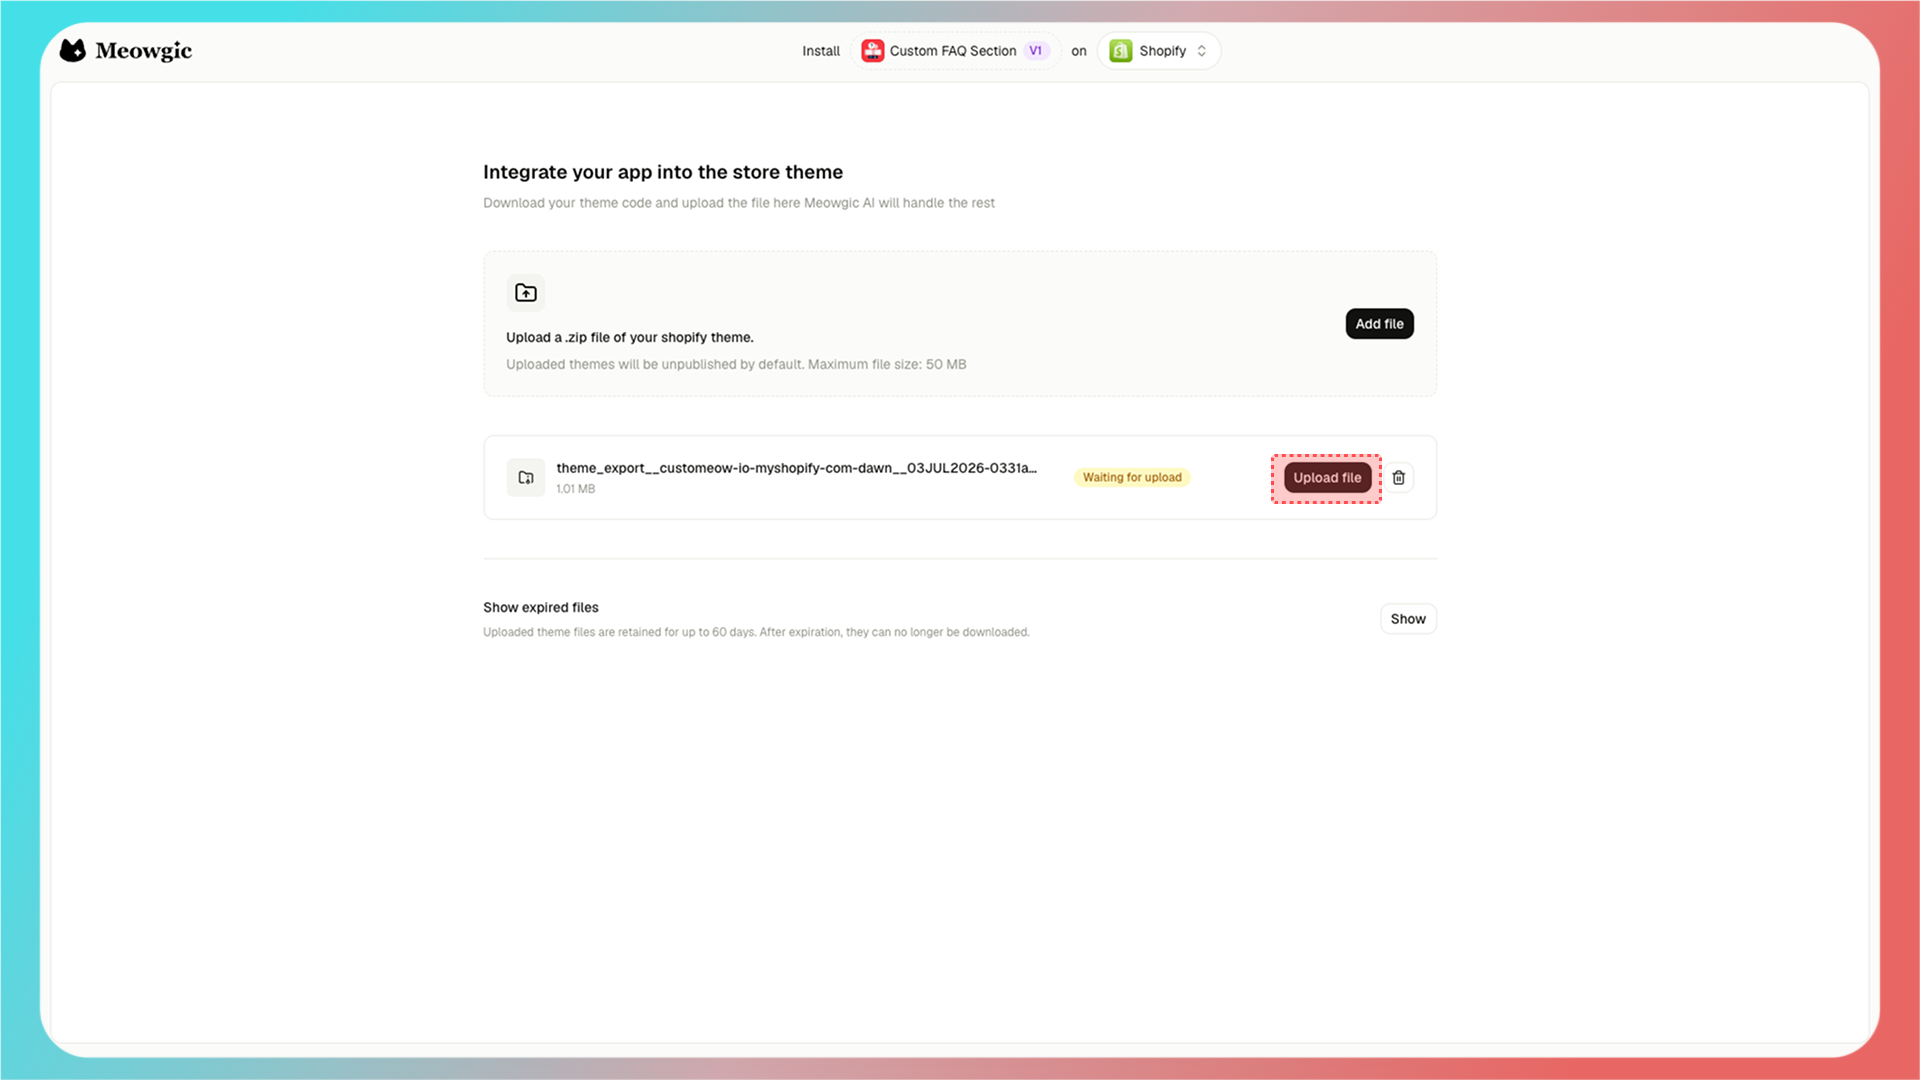
After the theme ZIP is added, click **Upload file** next to the selected file.
<Frame>
  <img src="https://assets.staticmeow.com/meowgic/static/images/20260706/ad62f6bf-3e1b-4fc3-b7e5-eef83add7a51.png" alt="Selected Shopify theme ZIP on the Meowgic integration page, ready for Upload file." />
</Frame>

<br />

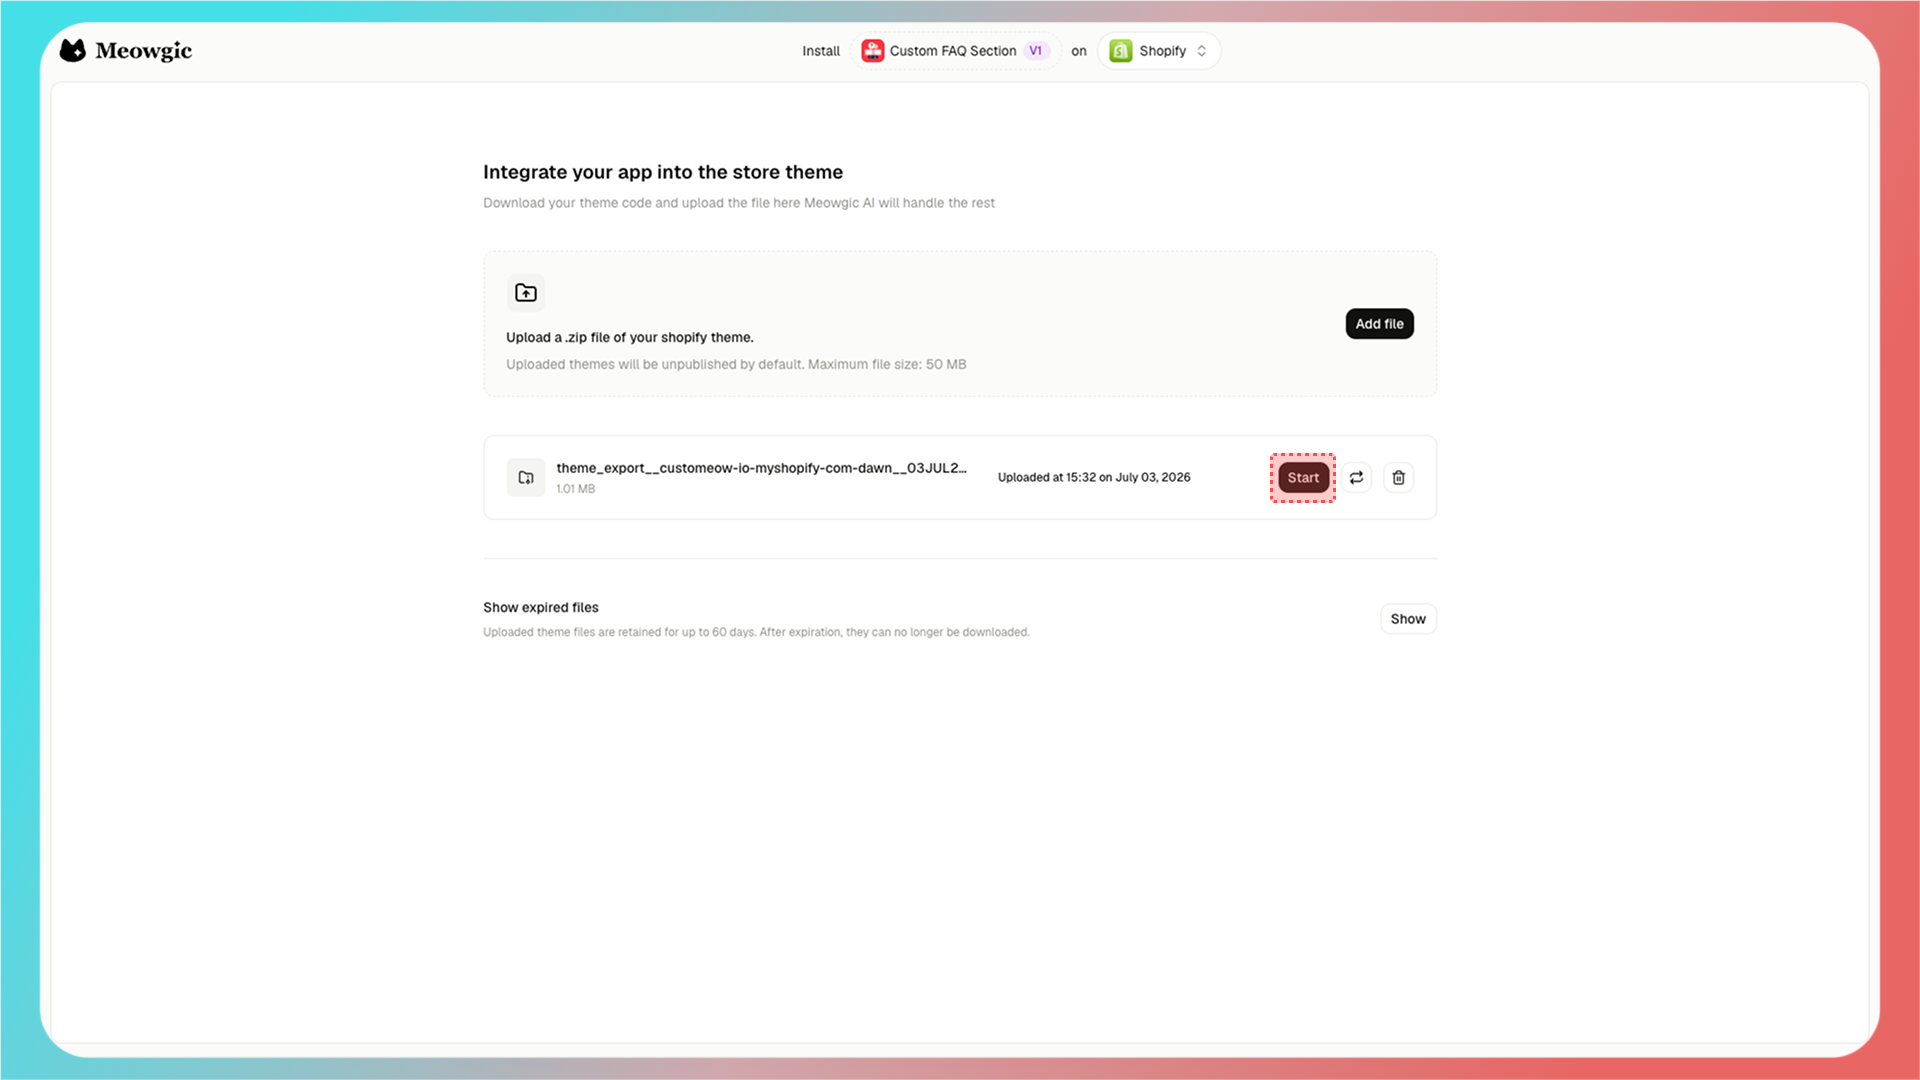
After the upload is complete, click **Start** next to the uploaded theme file to begin the integration.
<Frame>
  <img src="https://assets.staticmeow.com/meowgic/static/images/20260706/97f73af2-dfbb-4310-8821-a054adfae9c6.png" alt="Uploaded Shopify theme ZIP listed in Meowgic with the Start button ready to begin integration." />
</Frame>

<br />

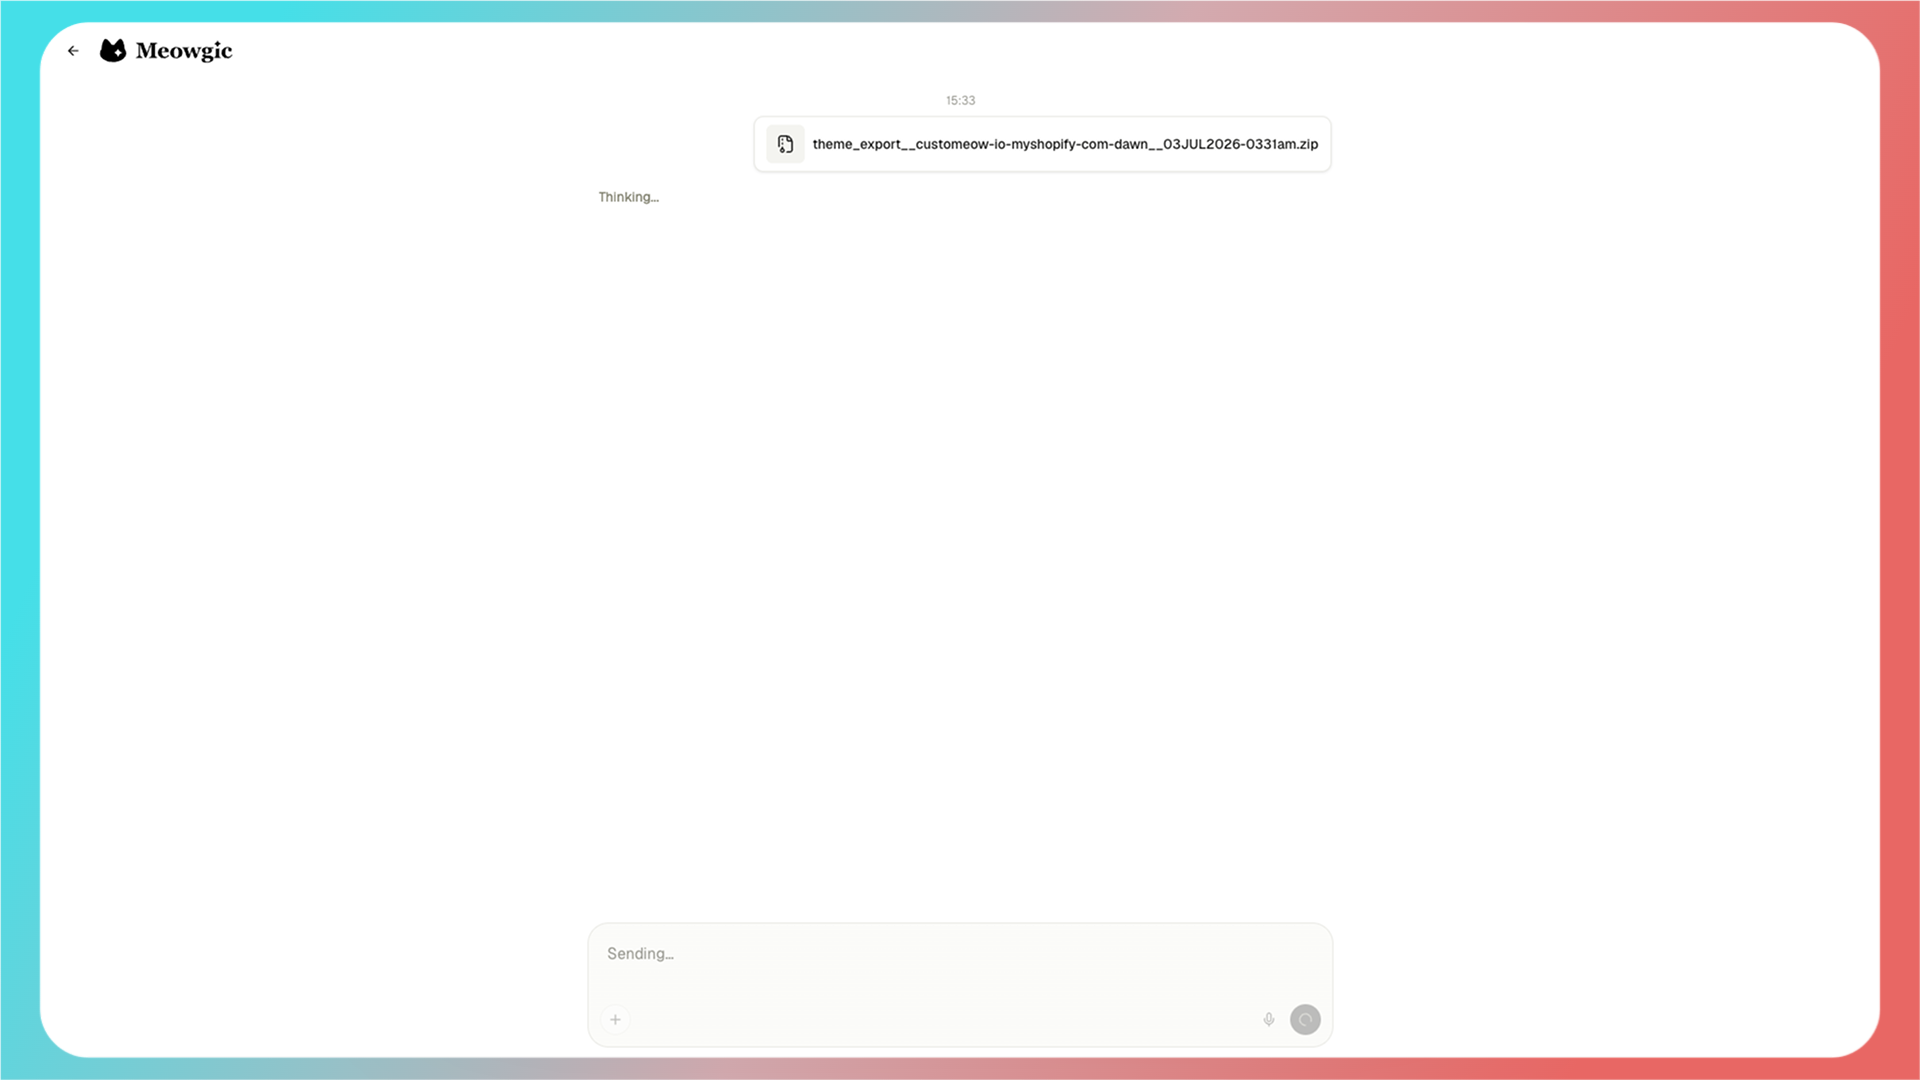
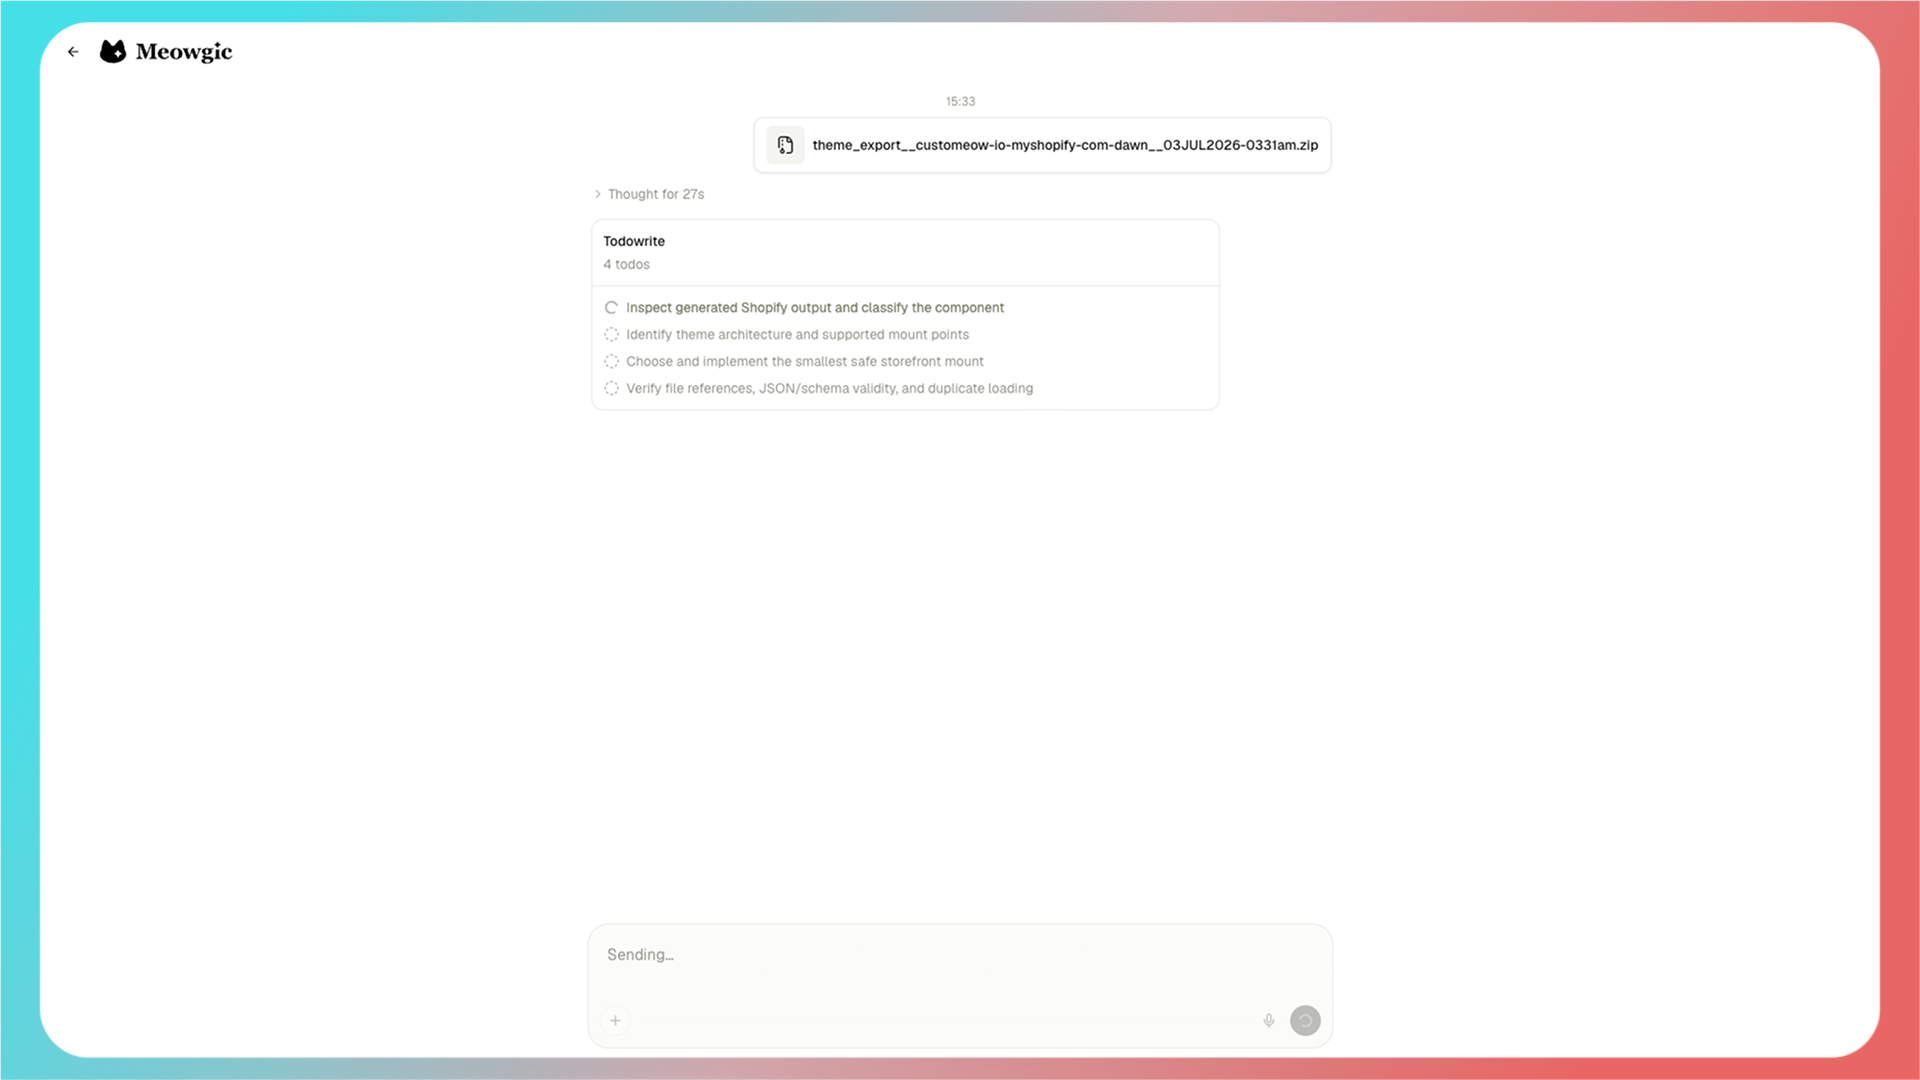
After you click **Start**, Meowgic will automatically begin the integration based on your theme template file.
<Frame>
  <img src="https://assets.staticmeow.com/meowgic/static/images/20260706/911caf3a-b514-4b12-8080-cb449f4be9ad.png" alt="Meowgic starts processing the uploaded theme file after the Start action." />
</Frame>

<Frame>
  <img src="https://assets.staticmeow.com/meowgic/static/images/20260706/badae060-4177-4ecb-8b05-f8502808bdcc.png" alt="Meowgic integration workspace showing the automatic theme integration to-do list." />
</Frame>

<br />

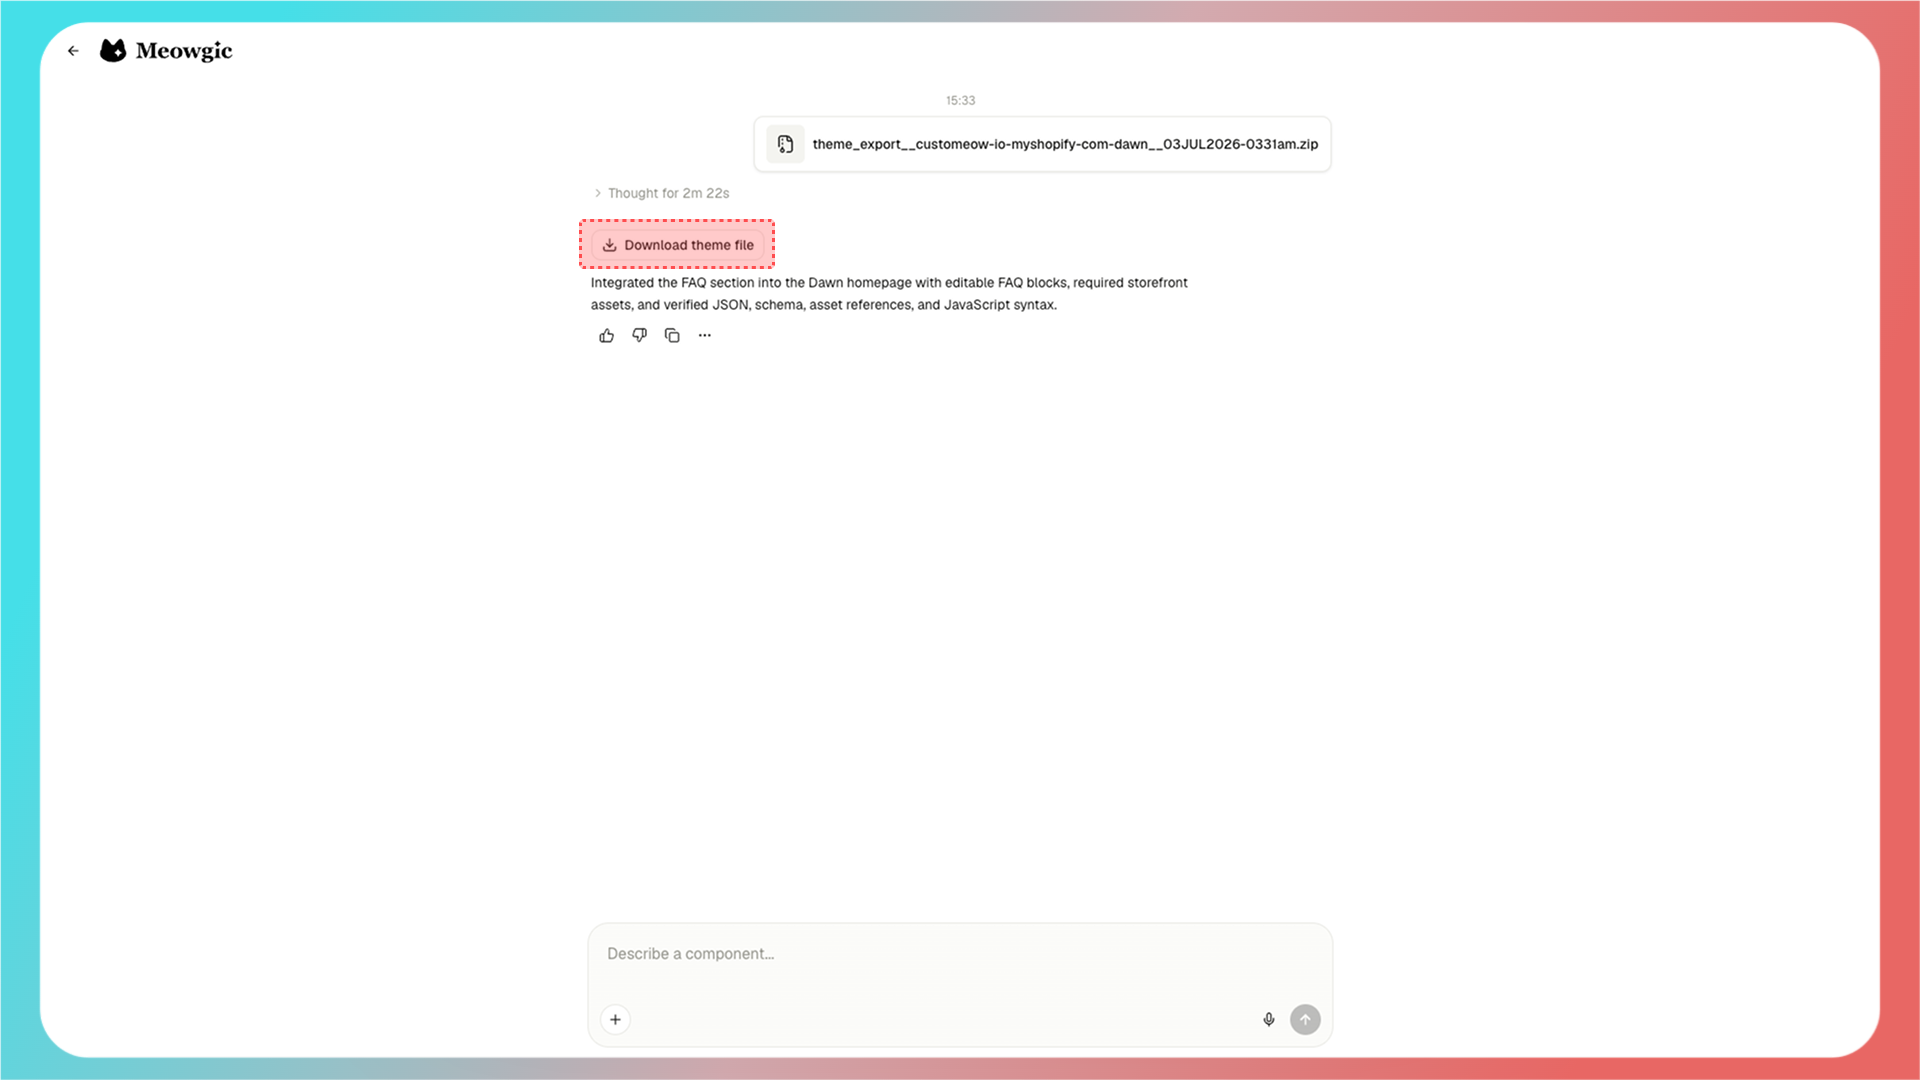
After the integration is complete, Meowgic generates a new theme template file. Click **Download theme file** to download it.
<Frame>
  <img src="https://assets.staticmeow.com/meowgic/static/images/20260706/1998ddfe-9b17-44c1-ae79-2a2af33dc14a.png" alt="Meowgic reports the FAQ section was integrated and offers Download theme file." />
</Frame>

<br />

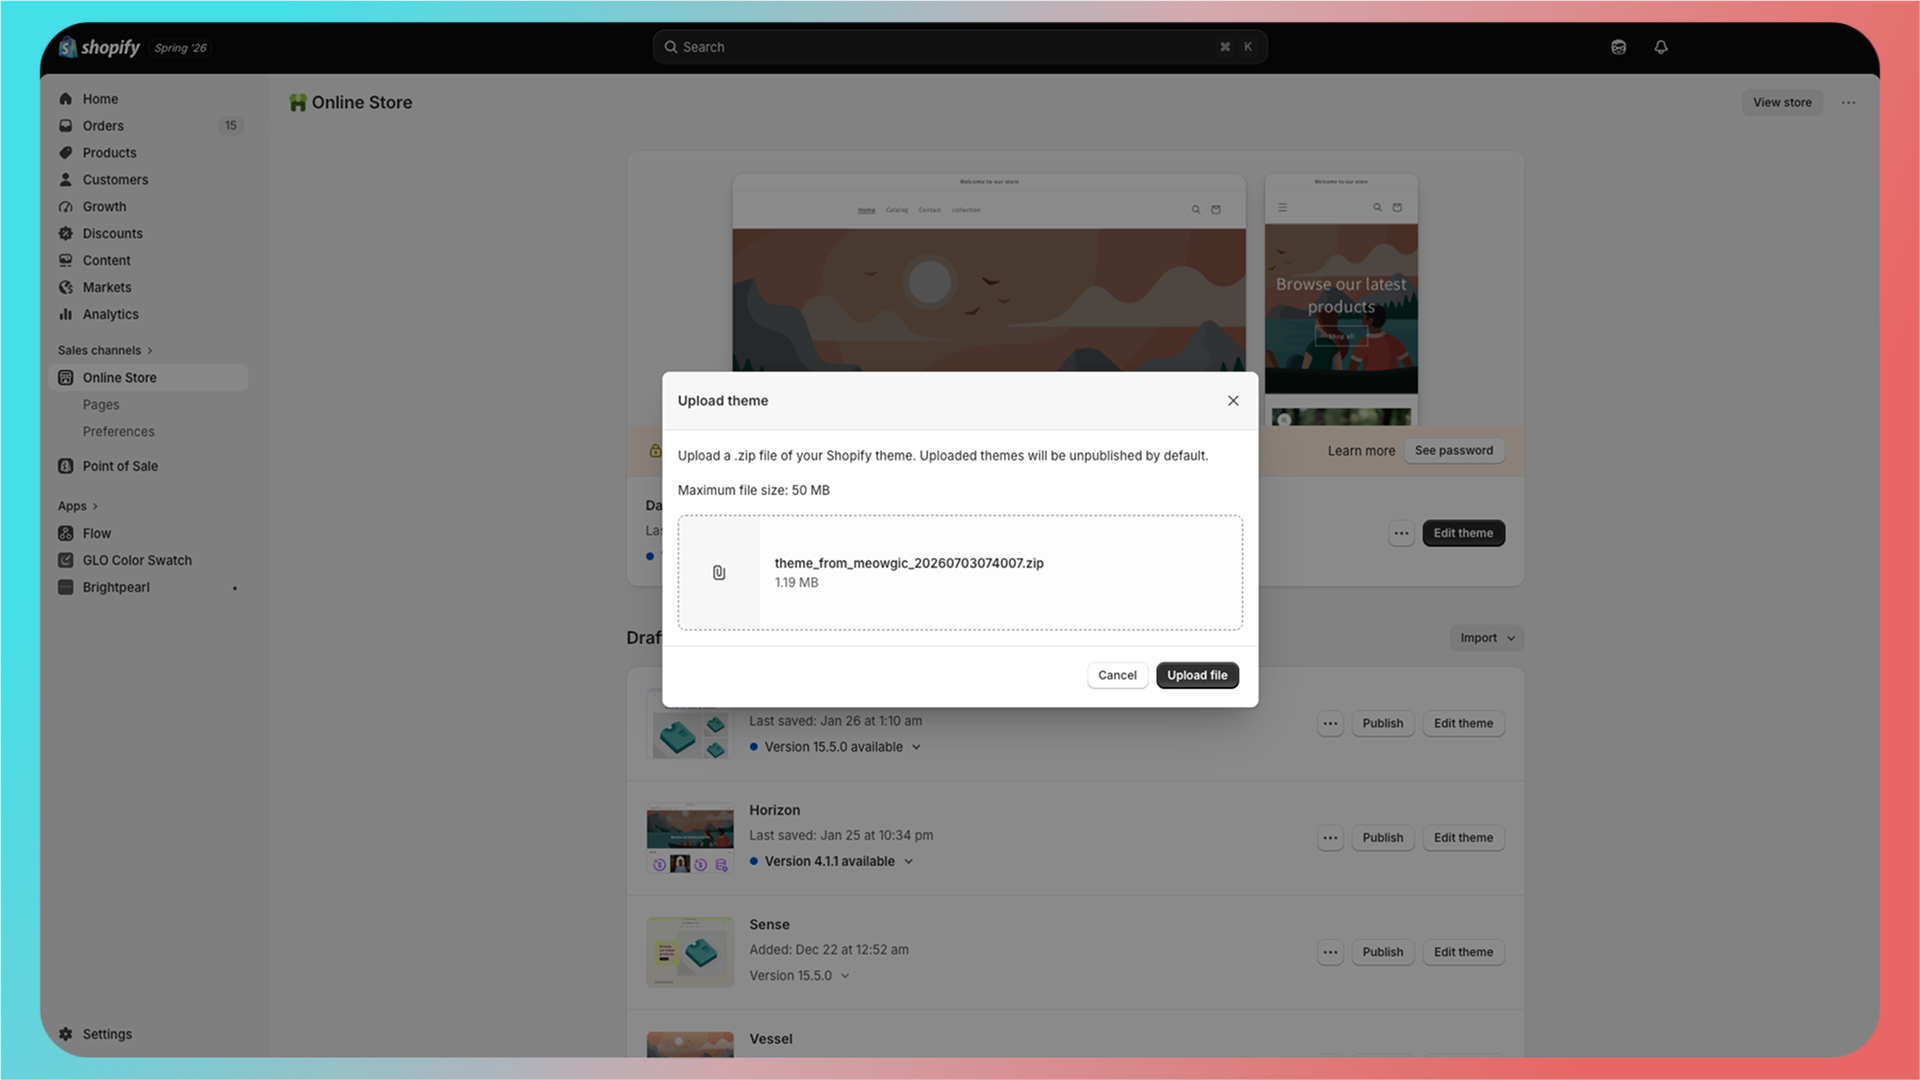
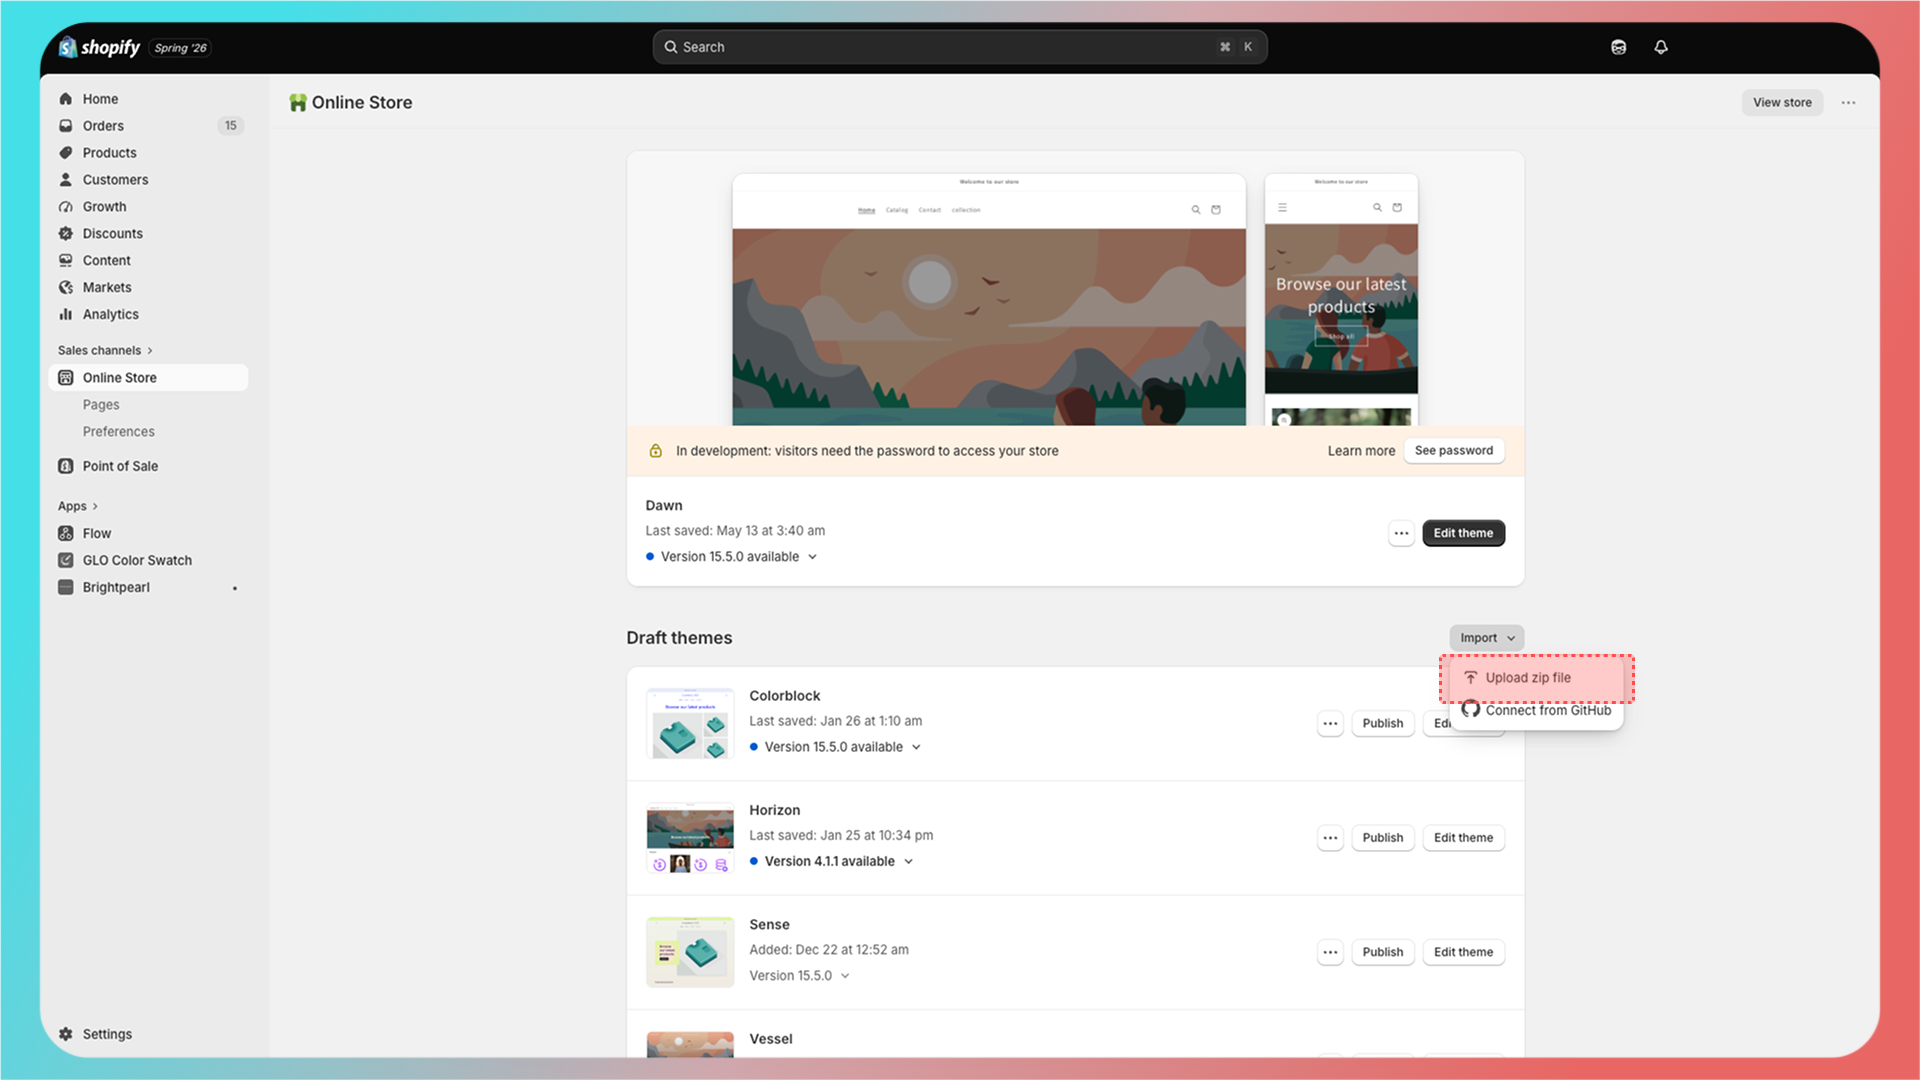
Return to the theme template editing page in your site admin, then upload the new theme file.
<Frame>
  <img src="https://assets.staticmeow.com/meowgic/static/images/20260706/e139625a-491b-42c8-82de-a198f26fd030.png" alt="Shopify Online Store themes page with the Import menu open to Upload zip file." />
</Frame>

<Frame>
  <img src="https://assets.staticmeow.com/meowgic/static/images/20260706/ad1ad8ec-95b9-45a1-81d7-dbe55ea77965.png" alt="Shopify Upload theme dialog with the Meowgic-generated theme ZIP ready to upload." />
</Frame>

<br />

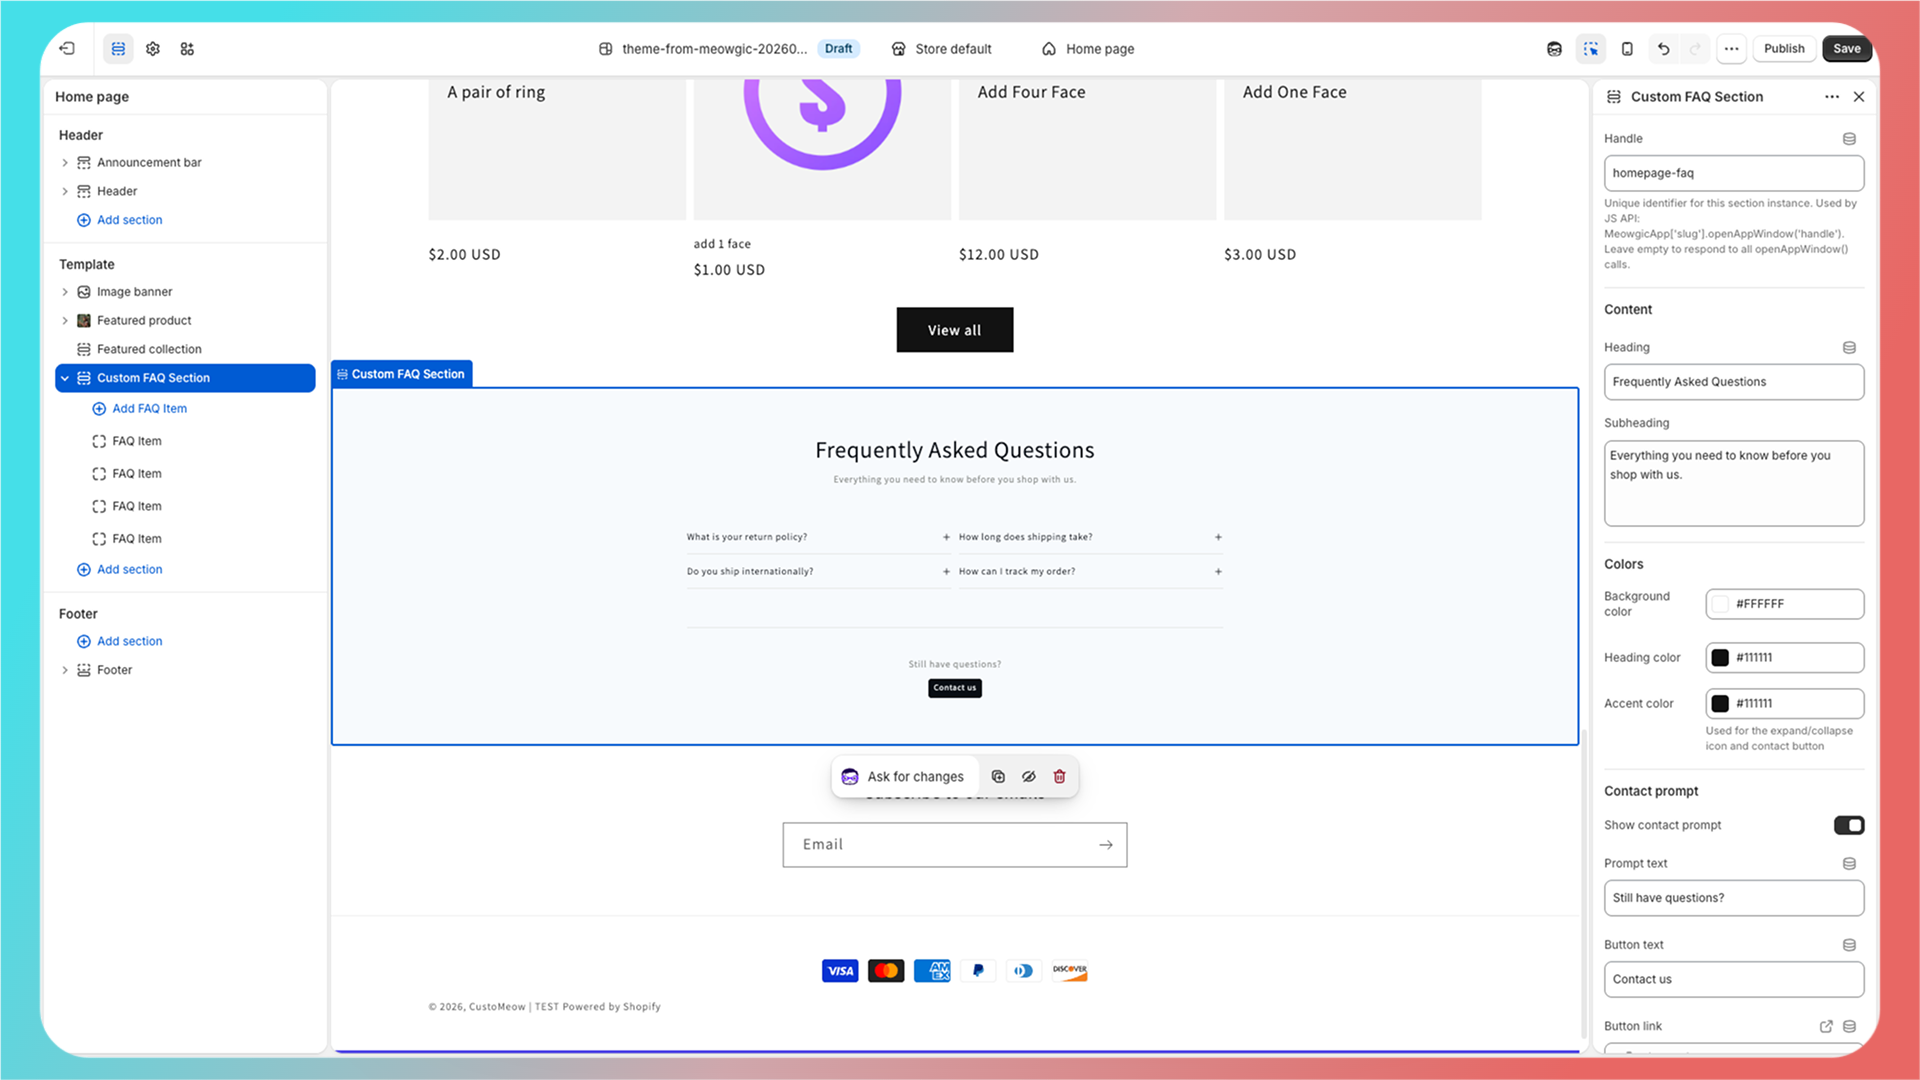
After the upload is complete, open the theme editor. The generated app appears in the theme editor's section list.
<Frame>
  <img src="https://assets.staticmeow.com/meowgic/static/images/20260706/3c3227f5-c318-478f-91c3-e49d14e01856.png" alt="Shopify theme editor with Custom FAQ Section selected on the home page." />
</Frame>

<Note>
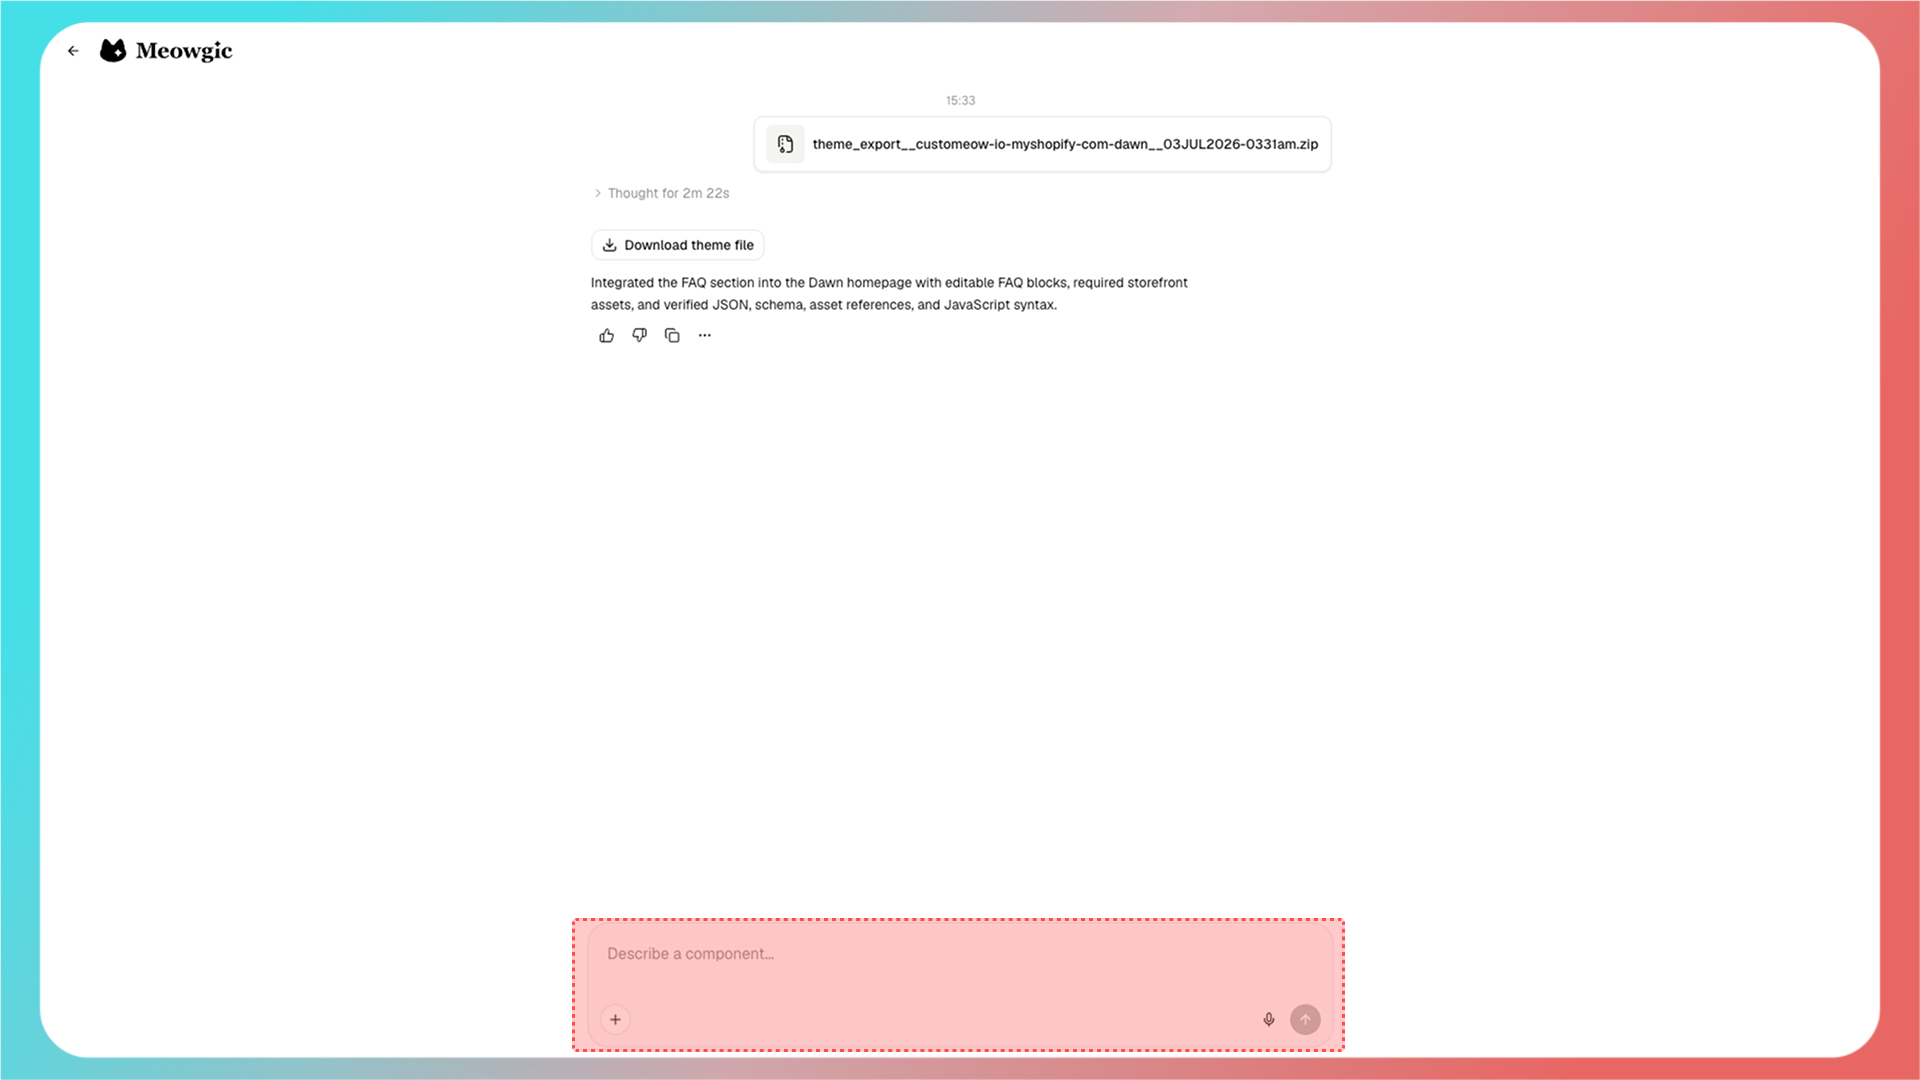
  If the app does not work properly after integration, or if it does not look like the preview in Meowgic, describe the issue in the integration page chat and ask Meowgic to fix it.
  <Frame>
    <img src="https://assets.staticmeow.com/meowgic/static/images/20260706/7d92dd54-fa04-4300-a66f-28454e326f11.png" alt="Meowgic integration chat where users can describe issues for Meowgic to fix after installation." />
  </Frame>
</Note>

<br />

## FAQ

<AccordionGroup>
  <Accordion title="Do I need to publish the app again after editing it?">
    Yes. If you update the app after publishing, publish it again so the preview link and integration use the latest version.
  </Accordion>

  <Accordion title="Can I install the same Meowgic app on Shopify, SHOPLINE, and Shoplazza?">
    Yes, but each platform requires you to download and upload its own theme file.
  </Accordion>
</AccordionGroup>

<br />

<Update label="07/06/2026">
  ## Article created

  Created this article.
</Update>